Quick start
Hardware preparation
A Windows computer, recommended for the Win10 system.
a set EC800MCNLE EVB(Including antenna, Type-C data cable, etc).
A Nano SIM card.
A speaker with a power of 2-5W.
Environment construction
- Download and install EC800M series module driver: QuecPython_USB_Driver_Win10_ASR.
- Download and install VSCode.
- Download and unzip QPYCom。
- Download Firmware
- Download Source code。
Hardware connection
Connect the hardware according to the following diagram:
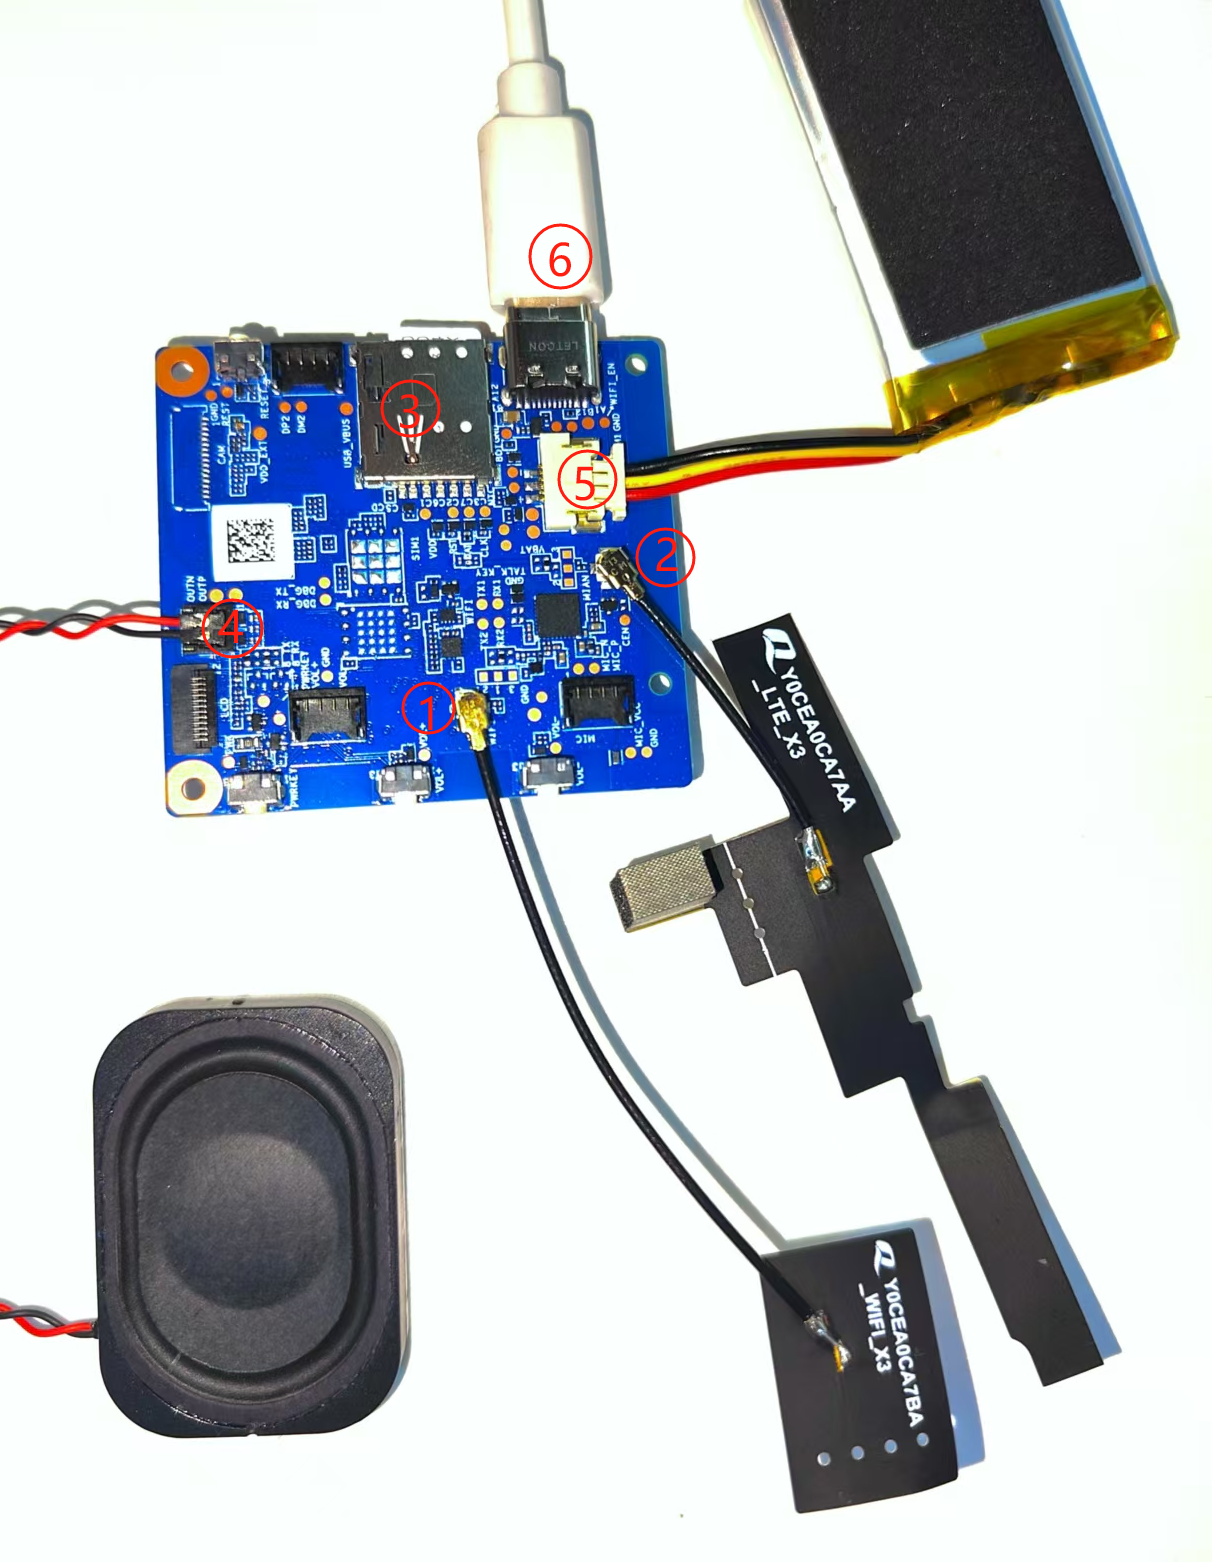
- Connect the
WiFantenna to the antenna socket marked with the wordWiFiin the picture. - Connect the antenna to the antenna socket marked with
LTE. - Insert the available
Nano SIMcard at the position shown in the diagram. - Connect the speaker to the pin headers marked with
SPK+andSPK-in the figure. - Connect the battery at the position shown in the diagram.
- Connect the development board to the computer using a Type-C data cable.
Equipment development
Power on
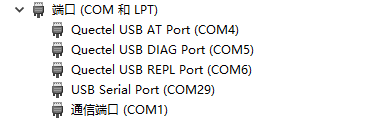
After completing the hardware connection work, if a COM port containing the words "Quectel USB" appears in the port list of the computer device manager, it indicates that the computer has successfully booted up.
Burn firmware package
Refer to this chapter Burn the corresponding firmware package to the development board.
Script import and execution
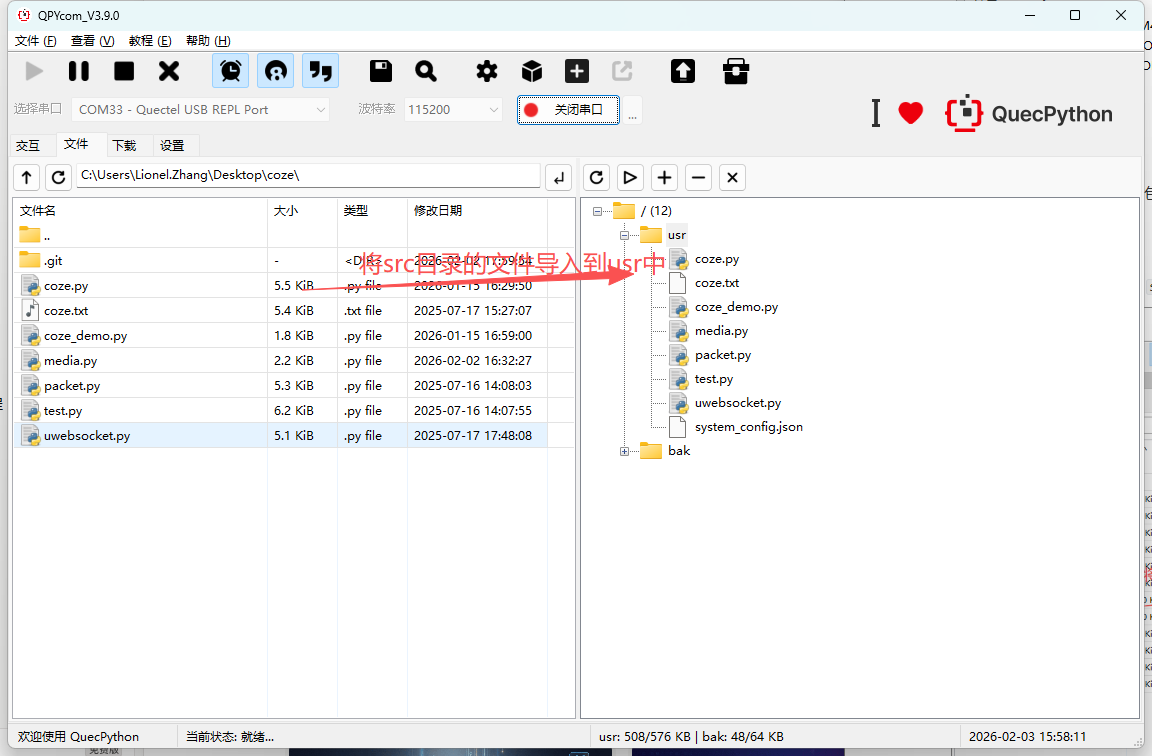
- Refer to this chapter Import all files from the 'src' folder in the source code directory into the module file system, as shown in the following figure:
- Refer to this chapter Execute the main program file
_main.py. - Refer to this chapter Stop the program from running.
Debugging
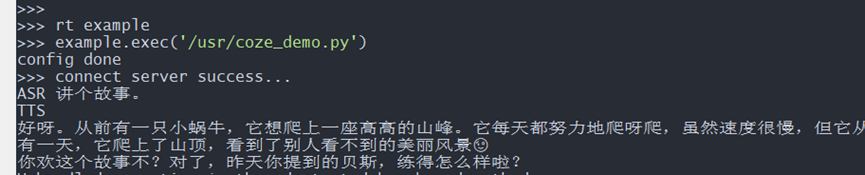
Program startup
After executing the _main. py script, the program starts running.
Register for Coze
If Coze is not registered, normal interaction cannot be carried out. You need to go to the Home - Coze to register the device. After registration is completed, we need to copy the AI agent
Duplicate AI Agent
a. Enter the template:
Enter the template -> Chat Companion -> Select an agent. You can choose an agent according to your own needs.
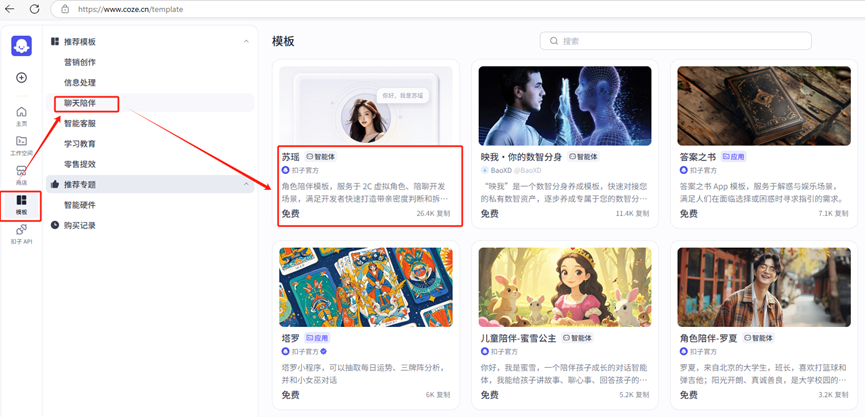
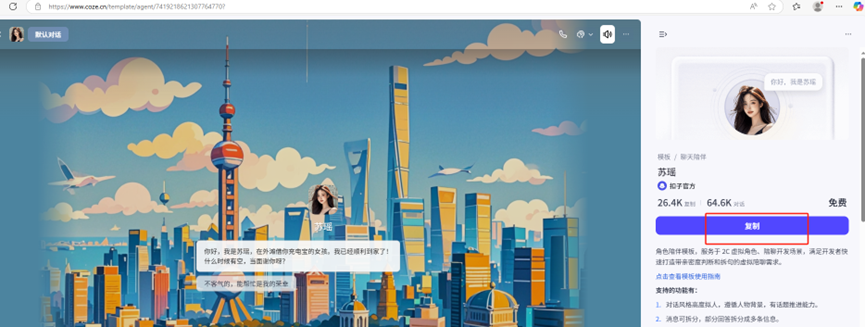
b. Copy Template
Select Copy Template
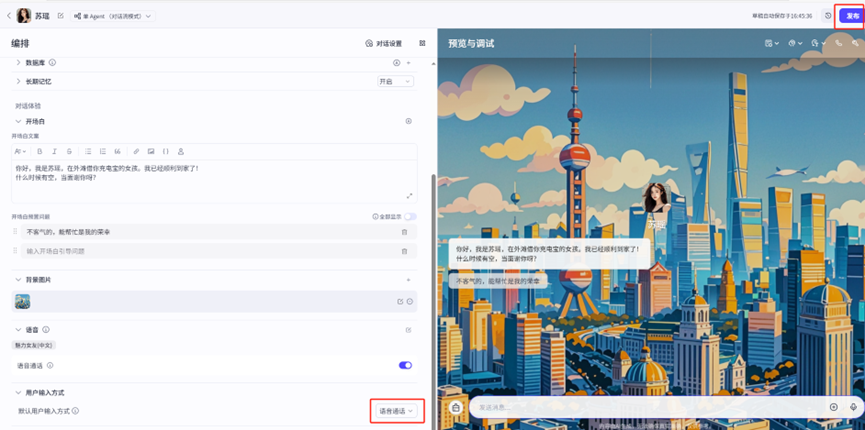
c. Release Template:
Select voice call and release the template.
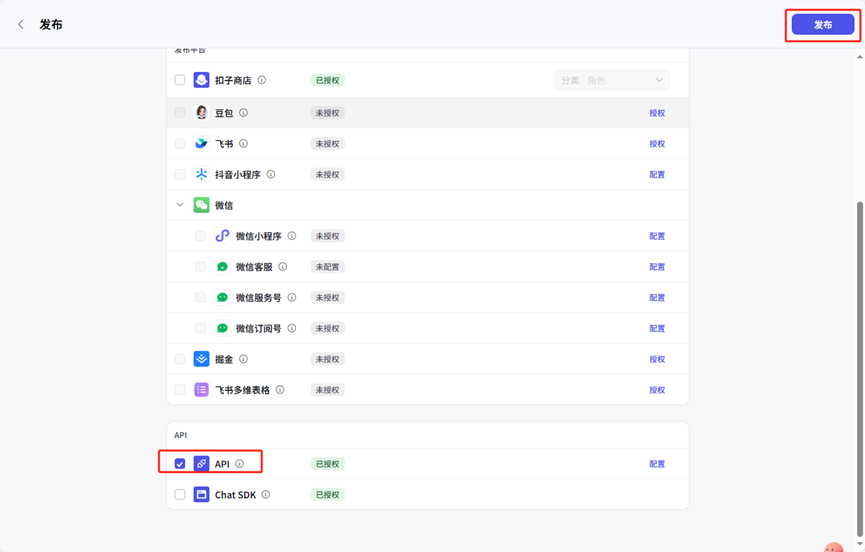
After selecting the API, click Release.
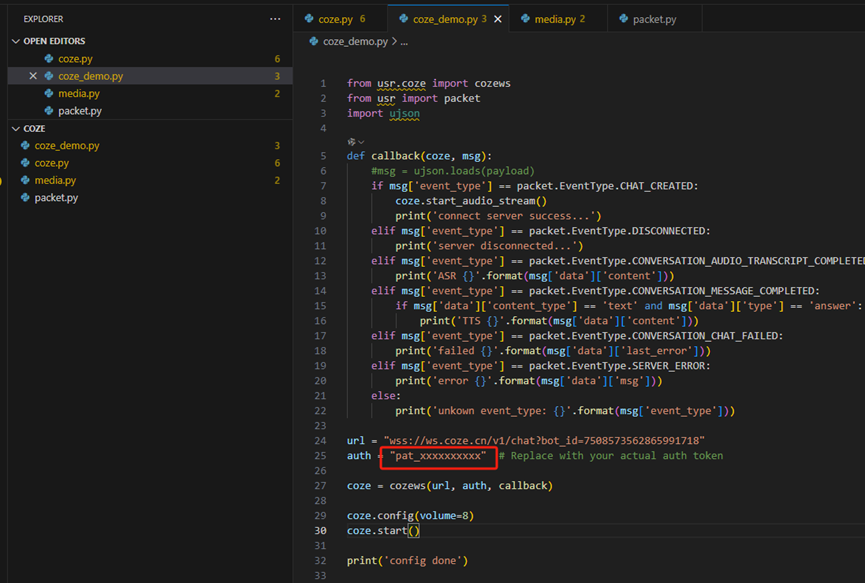
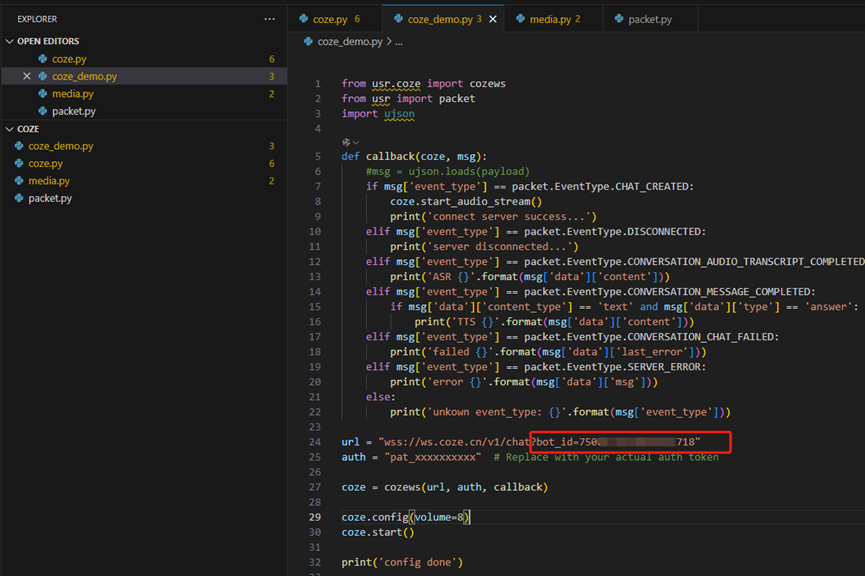
Configure server information into the module
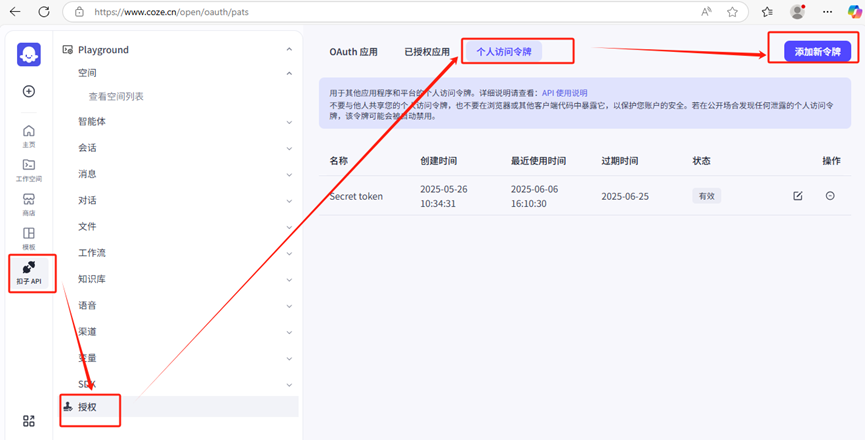
a. Configure a personal token.
Create a personal token and configure it into the module demo. Refer to the following figure for the specific process.
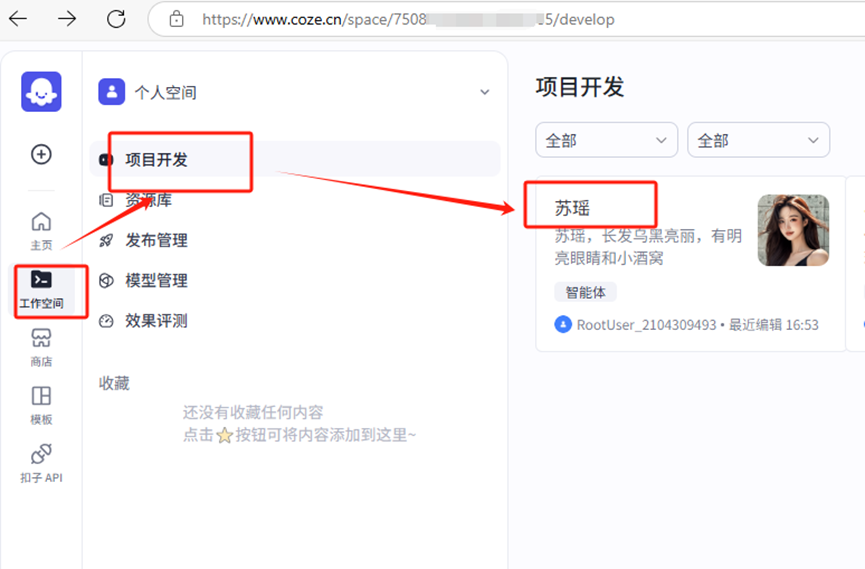
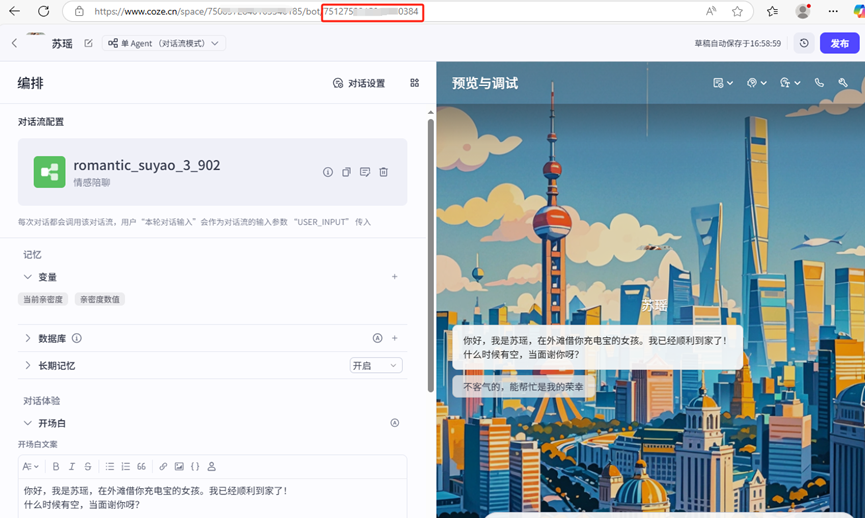
b. Configure the agent botid to enter the project development interface
click to enter the agent just copied. The accessed URL carries the botid information, configure the string after "bot" into the module demo, and refer to the following figure for specific information.
Run the code
The operation log is as follows. After the opening remarks conclude, real-time conversation can commence.