
VSCode Plugin User Guide
To facilitate developers using VSCode for QuecPython development, the QuecPython team has introduced a VSCode plugin called QuecPython.
The plugin currently supports the following features:
- Firmware flashing
- REPL command interaction
- File transfer
- Filesystem directory tree
- Run specific script files
It currently all QuecPython series modules.
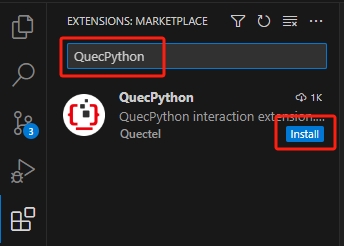
Plugin Installation
- Click on the
Extensionsicon in the primary sidebar .
. - Type
QuecPythonin the plugin search box. - Find the QuecPython plugin in the search list, click the
installbutton to complete the plugin installation.
Plugin Usage Guide
Before you start, make sure you have downloaded the appropriate QuecPython firmware package for your module. Click here to view how to download firmware packages.
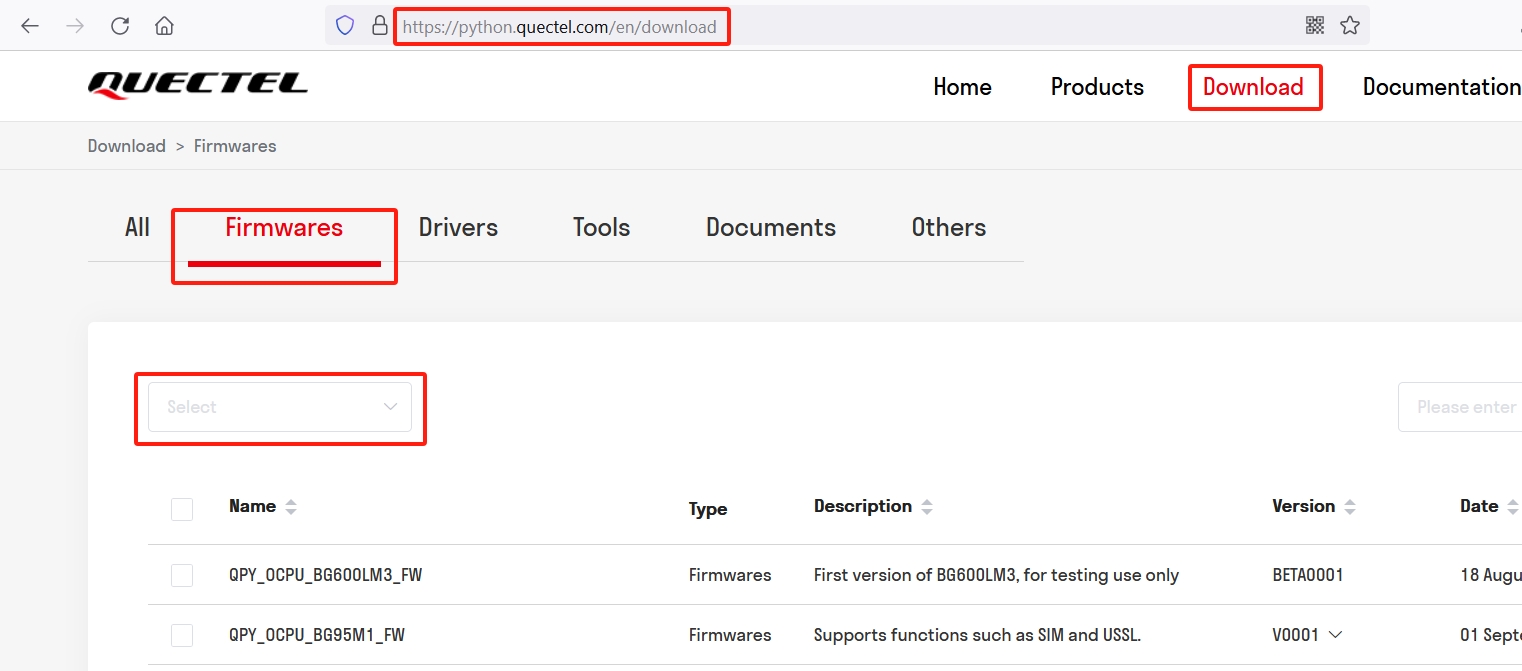
The following steps are demonstrated based on the U-235 development board.
Firmware Flashing
Access the Firmware Flashing Interface on the Primary Sidebar
There are two methods:
Click on the QuecPython plugin icon on the primary sidebar
 .
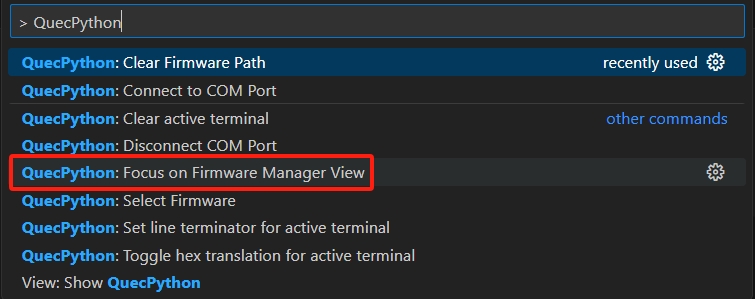
.Use the shortcut
Ctrl+Shift+Pto open the command palette, type> QuecPythonin it, and selectQuecPython: Focus on Firmware Manager Viewfrom the options, as shown below:
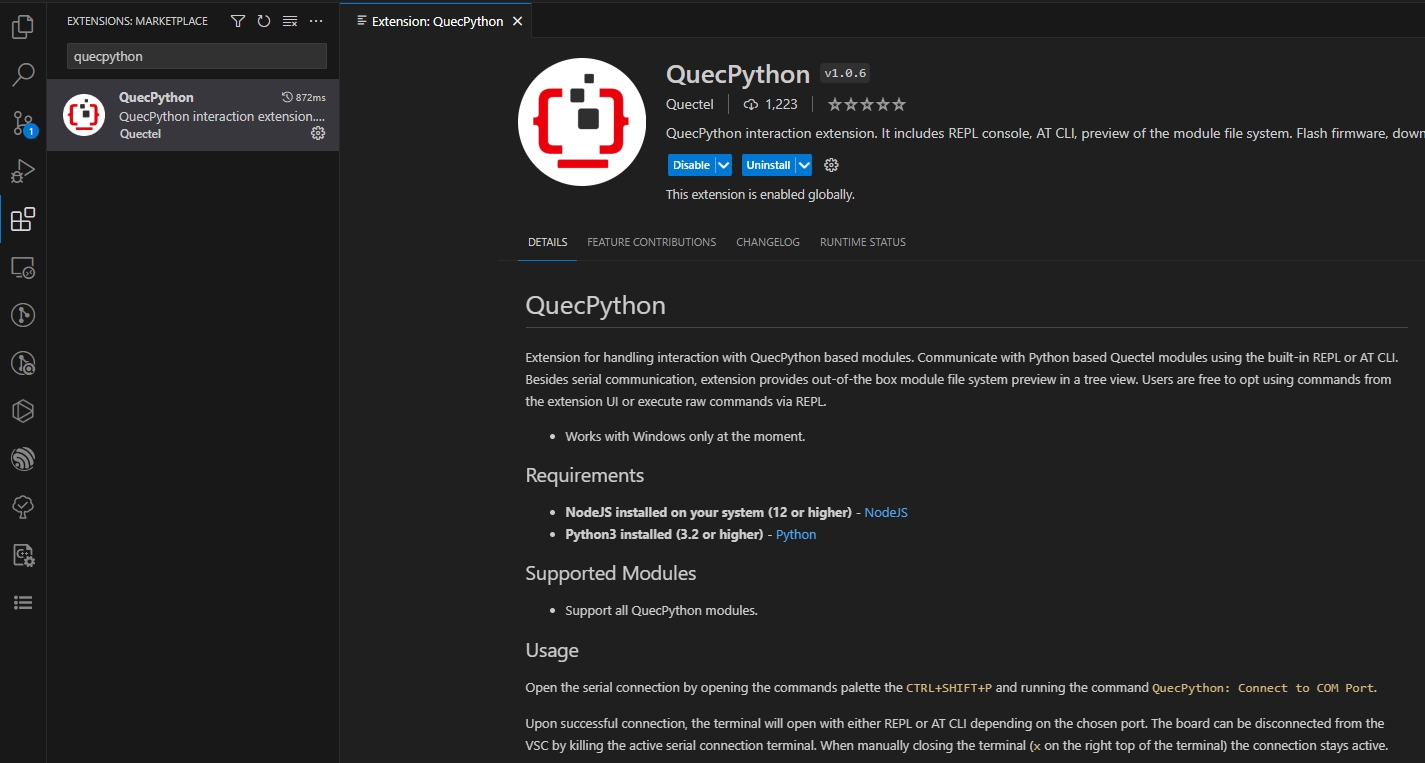
The firmware flashing interface on the primary sidebar is shown in the following image:
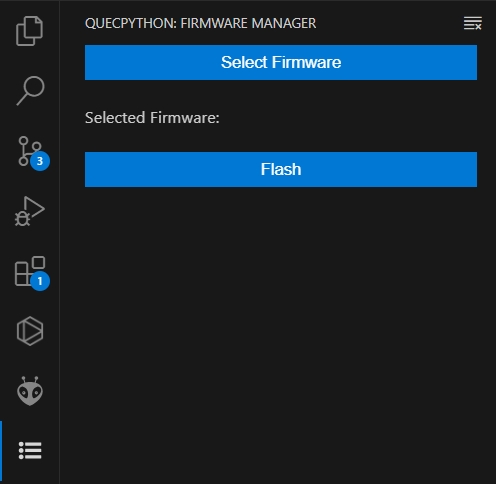
Select Firmware
Click the
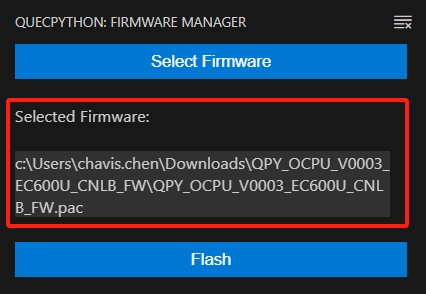
Select Firmwarebutton on the firmware flashing interface, and choose the firmware package for the U-235 development board module.
The path to the firmware package will be displayed on the interface:
Flash Firmware
i. Click the
Flashbutton on the firmware flashing interface.
ii. In the pop-up confirmation window, click the
Yesbutton .
.
Now you can see the firmware flashing progress bar in the lower right corner of the VSCode interface:

When the progress bar shows
Flashing Firmware: 8/8 100%, the firmware flashing is complete, and the module will restart.
REPL Command Interaction
Before starting the REPL command interaction for QuecPython, it is necessary to flash the firmware that supports QuecPython functionality.
Find the command to connect to the terminal in the command palette
Use the shortcut
Ctrl+Shift+Pto open the command palette. Enter> QuecPythonin the palette and selectQuecPython: Connect to COM Portfrom the options, as shown below: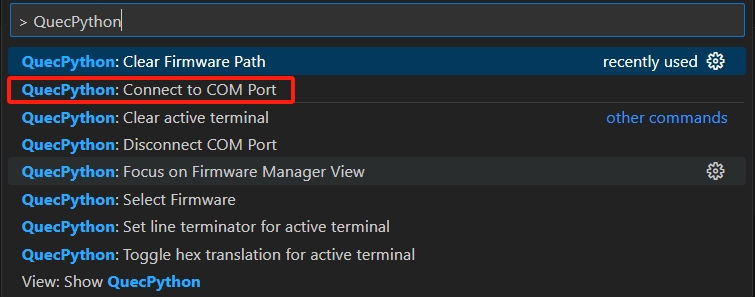
Connect to Terminal
Follow the instructions in the image below:

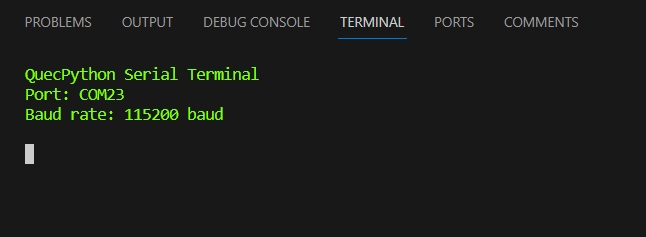
Once the operation is completed, the module will be connected to the terminal in VSCode.
At the same time, the terminal window will pop up with the content as shown in the image below:
REPL Command Interaction
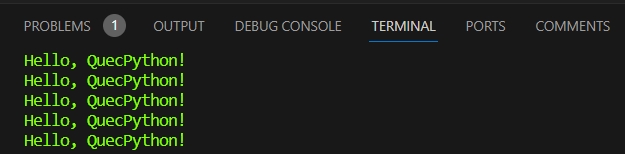
After pressing Enter in the terminal, you will see the QuecPython command prompt
>>>.Enter the following code in the terminal:
print("Hello, QuecPython!")After pressing Enter, you can see the execution result as shown in the following image:
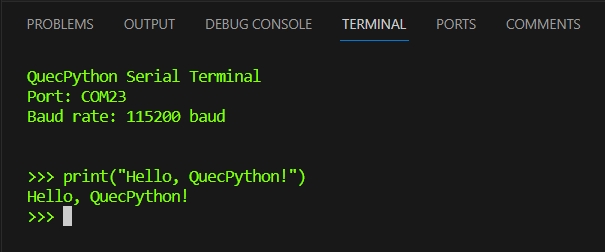
Now, we have completed the simplest QuecPython REPL interaction.
File Transfer
The edited script file test.py needs to be imported into the module's file system to run.
- In the editor page of the file to be transferred (i.e.,
test.py), right-click the mouse. - Click on the
QPY: Download Filecommand to start file transfer.
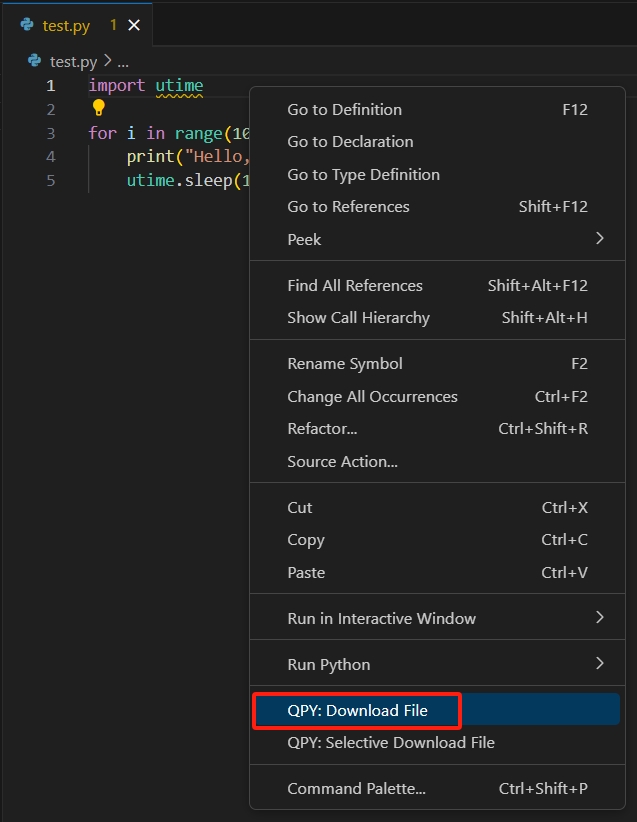
During the file transfer process, a pop-up window appears in the bottom right corner of the VSCode interface, as shown below:

File System Directory Tree
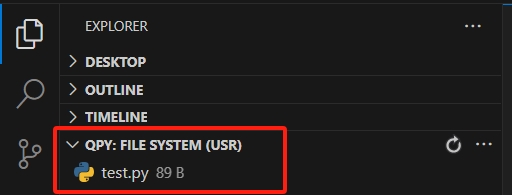
After the file transfer is complete, click on the
Explorerbutton on the primary sidebar.
Once the
Explorerinterface is open, look at the bottom and findQPY: FILE SYSTEM (USR). It shows the directory tree of the module's file system/usr.The imported file
test.pyis shown in the following image:
Run Script File
- Select the script file
test.pyin the directory tree. - Right-click on the script file
test.pyand chooseRun Scriptto execute the script file.
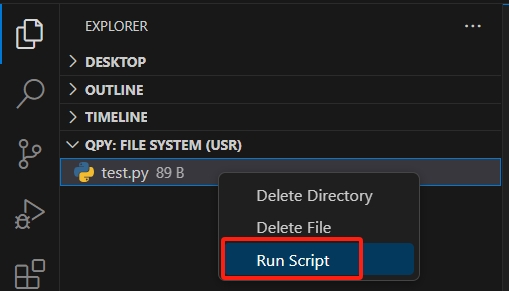
In the terminal window, you can see the script periodically outputting the string "Hello, QuecPython!".
Package Manager
- From QuecPython menu -> Quick Access -> Quectel -> Projects + Components
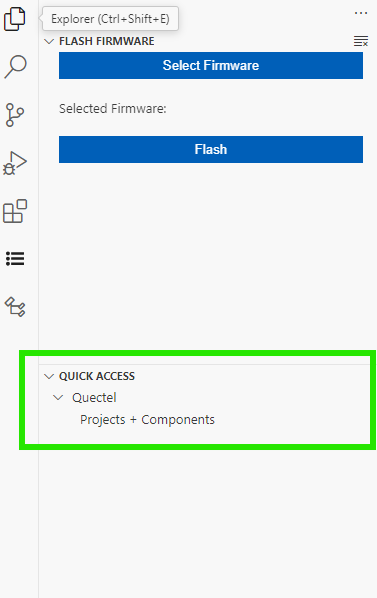
- List of Projects + Components will show in the panel

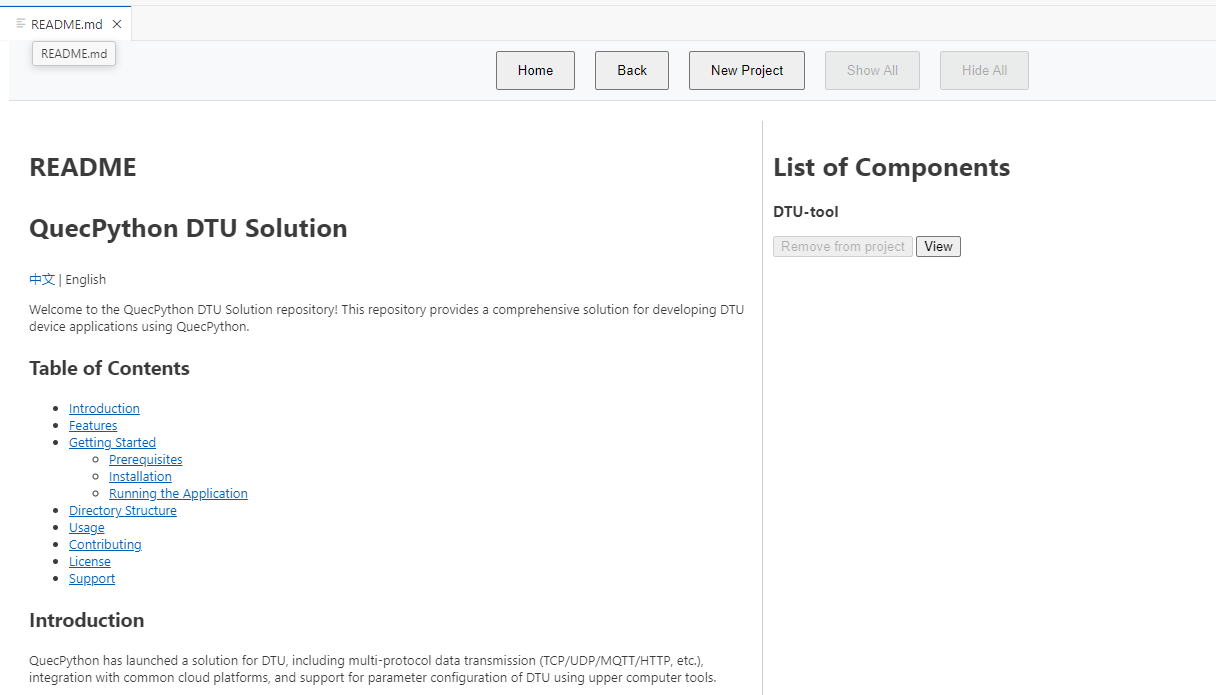
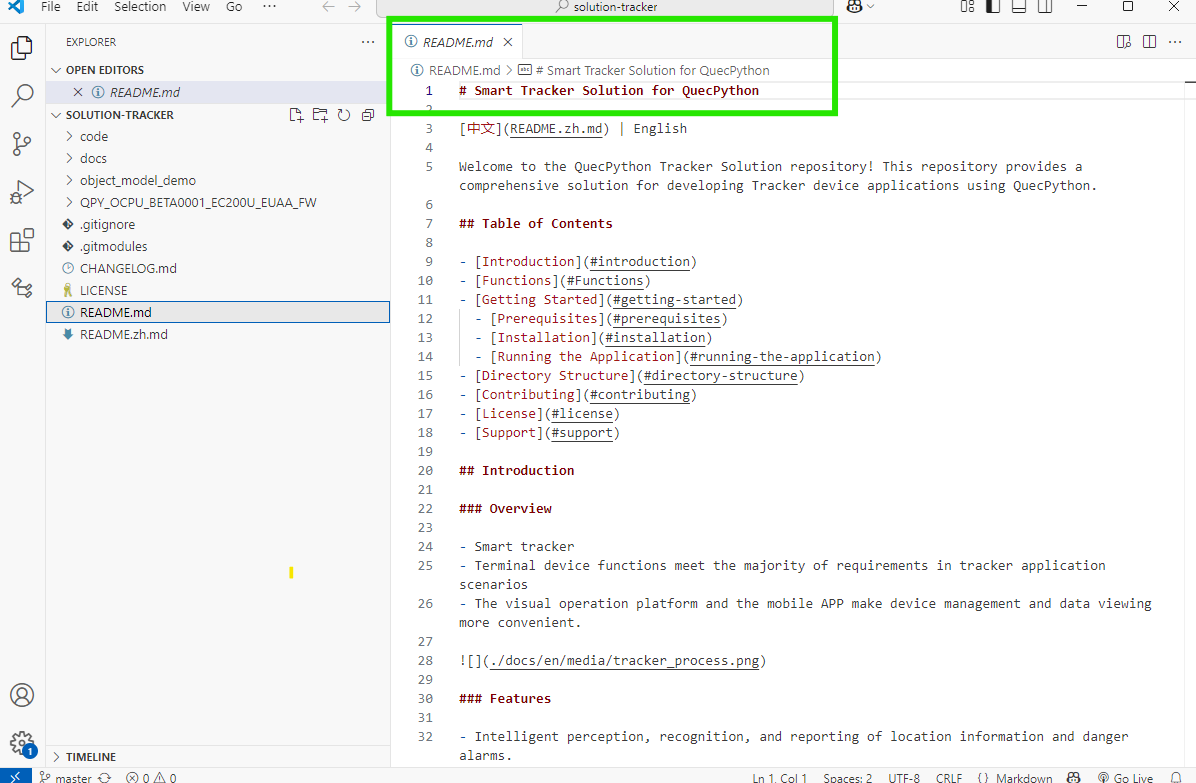
- From the panel, you can view usig view button for a project of component, which will show readme + submodules for project or component.
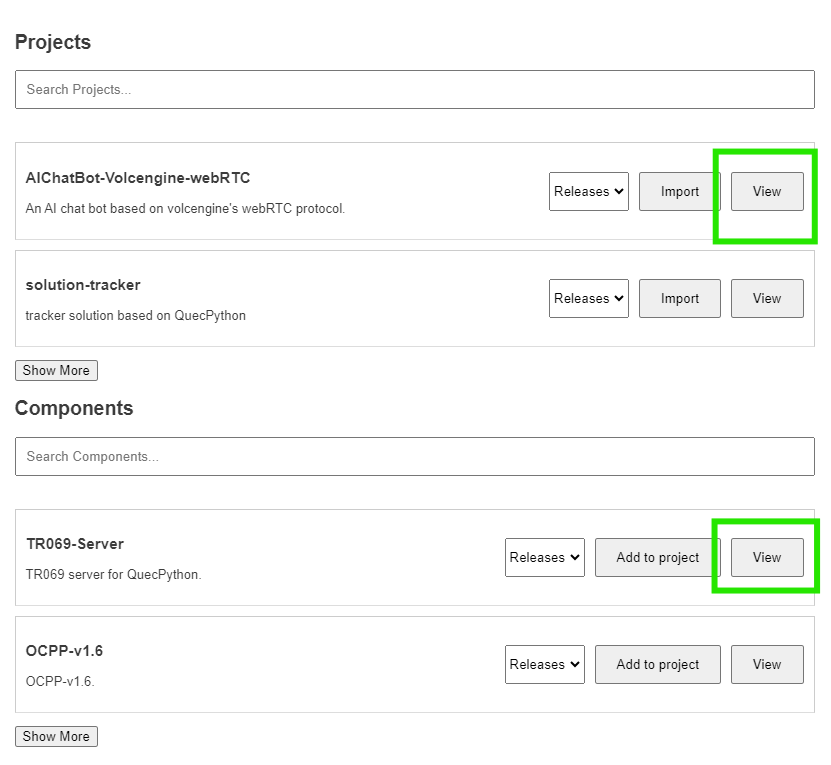
Note: View button will always show the info of project, component or submodule.
- From Main Panel, Import button will clone the project to your machine.
- click import
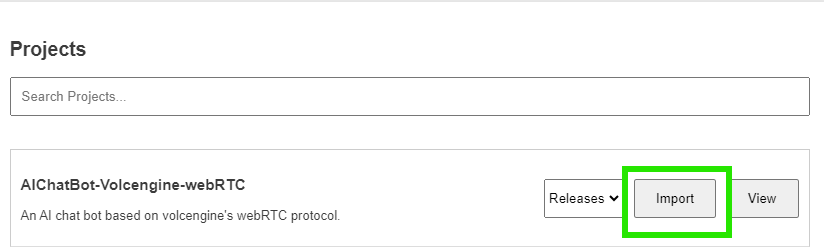
- choose where to save the project
- please wait while the extension clone the project
- when done, the extension will open the new project
- From Main Panel, Add to project button will clone the submodule to your current open project.
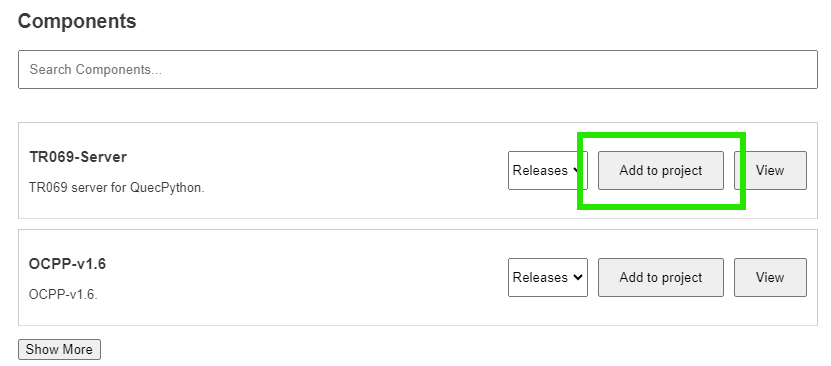
Note 1: Add to project will work only when there's an open project already.
If there's no project open, the button will be disabled.
Note 2: Add to project and these submodules can be used and cloned with any of client QuecPython projects or with our projects from our github.
- Banner buttons, and search fields are give a better experience while using the extension
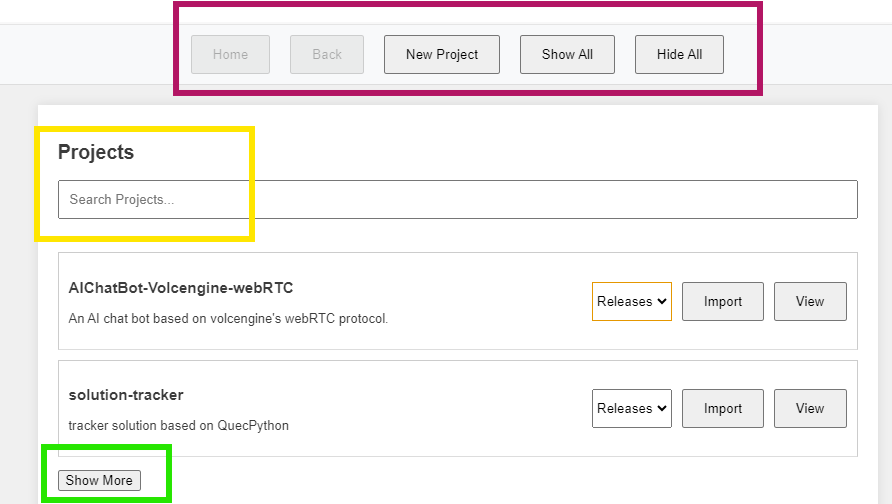
- Show all / Hide All: Show or Hide all the items from projects + components list.
- New Project: Create a new project.
- Home: Redirect to main page (Not active when user is alraedy at main page).
- Back: go back to previouse page (active only when previouse page is avilable).
- Search Projects / Components: search the list of Projects or Components.
- Show More:show the list of Projects or Components.