
Active cooler control
2026-02-28
This chapter introduces how to use the active cooler, including installing and connecting the cooling fan, as well as using its functions, to help users complete the configuration quickly and correctly.
Quick start
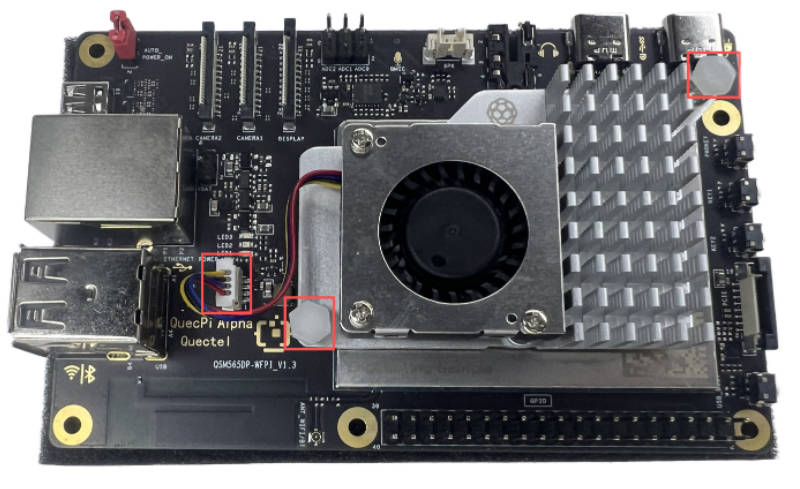
Install the fan module
- Insert the cooling fan cable into the FAN connector on the single-board computer, ensuring the orientation is correct.
- Align the mounting chips on both ends of the cooler with the reserved holes on the motherboard, then press down to secure them.
As shown below:
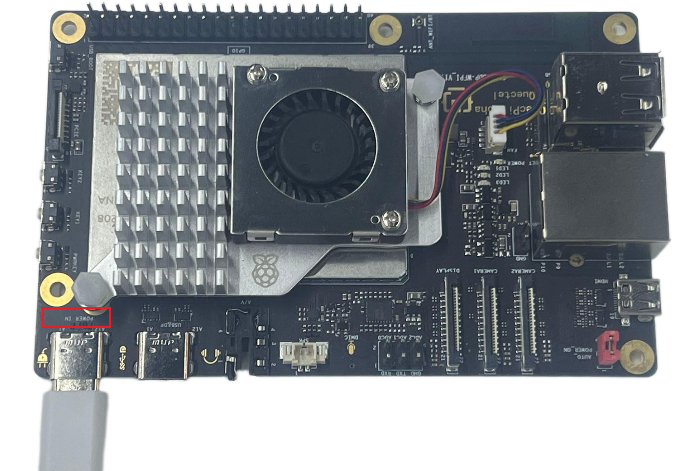
Connect the power supply
Connect the USB-A end of the USB-A-to-USB-C power cable to the power adapter.
Connect the USB-C end to the POWER IN port on the single-board computer.
As shown below:
Functional usage
Fan speed settings
- Set the root password and switch to the root user.
- Enter the following command in the terminal to set the root password.
sudo passwd
- Then, enter the following command to switch to the root user.
sudo su
- Set fan speed:
Enter the following command in the terminal to set the fan speed.
echo value > /sys/class/leds/fanfan/brightness #value ranges from 0-512
Parameter description
- value = 0: Turns off the fan.
- value > 0: The fan starts running; the higher the value, the faster the fan spins.