
Home NAS system
The home NAS system is built on the Quectel Pi H1 smart single-board computer, provides high-speed storage via SSD solid state drives, enables file sharing through the Samba service, supports multiple access methods, and delivers a convenient privatized deployment solution for home users.
Development resources summary
Development accessories list
| Accessory name | Quantity | Specifications |
|---|---|---|
| Quectel Pi H1 smart single-board computer | 1 | Quectel Pi H1 smart single-board computer |
| USB-C power supply | 1 | 27W USB Type-C Interface Charger 1.2m Cable Length Standard Power PD Power Supply Suitable for Raspberry Pi 5 |
| USB-C DP cable / Micro HDMI cable | 1 | Spec: DP 1.4; Length: 1m; USB-C (male) to USB-C (male) Spec: Micro HDMI 2.0 ; Length: 1m; HDMI-A (male) to HDMI-D (male) |
| Ethernet cable | 1 | Length: 1m; Transmission rate: Gigabit |
| SSD solid state drive | 1 | Official Raspberry Pi SSD Kit, inlcuding 256 GB high-speed solid state driver, Raspberry Pi M.2 HAT + complies with PCIe Gen3 suitable for Raspberry Pi 5 |
| CPU cooling fan | 1 | Raspberry Pi 5 Official Active Cooler with Heatsink and Thermal Pad |
| Display screen | 1 | 24-inch HDMI monitor |
Physical reference of accessories

Get started quickly
Development preparation
The Quectel Pi H1 comes pre-installed with Debian 13 system image, so no re-flashing is required. Just follow the steps below.
Hardware connection
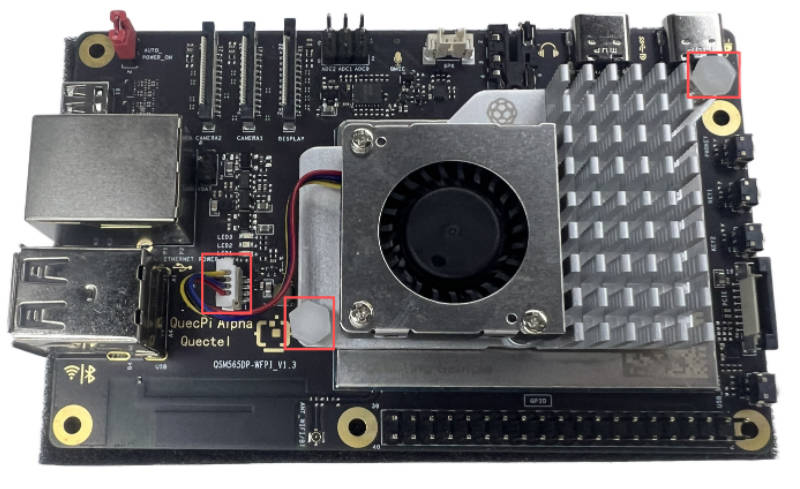
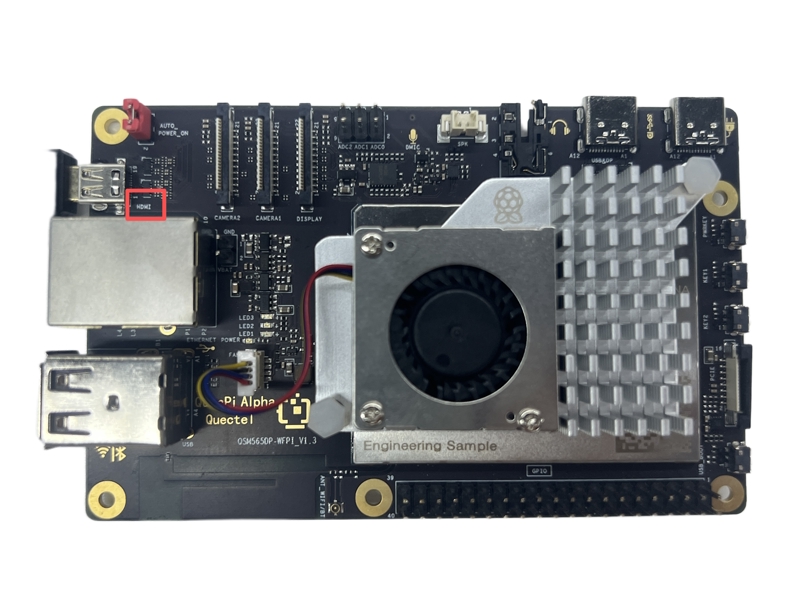
Install cooling fan
Plug the fan cable into the FAN header on the Quectel Pi H1, then secure the heatsink clips into the mounting holes as shown:
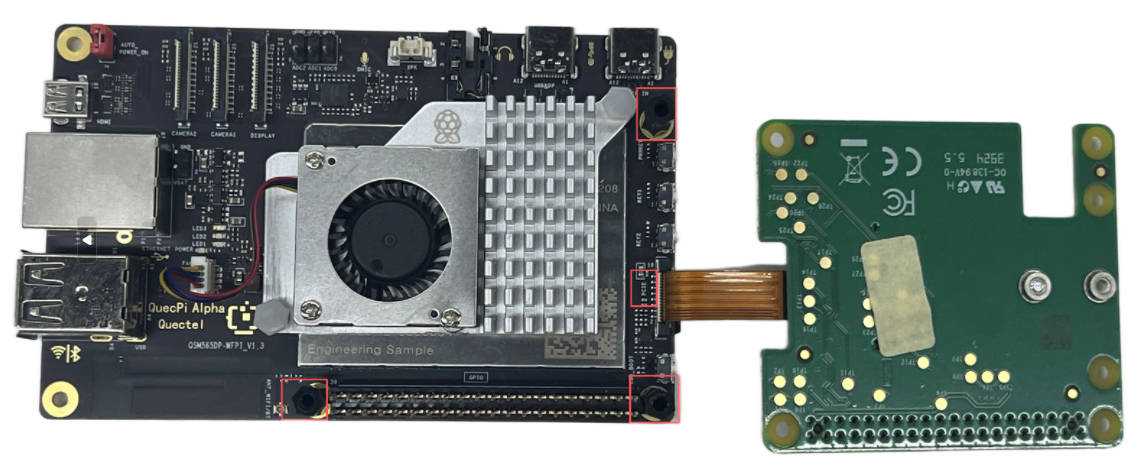
Install SSD
First, install the three nylon standoffs and secure their bases with three short screws. Then install the GPIO adapter and press down firmly to ensure all pins are fully seated. Next, insert the PCIe adapter cable fully and evenly into the PCIe port on the Quectel Pi H1, and push down the PCIe connector brackets from both sides to lock the cable firmly in place.
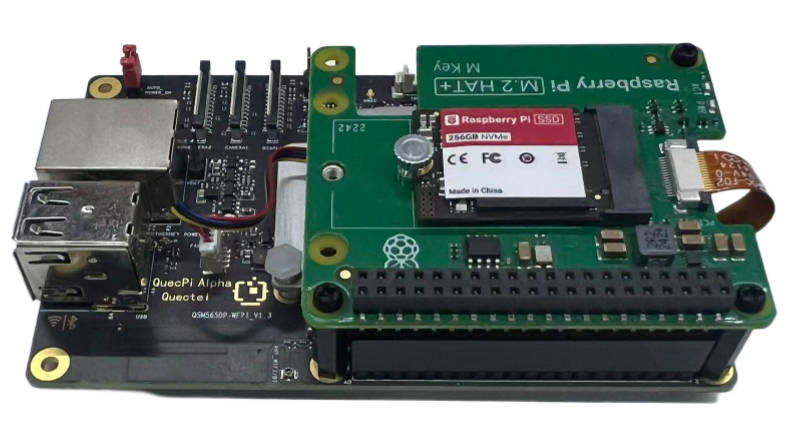
- Front view after installation:
- Back view:
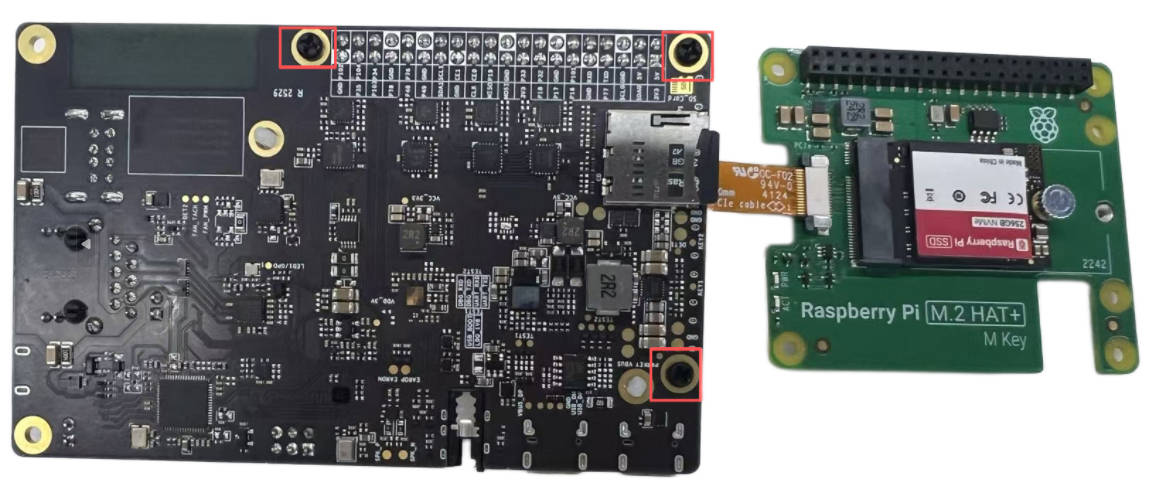
- Side view:
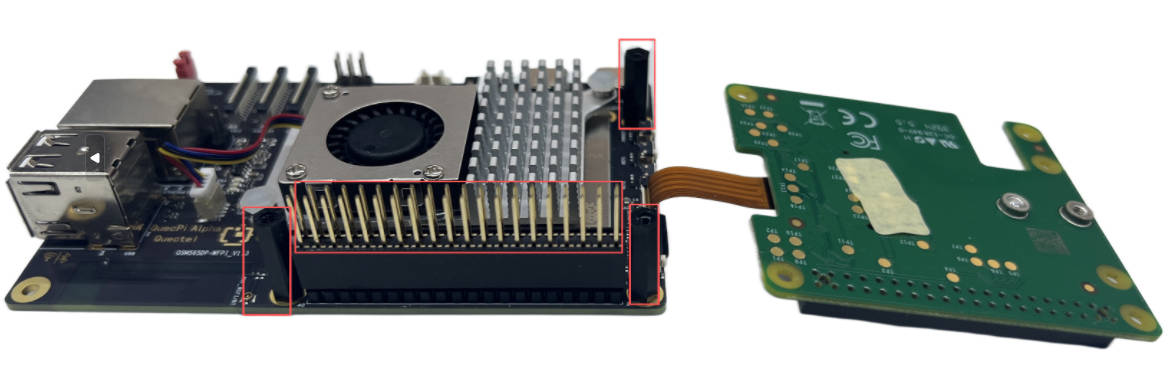
Finally, place the M.2 HAT+ on top of the nylon standoffs and use 3 long screws to secure the M.2 HAT+ in place.
Display connection
Connect one end of the Micro HDMI cable to the Micro HDMI port of Quectel Pi H1 and the other end to the HDMI port of the monitor.
Input device connection
Connect the USB keyboard and mouse to the two USB-A ports on the Quectel Pi H1. If using a wireless input device, just plug the receiver into the USB port.

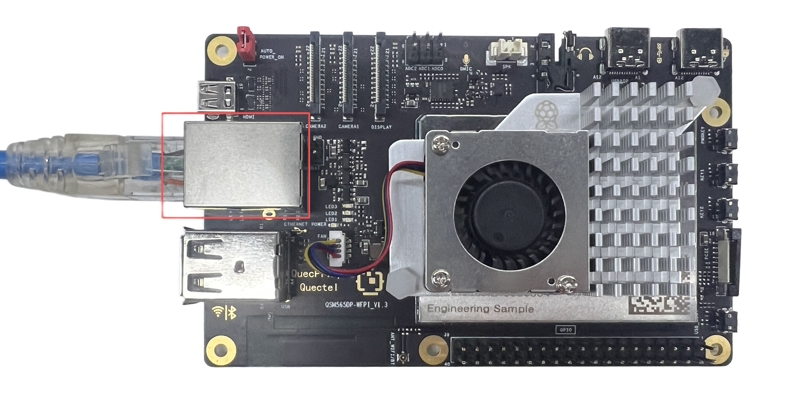
Network connection
Connect one end of the Ethernet cable to the Gigabit Ethernet port of Quectel Pi H1, and the other end to the Ethernet port of the router (ensure the router is already connected to the network).
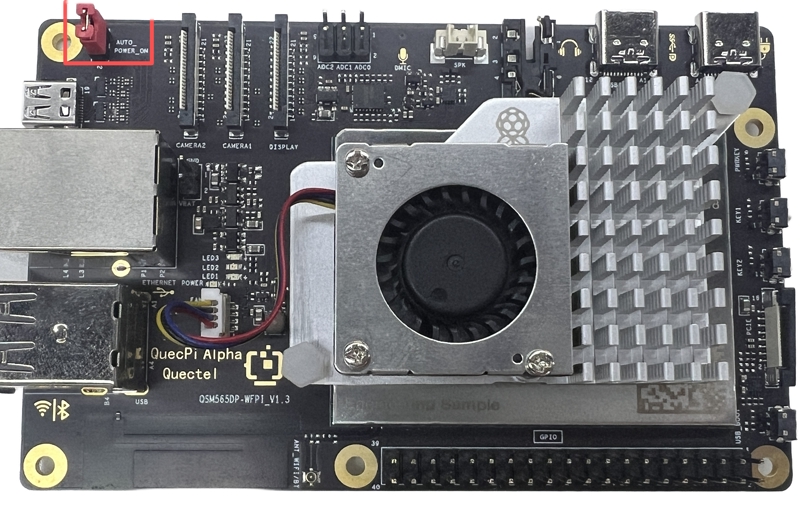
Jumper cap connection:
Locate the pin header labeled AUTO_POWER_ON at the upper left corner of Quectel Pi H1, and ensure it is shorted with a jumper cap.
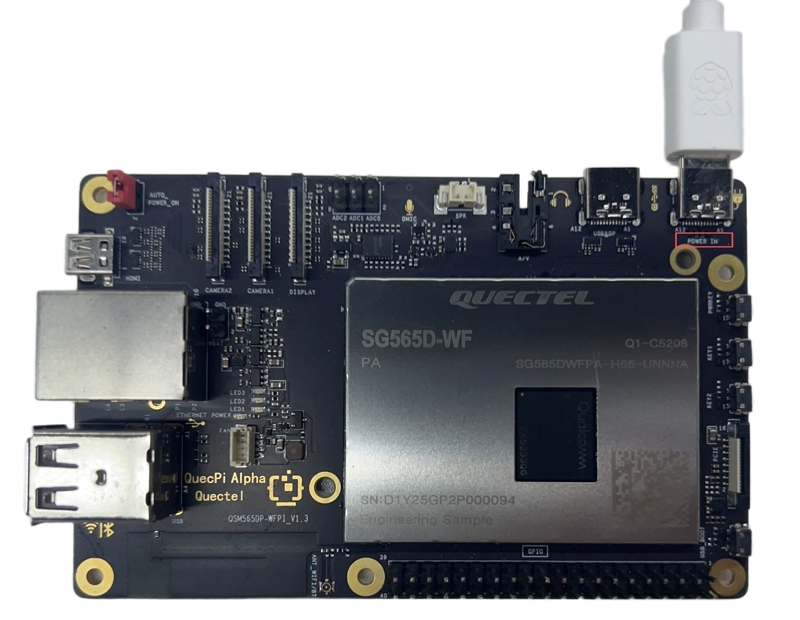
Power connection
Connect the USB-A end of the USB-A power cable to the power supply, and connect the USB-C end to the power port of Quectel Pi H1 (usually labeled POWER IN).
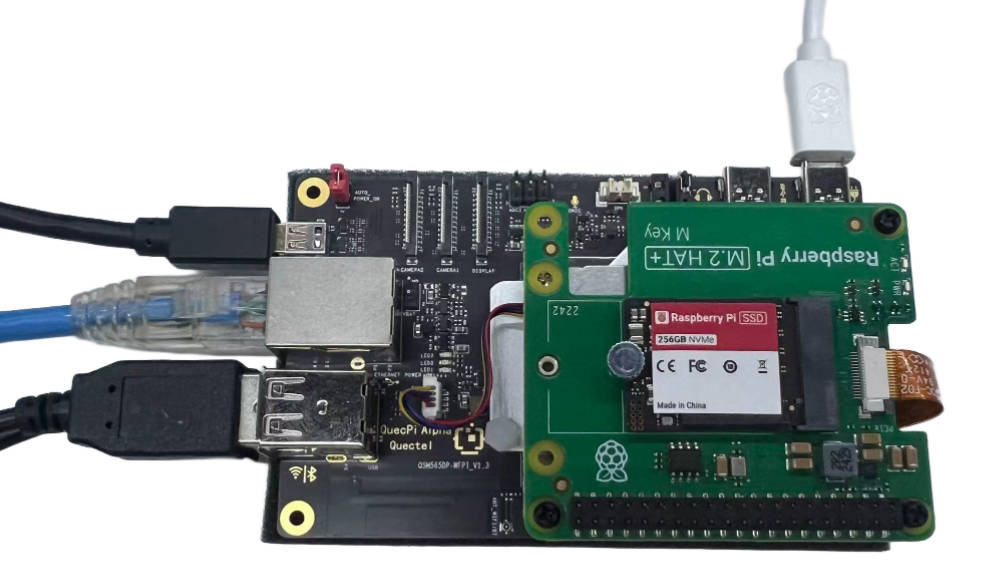
Connection complete reference
Project implementation
Update software sources
sudo apt-get update
Install Samba
sudo apt-get install samba
Create mount folder
sudo mkdir /mnt/resource
Set permissions for mount folder
sudo chown -R username: /mnt/resource/
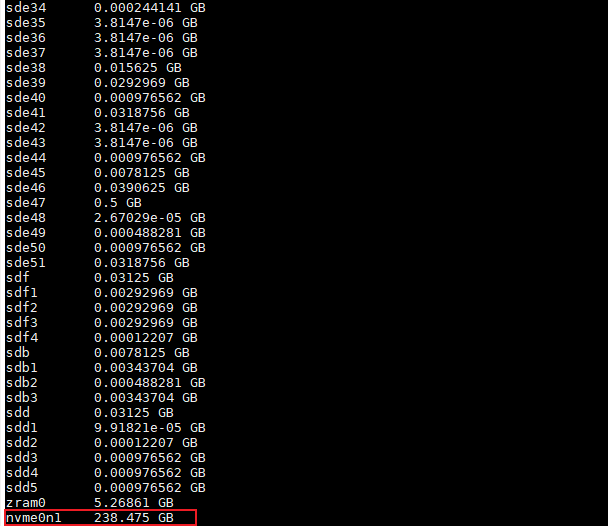
Check disk info
- Check the device corresponding to each partition
awk 'NR > 2 {printf "%-10s %s\n", $4, $3 / 1024 / 1024 " GB"}' /proc/partitions
- Formatting SSD
sudo mkfs.ext4 /dev/nvme0n1 # Format the hard drive device according to its actual mount location
- Check the filesystem type of the storage device to be mounted (Note: The Quectel Pi H1 uses ext4 for mounting by default. If the filesystem type of the external storage device does not match, the storage device needs to be reformatted).
sudo blkid

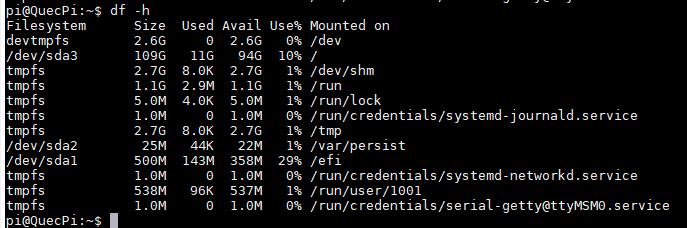
- Check current mounts (If there is an existing mount point under /mnt/resource, you need to unmount it first).
df -h
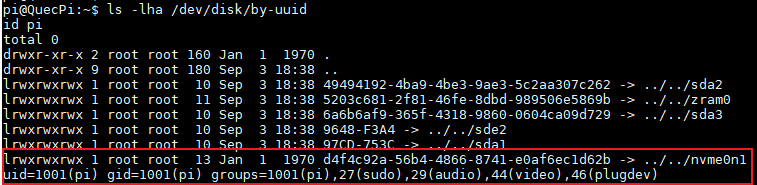
- Check the UUID of the corresponding partition, as well as the user's uid and gid.
ls -lha /dev/disk/by-uuid
id username
Modify configuration file
Here we use a 256GB solid state drive as the NAS server, so we select nvme0n1 as the extended partition to mount and modify the fstab file.
sudo apt install vim
sudo vim /etc/fstab
Press ESC+"i" to add the following statement to the end of the file. After adding it, press ESC+"Shift + :", then type wq and press Enter to save and exit.
#Use ext4 as the file system, referring to the partition file type queried in the previous step.
#Add the nofail option. The nofail option allows normal booting even if the device does not exist.
UUID=The UUID queried in the previous step /mnt/resource ext4 defaults,nofail 0 0

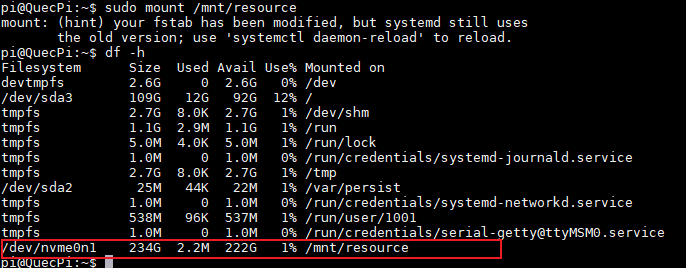
Mount the device
sudo mount /mnt/resource
df -h
Configure Samba user
sudo smbpasswd -a username
Note: Enter the current username and password. Please note that the user here must be an existing Linux user.
Edit Samba config
Enter the following command to open the configuration file
sudo vim /etc/samba/smb.conf
Add the following statements at the end of the file (the content in brackets is the disk name displayed externally).
[resource]
    comment = Resource
    create mask =0777
    directory mask = 0777
    path = /mnt/resource
    valid users = pi
    read only = no
    vfs objects = catia fruit streams_xattr
Check configuration
sudo testparm -s

Restart Samba
sudo systemctl restart smbd
sudo systemctl enable smbd
Test Samba service
- To test if a mounted folder has the necessary permissions, enter the following command. If the test file appears, it means you can perform operations on that folder.
sudo -u username touch /mnt/resource/test_from_kane.txt

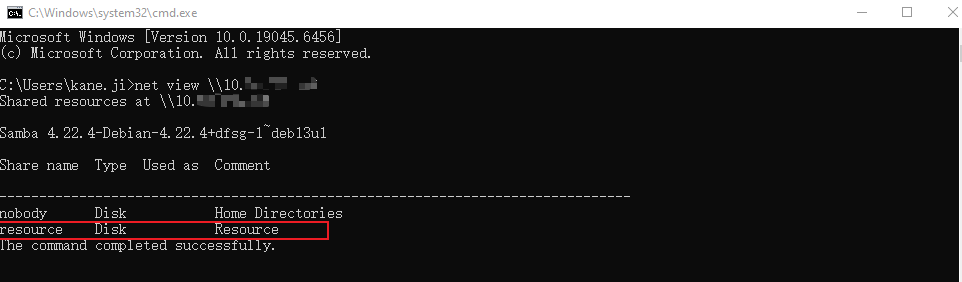
- Test the Samba share connectivity in Windows CMD. If the customized resource folder is displayed, it proves that the NAS server has been successfully set up.
net view \\[NAS_IP]
Connect to the NAS server
Windows file explorer (Easiest)
- Enter the following commands in sequence in the console of the Quectel Pi H1 to grant the user the highest privileges for operation.
cd /mnt
sudo chmod 777 resource/
Next, enter the
ip addresscommand in the console to query the IP address of Quectel Pi H1.Open Windows File Explorer, enter"\\\ + the IP address of Quectel Pi H1"in the search box, and press Enter to view the two shared folders.
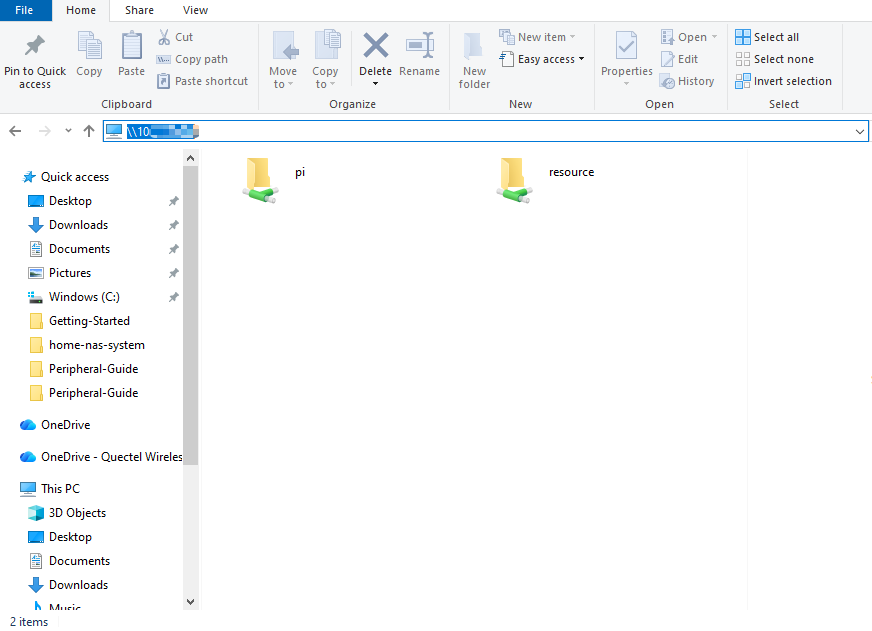
- After opening the resource folder in Windows File Explorer, users can directly add, delete, and modify files within the mounted folder.

SCP commands
- Upload files from Windows to NAS server.
scp "local_file_path" Quectel Pi H1 username@nas_ip:/mnt/resource/
- Upload an entire folder to the NAS server from Windows.
scp -r "local_folder_path" Quectel Pi H1 username@nas_ip:/mnt/resource/
CasaOS
CasaOS is an open-source home storage solution built on the Docker ecosystem, designed specifically for home users to deliver simple, easy-to-use, and elegant personal storage services. It allows users to quickly build and manage various home entertainment and smart applications, such as media servers, file storage services, and ad blockers, through a user-friendly graphical interface.
- Update Source
sudo apt update
- Install docker
sudo apt install docker.io
- Start the docker service
sudo systemctl start docker
sudo systemctl enable docker
- Check docker service status
sudo systemctl status docker
After successful startup, the following is shown:

- Install the full version of wget
sudo apt install wget -y
When the following option box appears, just press Enter.

- Install CasaOS
sudo apt install curl
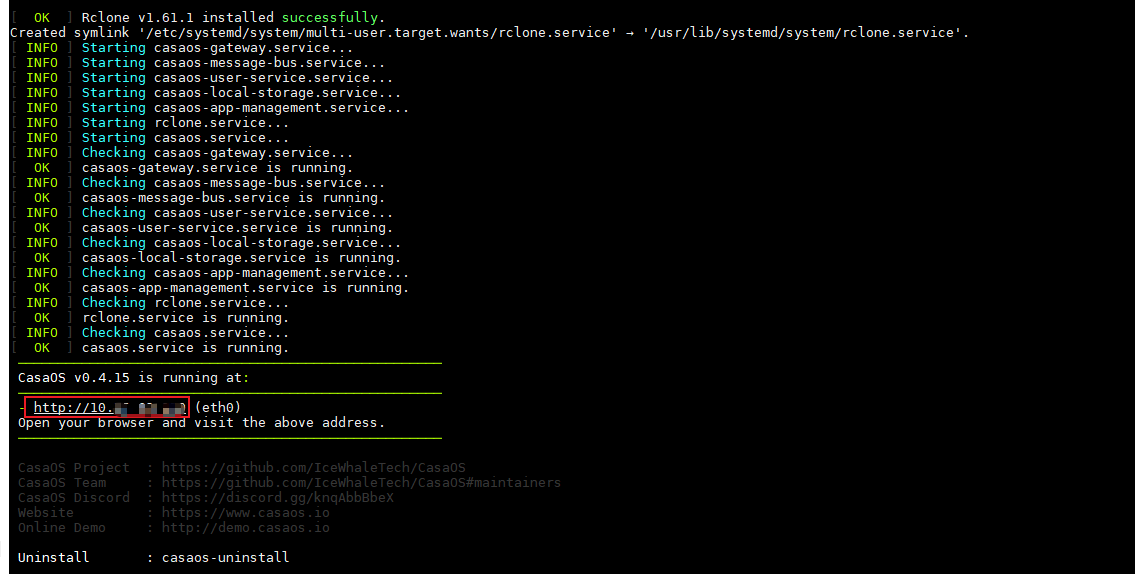
curl -fsSL https://get.casaos.io | sudo bash
After successful installation, copy the URL in the red box and open it in the browser.
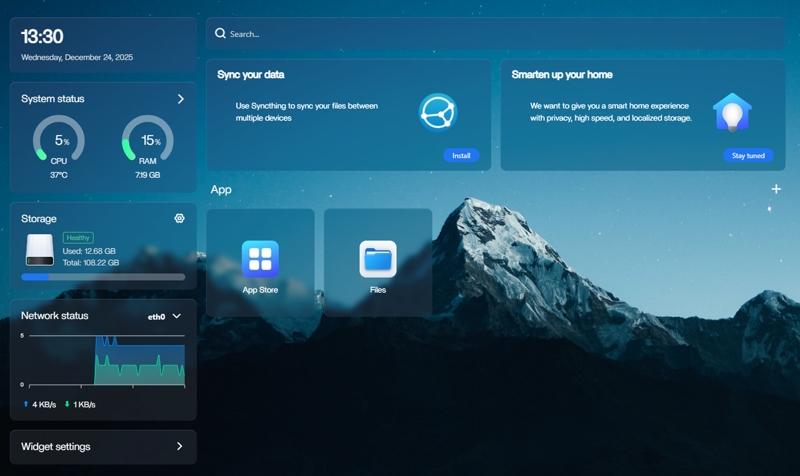
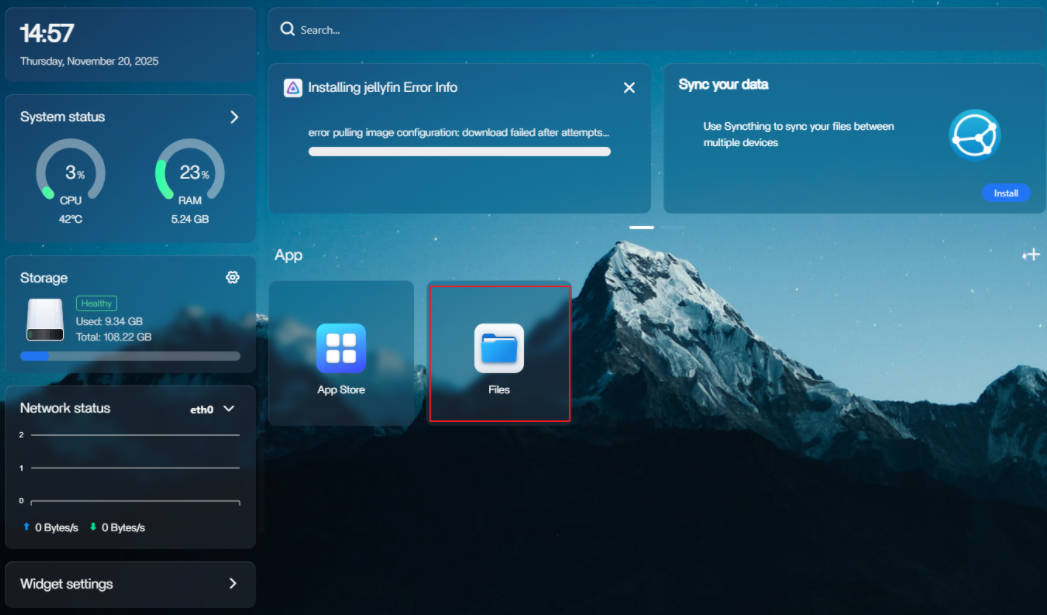
After creating an account, log in and click Files. After finding the folder mounted on the NAS server in the Root directory, you can directly upload, delete, modify, etc in the folder.

Application demo
Technical Support and Contributions
If you encounter any issues during use, please submit technical inquiries on the Quectel Official Forum. Our technical support team will respond promptly.