
M.2 SSD hard drive
This section describes the complete process of partitioning, formatting, mounting, and performing performance tests on an NVMe solid-state drive (using /dev/nvme0n1 as an example) under a Linux system, applicable to the Quectel Pi H1.
Hardware interface
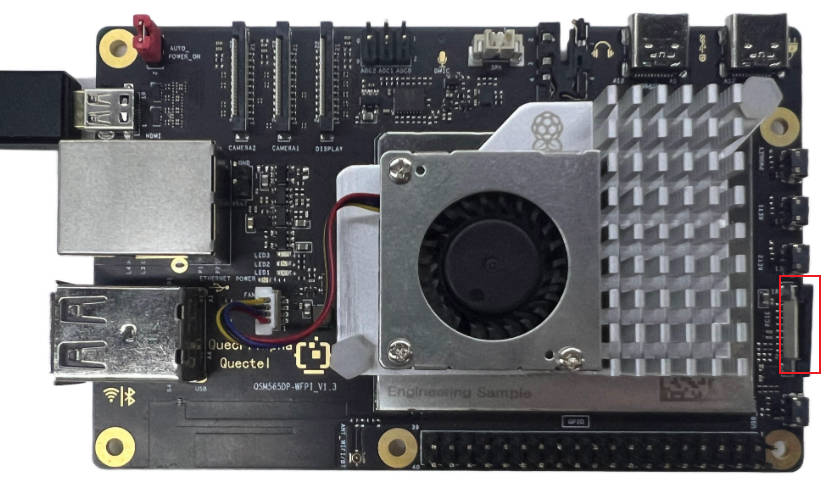
Quick start
Follow the steps below to complete the installation of the M.2 NVMe SSD:
- Install three nylon standoffs and secure them to the baseboard using three short screws.
- Install the GPIO expansion header and press firmly to ensure all pins are fully seated.
- Insert the PCIe adapter cable evenly into the PCIe interface of the single-board computer, then press down the mounting brackets on both sides to secure the cable in place.
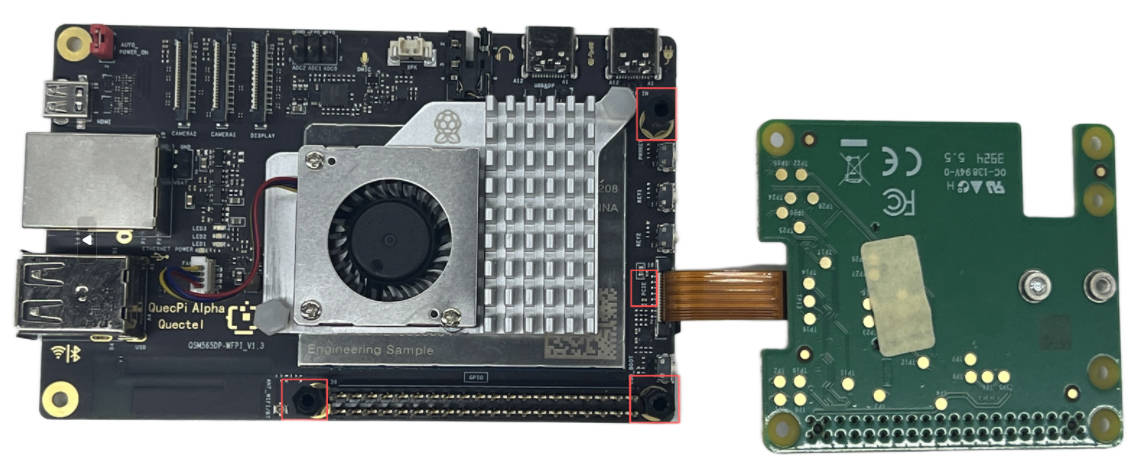
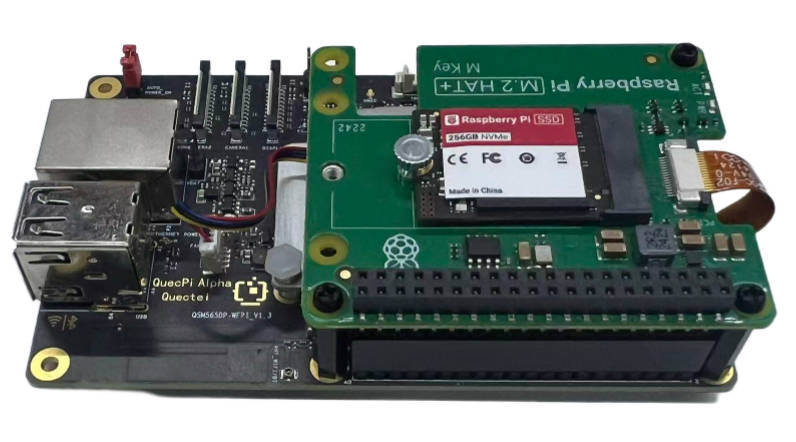
The installation reference views are shown below:
- Front view:
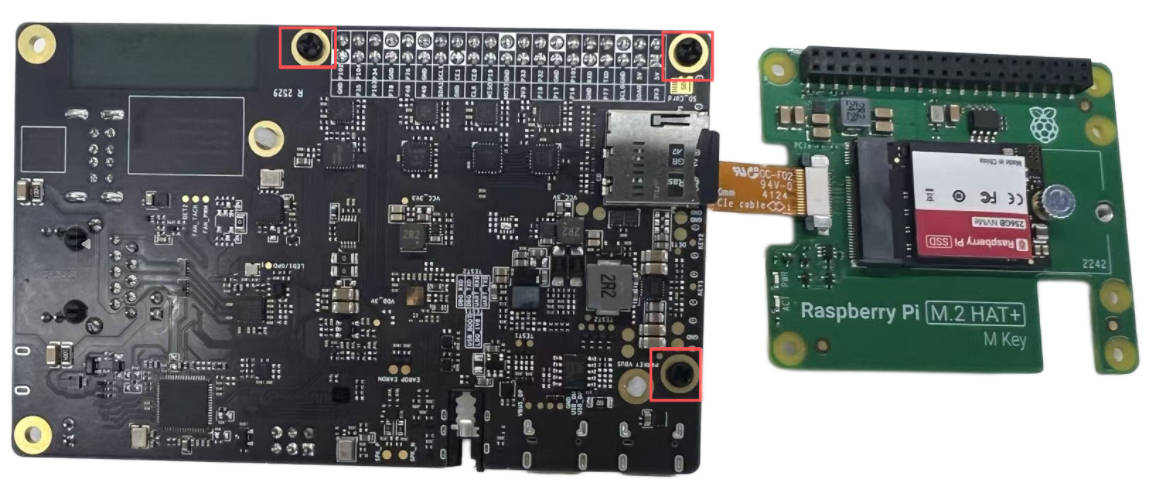
- Back view:
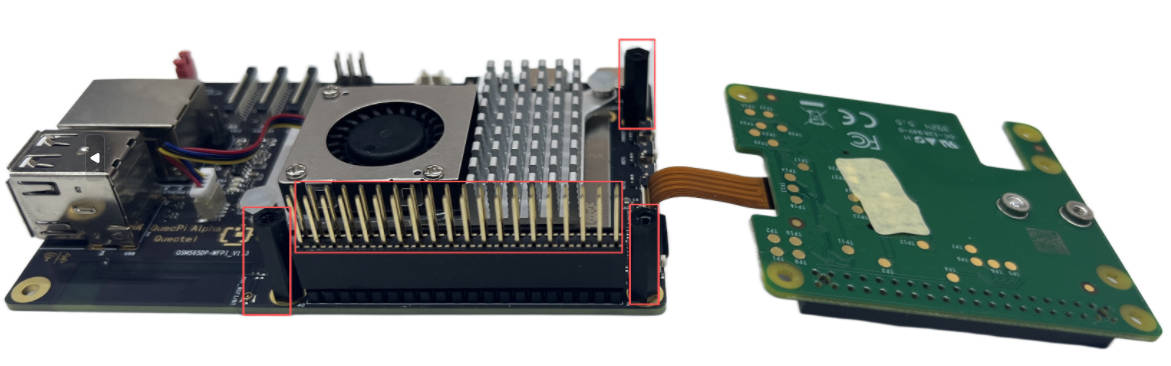
- Side view:
- Finally, place the M.2 HAT+ on top of the nylon standoffs and secure it using 3 long screws.
Function usage
Partitioning (fdisk)
Partition the NVMe device using the fdisk tool with the following steps:
Start fdisk
Execute the following command to launch fdisk and specify the target NVMe device:
fdisk /dev/nvme0n1
Interactive operation steps
After entering the fdisk interface, perform the following actions:
Create a GUID Partition Table (GPT)
Enter g and press "Enter" to create a GPT (recommended for large‑capacity devices):
Command (m for help): g
Created a new GPT disklabel (GUID: XXXXXXXX-XXXX-XXXX-XXXX-XXXXXXXXXXXX)
Create a new partition
Enter n and press "Enter" to create a new partition. Keep the default values for partition number, start sector, end sector (this uses the full available space):
Command (m for help): n
Partition number (1-128, default 1):
First sector (2048-xxxxxxxxx, default 2048):
Last sector, +/-sectors or +/-size{K,M,G,T,P} (2048-xxxxxxxxx, default xxxxxx):
Created a new partition 1 of type 'Linux filesystem' and of size XX GiB.
Write the partition table
Enter w and press "Enter" to write the partition configuration to the device and exit fdisk:
Command (m for help): w
The partition table has been altered.
Calling ioctl() to re-read partition table.
Syncing disks.
After the operation completes, the system will generate the new partition /dev/nvme0n1p1 (p1 indicates the first partition).
Format the partition (EXT4)
Use the mkfs.ext4 tool to format the new partition into the EXT4 file system (suitable for most Linux environments):
mkfs.ext4 /dev/nvme0n1p1
After execution, the formatting progress will be displayed.
Example output:
mke2fs 1.46.5 (30-Dec-2021)
Creating filesystem with 12345678 4k blocks and 3456789 inodes
Filesystem UUID: xxxxxxxx-xxxx-xxxx-xxxx-xxxxxxxxxxxx
Superblock backups stored on blocks:
  32768, 98304, 163840, ...
Allocating group tables: done
Writing inode tables: done
Creating journal (65536 blocks): done
Writing superblocks and filesystem accounting information: done
Manually mount the partition
Create a mount directory
Use mkdir to create a directory for mounting the SSD (example path: /mnt/myssd):
mkdir -p /mnt/myssd
Mount the partition
Mount the /dev/nvme0n1p1 partition to the /mnt/myssd directory:
mount /dev/nvme0n1p1 /mnt/myssd
You can verify the mounting success using the df -h command. If the output includes /dev/nvme0n1p1 and /mnt/myssd, the mounting is working correctly:
df -h
Filesystem      Size  Used Avail Use% Mounted on
/dev/nvme0n1p1  100G   5G   95G   5% /mnt/myssd
Configure auto-mount (Effective after reboot)
Modify /etc/fstab to automatically mount the partition at system startup.
Edit fstab
Open the file with nano editor (or any preferred editor such as vim):
Add mount configuration
Append the following line to the file to specify the partition, mount point, file system type, and mount parameters:
/dev/nvme0n1p1 /mnt/myssd ext4 defaults 0 2
Performance testing (Read/write speed verification)
Use the dd command to test the read/write performance of the SSD (ensure the partition is mounted during testing):
Read speed test
Create a temporary test file. Read the test file to /dev/null to measure raw read performance:
dd if=/mnt/myssd/testfile of=/dev/null bs=1G iflag=direct # iflag=direct: bypass system cache to test the real read speed
1+0 records in
1+0 records out
1073741824 bytes (1.1 GB, 1.0 GiB) copied, 0.852345 s, 1.3 GB/s
Write speed test
Generate a 1 GB empty file (/dev/zero as the source of zero data) to test the write speed:
dd if=/dev/zero of=/mnt/myssd/testfile bs=1G count=1 oflag=direct
1+0 records in
1+0 records out
1073741824 bytes (1.1 GB, 1.0 GiB) copied, 1.245678 s, 862 MB/s
Delete test file
After testing, you can delete the temporary file using the following command:
rm /mnt/myssd/testfile