
Home theater
Development resources summary
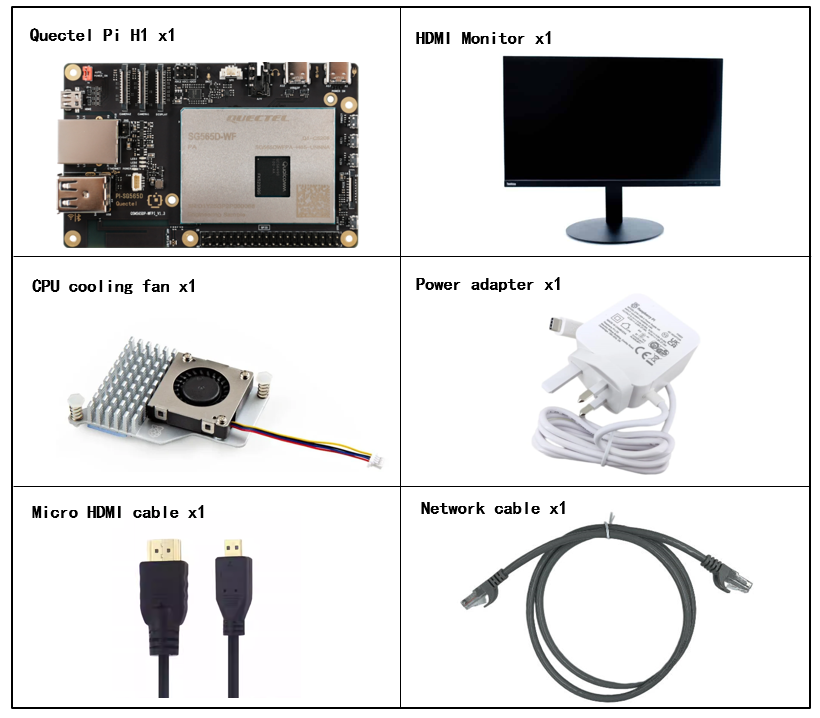
Development accessories list
| Accessory name | Quantity | Specifications |
|---|---|---|
| Quectel Pi H1 smart single-board computer | 1 | Quectel Pi H1 smart single-board computer |
| USB-C power supply | 1 | 27W USB Type-C interface charger 1.2m cable standard power PD power supply suitable for Raspberry Pi 5 |
| Micro HDMI cable | 1 | Specification: Micro HDMI 2.0; Cable length: 1m; Interface: HDMI-A (Male) - HDMI-D (Male) |
| Ethernet cable | 1 | Cable length: 1m; Transmission rate: Gigabit; |
| CPU cooling fan | 1 | Raspberry Pi 5 official active cooler with heatsink and thermal pad |
| Display | 1 | 24-inch HDMI display |
Physical reference of accessories
Get started quickly
Development preparation
The Quectel Pi H1 comes pre-installed with Debian 13, so no re-flashing is required. Just follow the steps below.
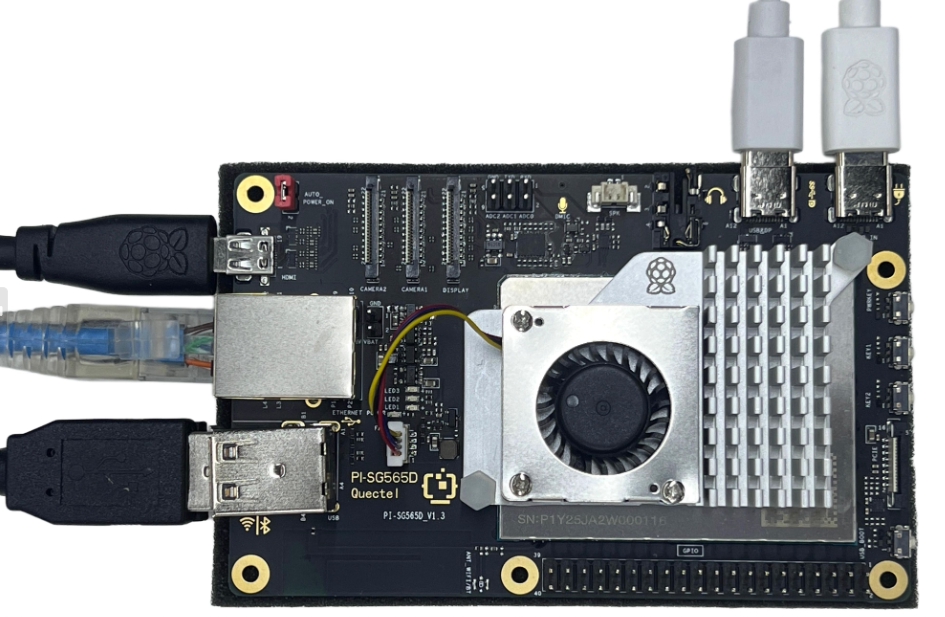
Hardware connection
Complete all hardware connections below. The numbering matches the interface diagram:

Display Connection: Connect one end of the Micro HDMI cable to the Micro HDMI port on the smart board, and the other end to the HDMI port of the monitor.
Network Connection: Connect one end of the Ethernet cable to the Gigabit Ethernet port on the smart board, and the other end to a router port (make sure the router is connected to the internet).
Input Device Connection: Connect the USB keyboard and mouse to the USB ports on the docking station, then connect the docking station to the USB port on the smart board. If using wireless input devices, insert the receiver into the USB port on the docking station.
Power Connection: Connect the USB-A end of the power cable to the power adapter, and the USB-C end to the power port on the smart board (usually labeled POWER IN).
Cooling Fan Connection: First plug the cooling fan cable into the FAN connector on the smart board, then secure both sides of the heat sink to the reserved mounting holes on the board.
Connection complete reference
Project implementation
- Update installation sources
sudo apt update
- Install Kodi service
sudo apt install kodi -y
- Install PVR plugin
sudo apt install kodi-pvr-iptvsimple -y
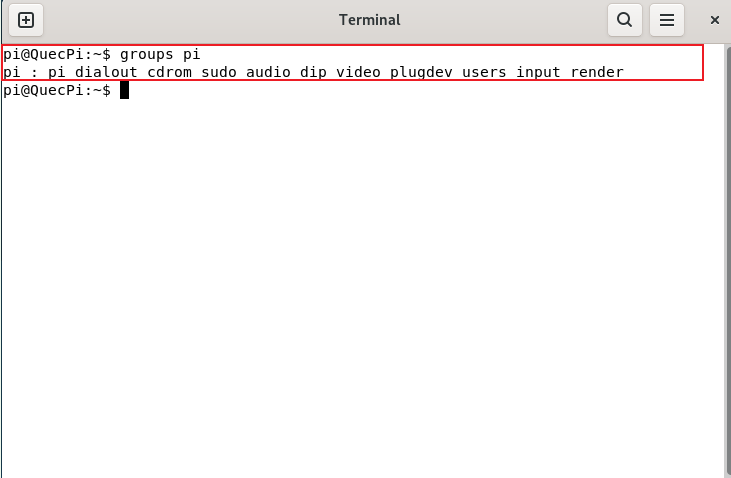
- Ensure the video acceleration API is initialized correctly during Kodi startup. To add the user to the groups, please use the following command:
sudo usermod -a -G cdrom,audio,render,video,plugdev,users,dialout,dip,input $USER
- Ensure the user running Kodi belongs to the following groups (for example, for user pi)
groups username
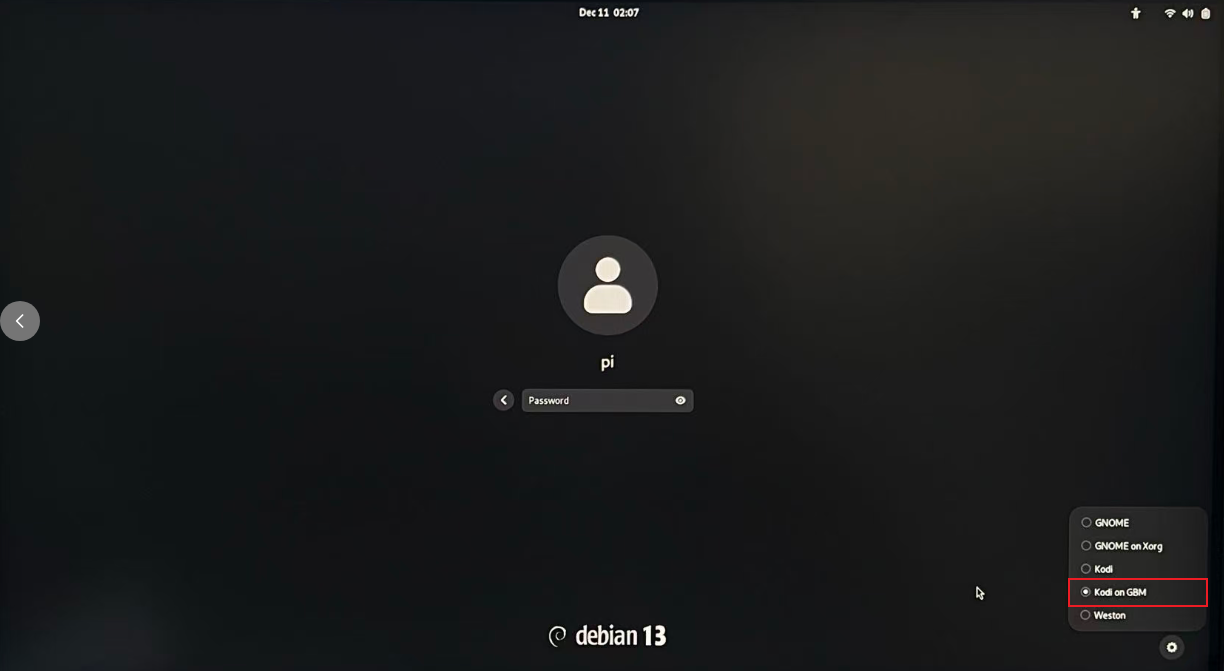
- After restarting, select "Kodi on GBM" in the gear icon at the bottom right of the login interface to run the Kodi service.
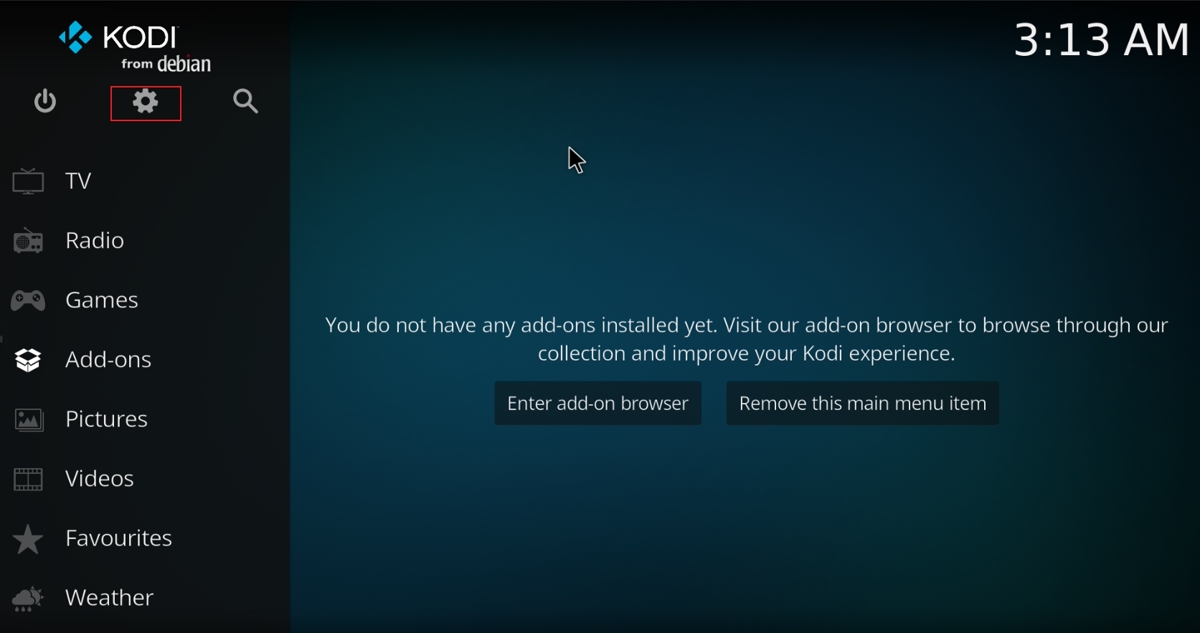
After entering Kodi, we will be asked whether to enable the installed plugin. We can choose NO and set it later. Then the options Enter add-on browser and Remove this main menu item will appear. Click the gear icon in the upper left to enter settings.
- Add plugin
For convenient operation, we can use "\" to switch Kodi between fullscreen and windowed mode.
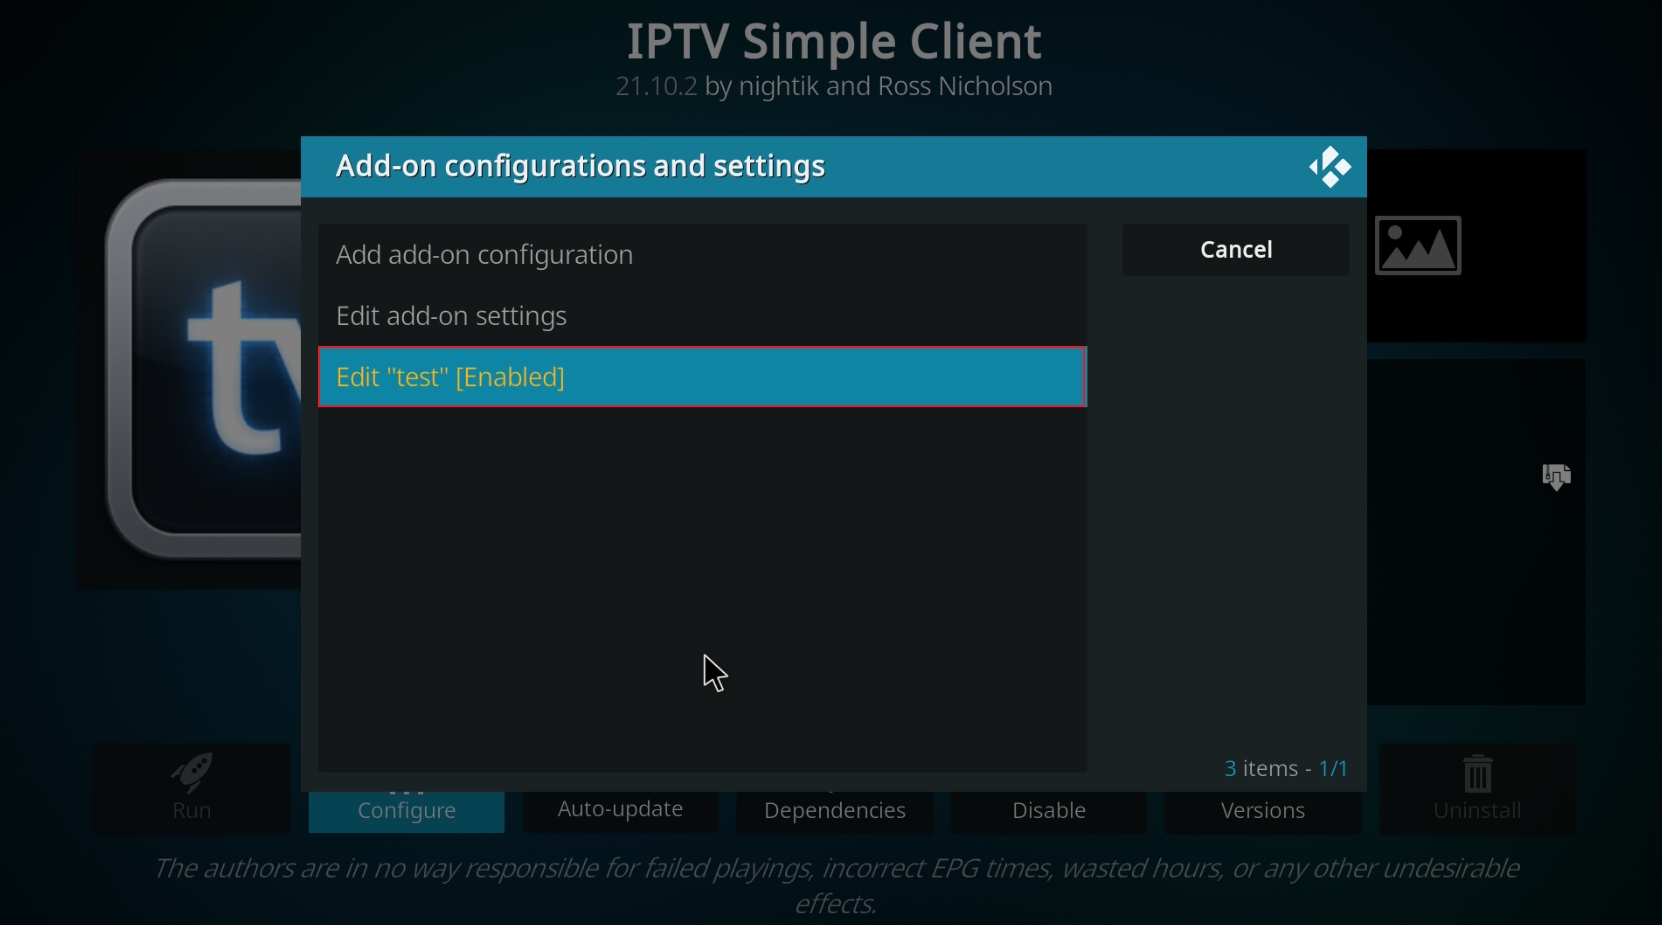
We have already installed IPTV Simple Client through the terminal command. So we click Add-ons→My Add-ons→PVR clients to find IPTV Simple Client, then click it to configure.
- Add source
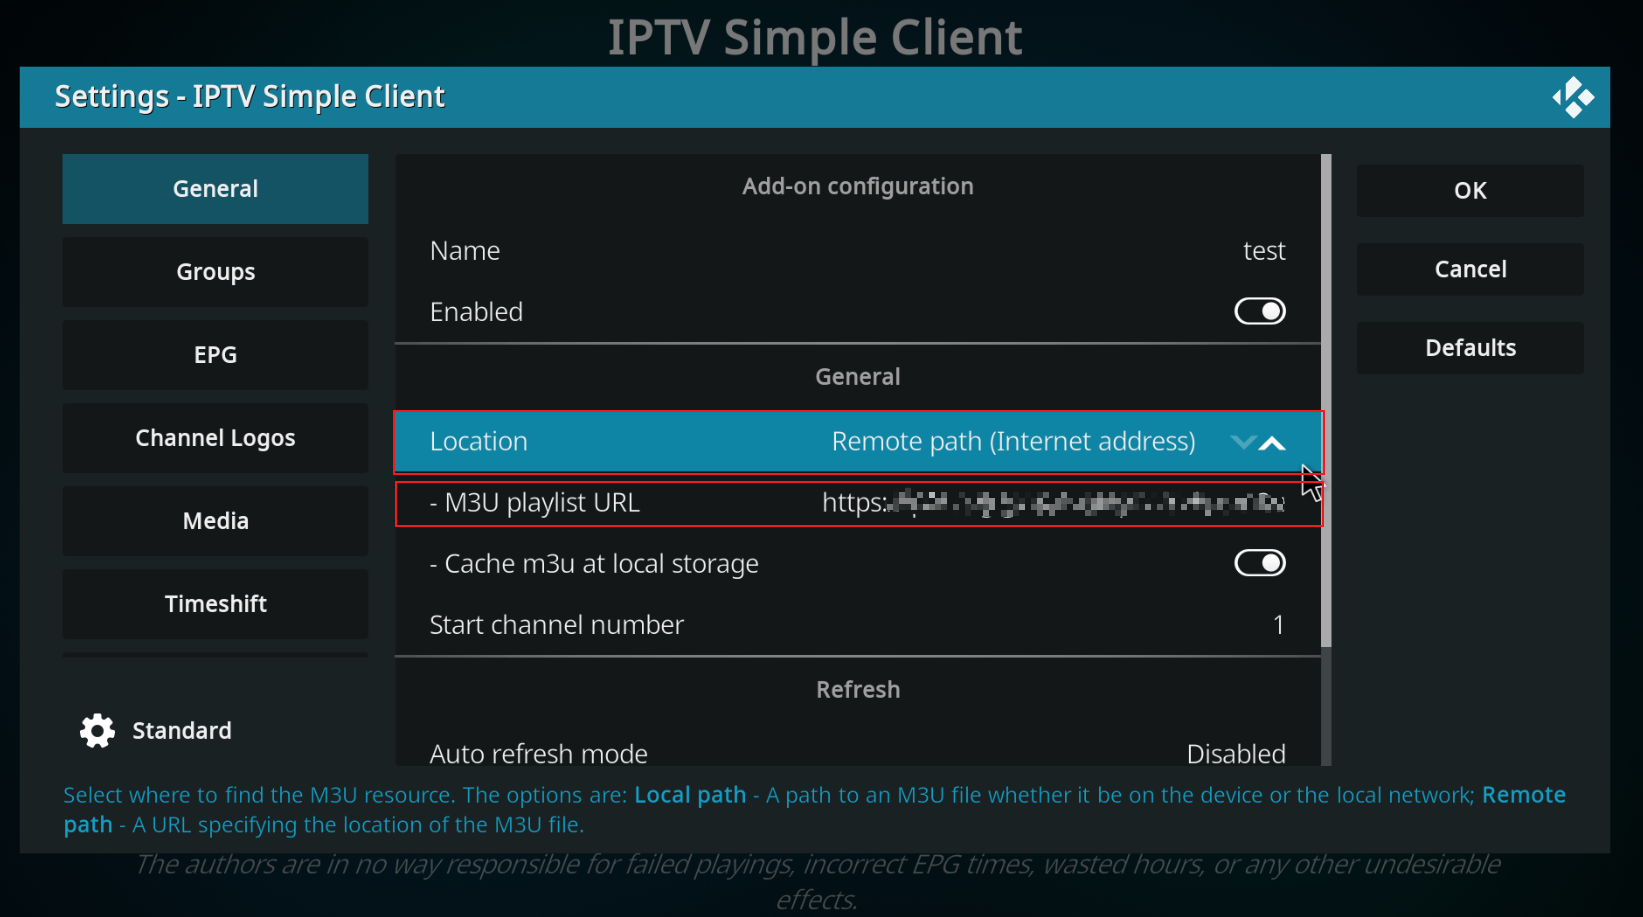
The location defaults to remote path. You can switch to local path by clicking the up/down toggle on the right. Select the live source file directory in the M3U playlist path. (Live source files are generally M3U8, which can be searched online, downloaded and stored locally, or accessed via URL remote path.) Here we choose to load the live source via remote path. Enter the remote URL into the "M3U playlist URL bar", click OK, Enable, then press ESC to return to the navigation interface.

- Press ESC to return to the main interface, click the TV bar, select your favorite program, and you can start watching.


Note: Currently, only low frame rate TV programs can be played. Hardware video decoding is still being adapted. Please pay attention to Quectel developer website for more information.
Advanced usage
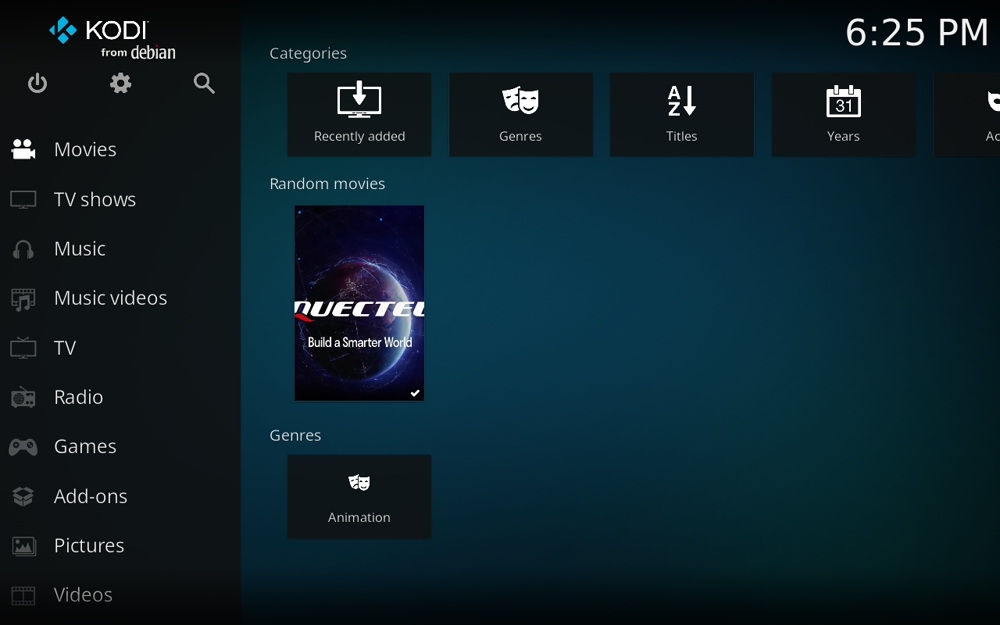
Here we introduce how to import movies, videos and other resources to play on Kodi.
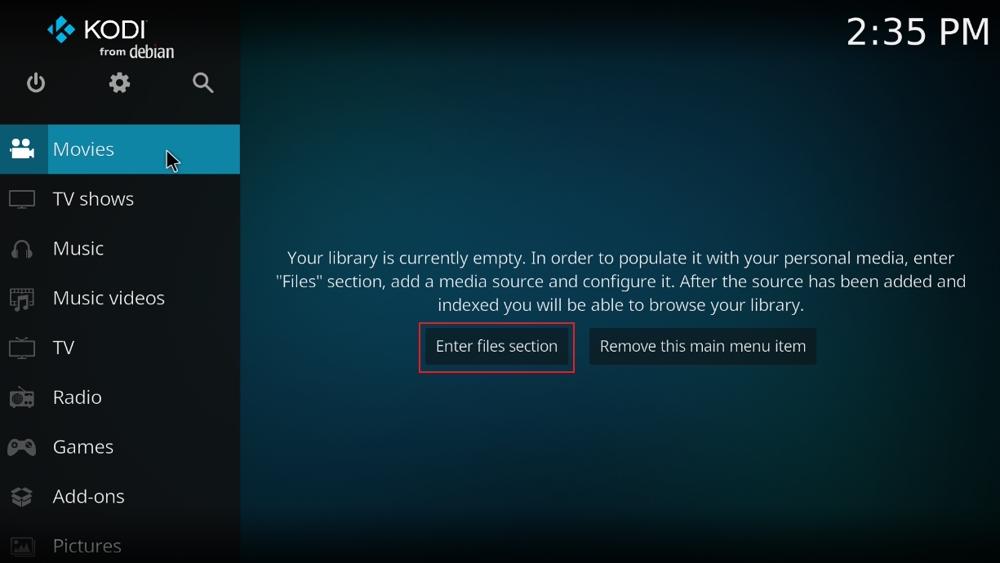
Step 1: In the Movies interface, click Enter files section -> Add videos to add resources.
Step 2: Select the path where the imported resources are stored, then click OK (here my resources are stored in /home/pi/media).

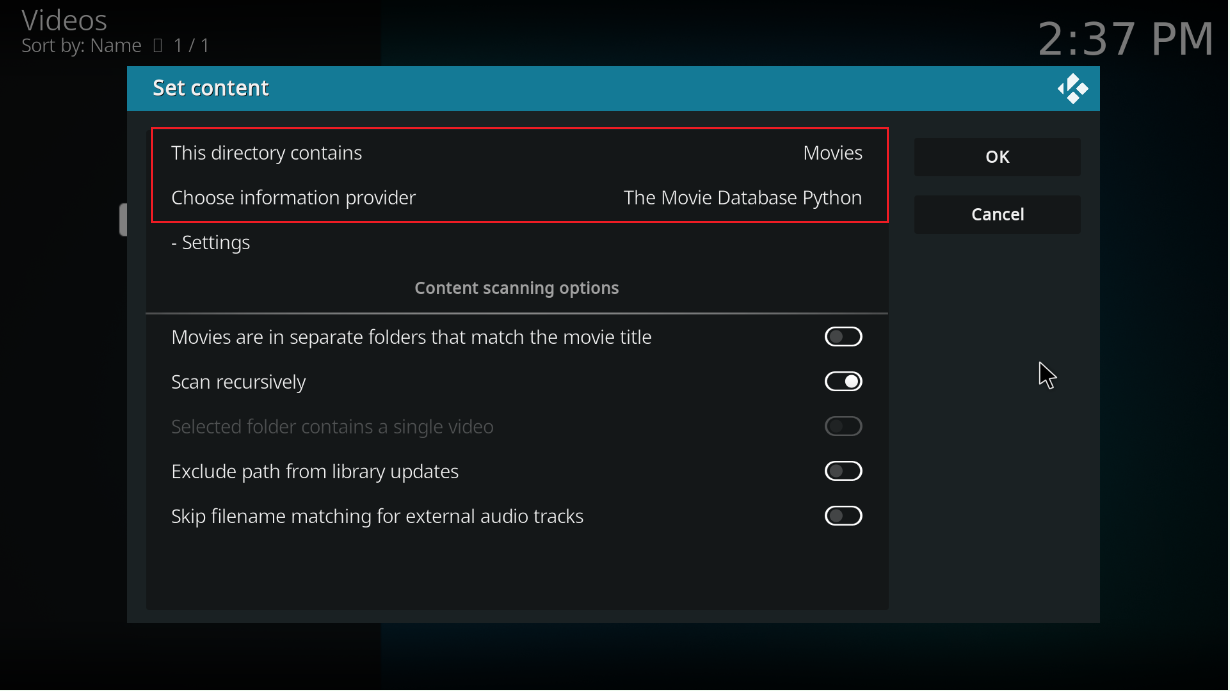
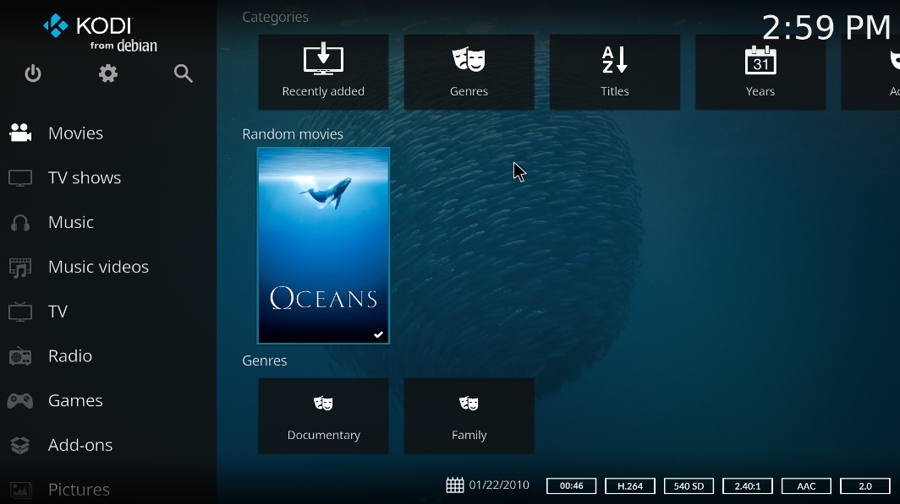
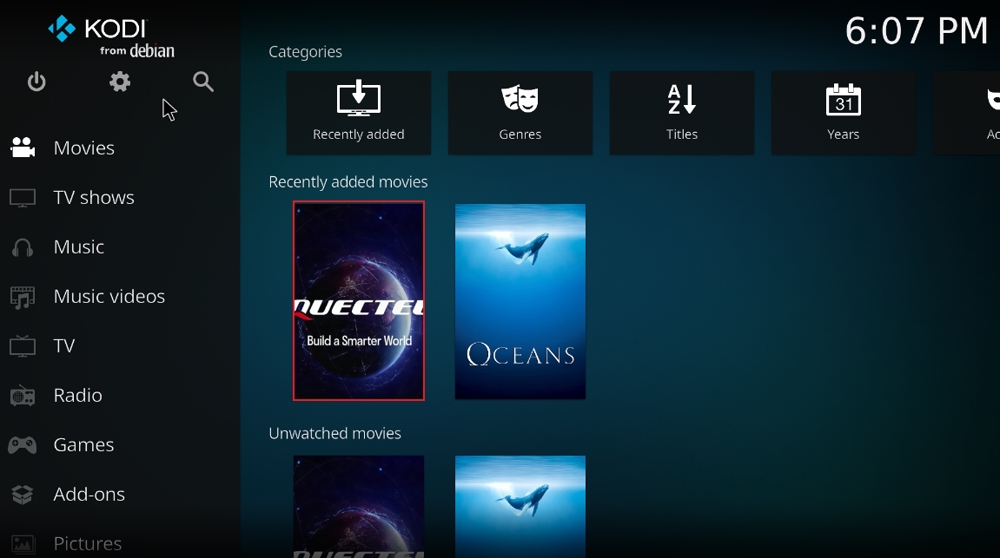
Step 3: Set the resource type to Movies, other options remain default, then click OK. It will prompt whether to update information, select Yes. Kodi will automatically scan the videos in the folder and download covers, descriptions and other information from the internet. After scanning is complete, return to the Movies interface, and you will see movies with covers.
Note: The above operation is based on the condition that the information of imported videos can match with online resources. If unable to match, the videos will not be loaded to the Movies interface.
Next, we introduce the method of importing customized resources.
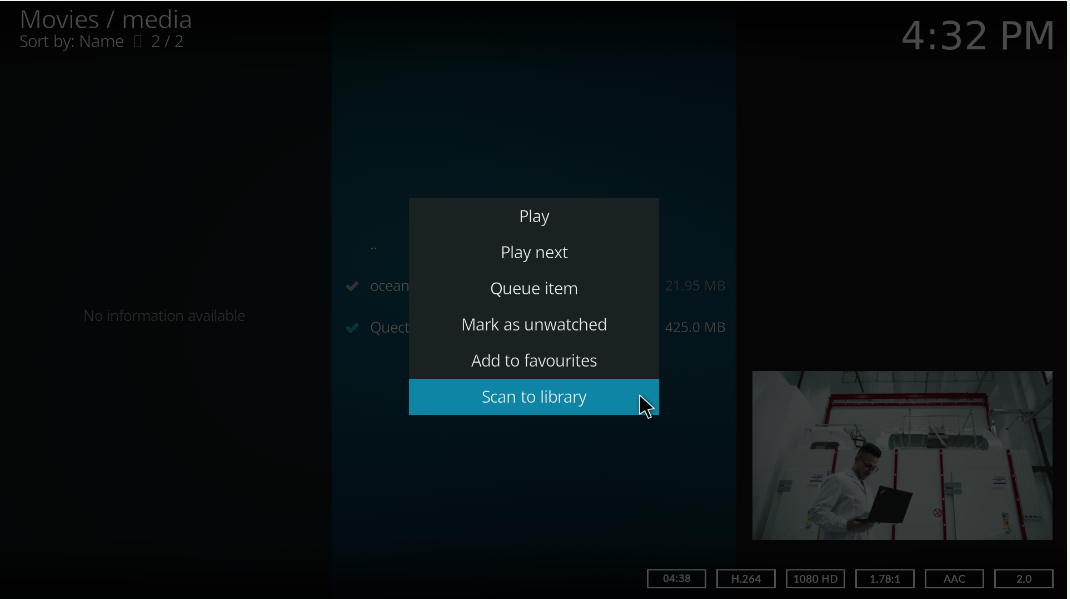
Step 1: Click the Movies interface to enter the video storage folder, select the video with cursor and press the right mouse button, then select Scan to library.
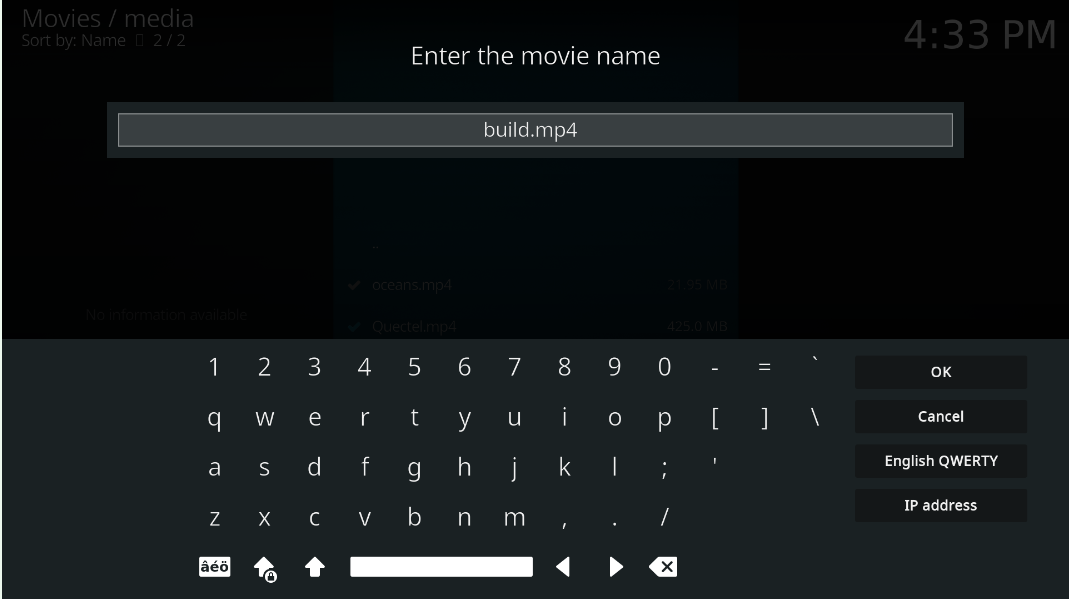
Step 2: Enter the movie name, which needs to be changed to a name that can match with online resources, such as: bulid.mp4.
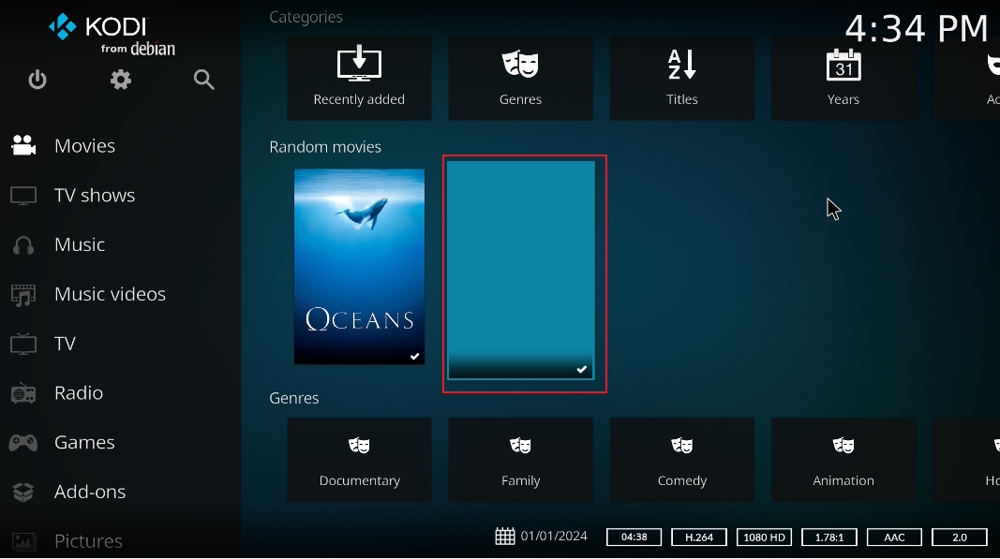
Step 3: After information matching, a prompt box will appear, select Yes, double-click to select any matching movie, then press ESC to return to the Movies interface. At this point, we can see the customized video without a cover.
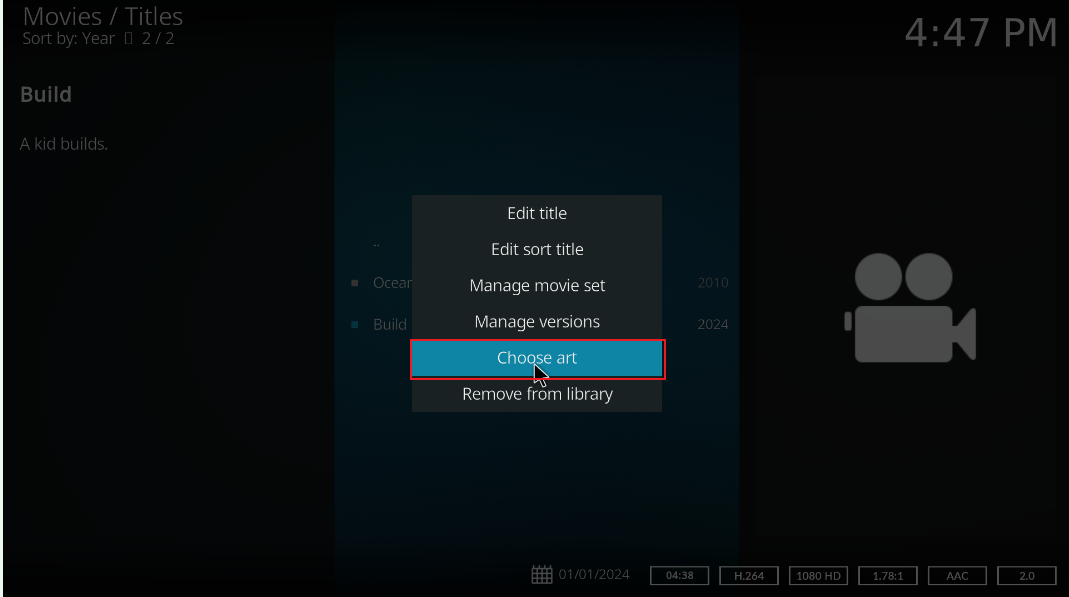
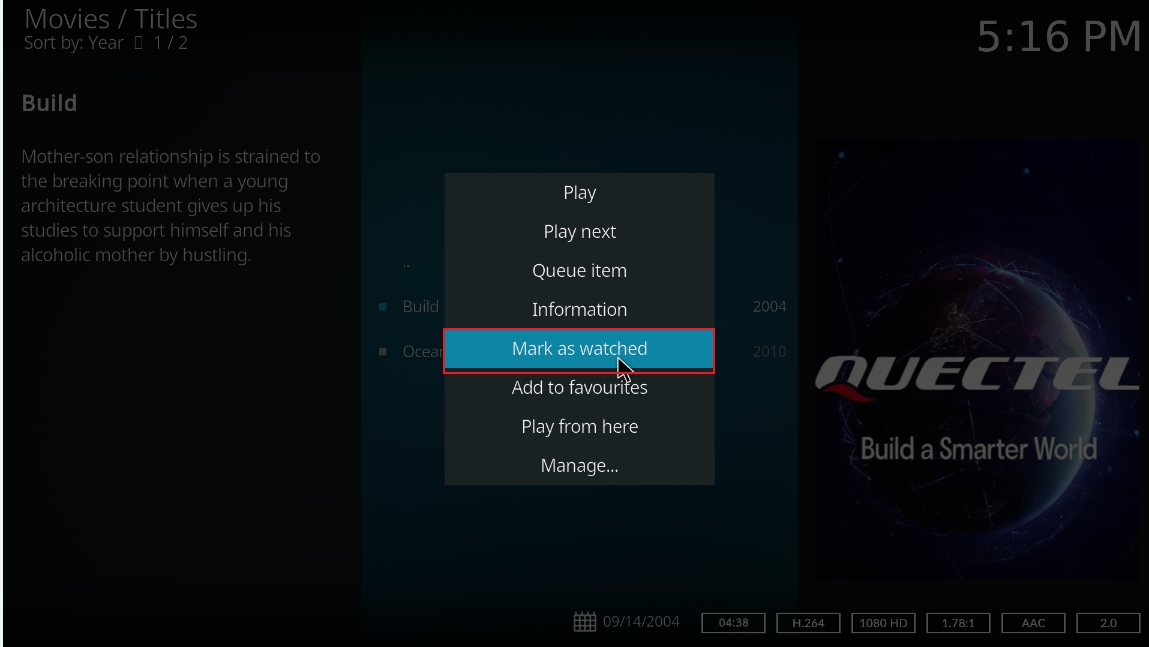
Step 4: Click the Movies interface, right-click on the customized video and select Manage, where you can modify the movie name, genre classification, etc.; click Choose art->Poster, select the picture that already stored in the imported folder to change the video cover.

Step 6: Press Esc to return to the initial interface, then right-click on the video and select Mark as Watched, finally return to the Movies interface, and you can see the customized video with the changed cover.
Technical Support and Contributions
If you encounter any issues during use, please submit technical inquiries on the Quectel Official Forum. Our technical support team will respond promptly.