
Retro game console
The retro game console system is built on the Quectel Pi H1 smart single-board computer and supports the operation of various classic games through the RetroPie emulator platform. It provides a smooth control experience with Xbox gamepads and touch displays, enabling plug-and-play access to retro games and creating a portable retro game entertainment terminal for game enthusiasts.
Development resources summary
Development accessories list
| Accessory name | Quantity | Specifications |
|---|---|---|
| Quectel Pi H1 smart single-board computer | 1 | Quectel Pi H1 smart single-board computer |
| USB-C power supply | 1 | 27W USB Type-C interface charger 1.2m cable standard power PD power supply suitable for Raspberry Pi 5 |
| Xbox gamepads | 1 | Xbox |
| 8-inch IPS capacitive touch display | 1 | 8-inch capacitive touch display for Raspberry Pi, 1280×800, IPS, DSI interface |
| Ethernet cable | 1 | Length: 1m; transmission rate: Gigabit |
| CPU cooling fan(optional) | 1 | Raspberry Pi 5 official active cooler with heatsink and thermal pad |
Get started quickly
Hardware connection
Install cooling fan
Plug the fan cable into the FAN header on the Quectel Pi H1, then secure the heatsink clips into the mounting holes as shown:

Connect display
Select an 8-inch IPS capacitive touch display (you can also use an HDMI display).
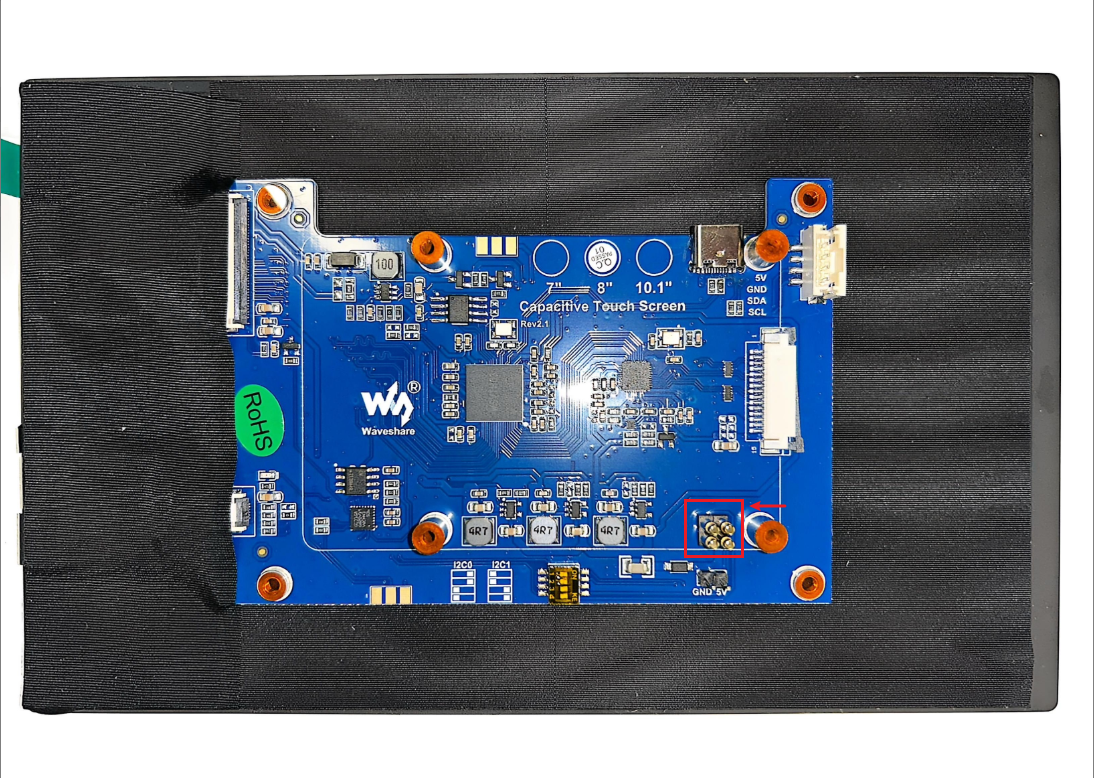
Align the pin header of the display with the 40-pin interface of the board and snap them together, then secure them tightly with brass standoffs. Next, connect the MIPI interface of the display to the corresponding interface on the board. The completed connection is as follows:
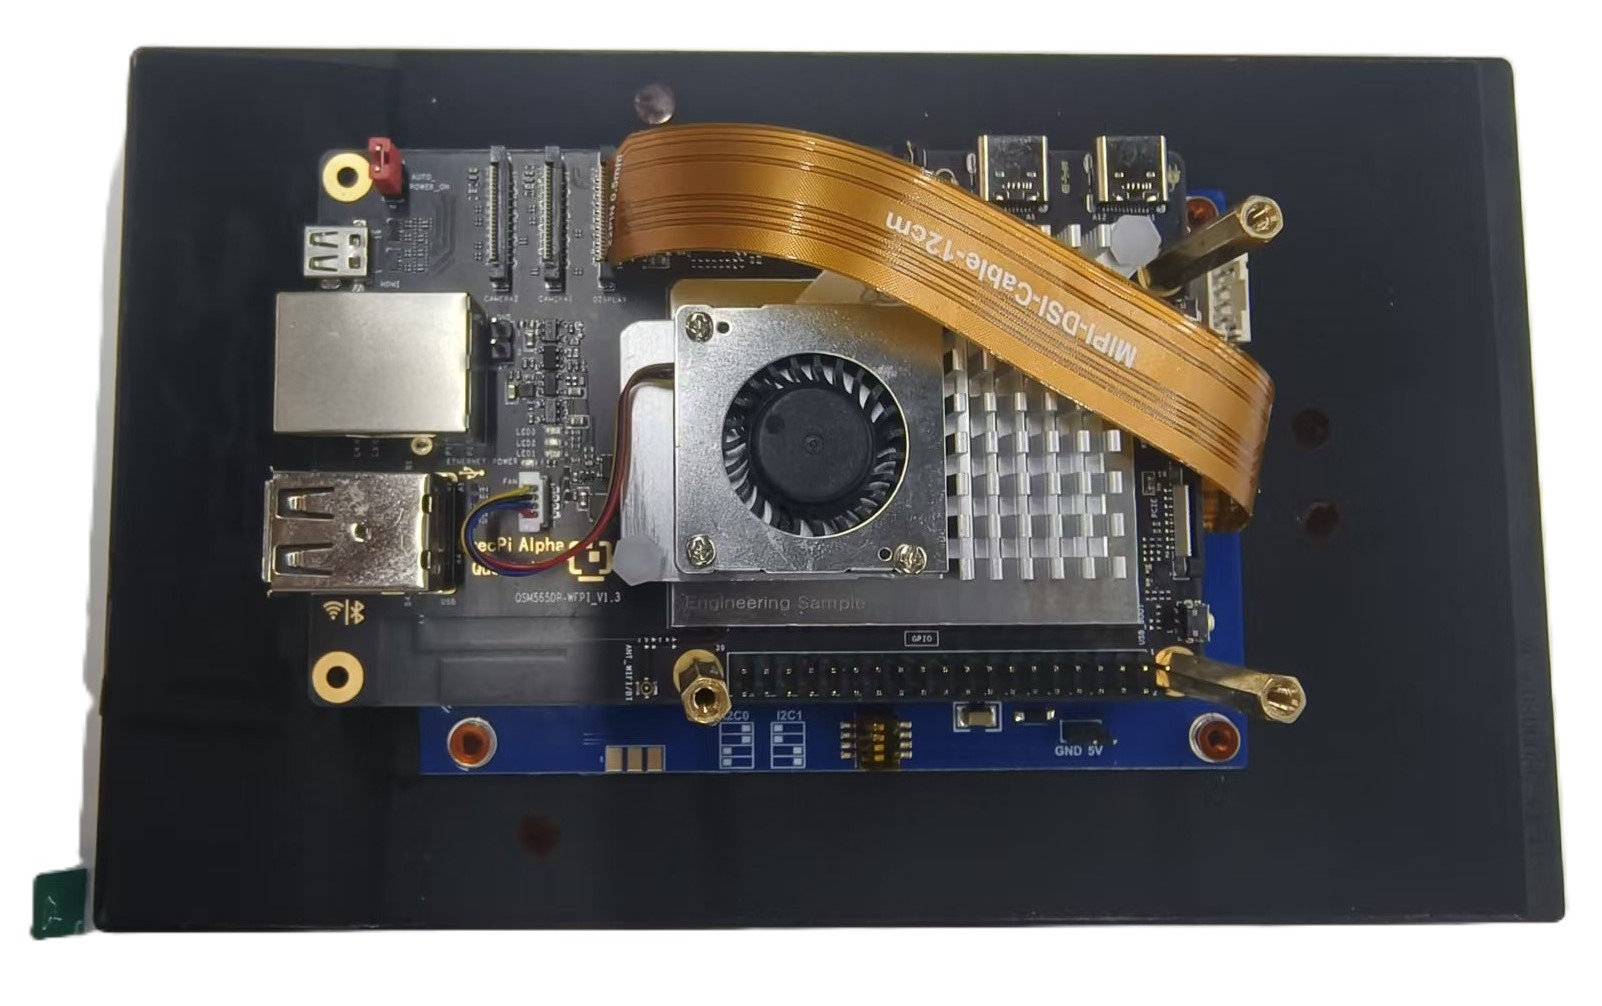
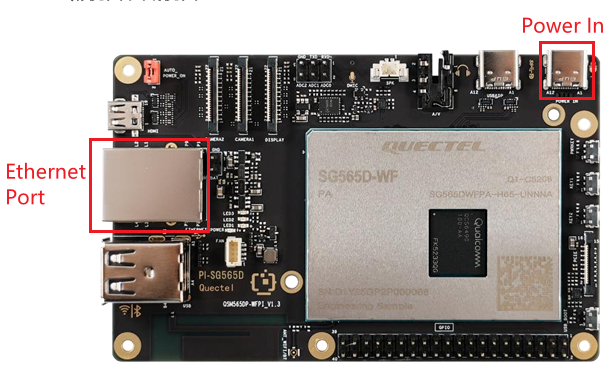
After the display is connected, plug in the Ethernet cable, and finally connect the Power In port to supply power to the board.
Project implementation
Environment preparation
1. Update software sources
sudo apt update
2. Install and configure SSH
sudo apt install openssh-server
Set auto-start
sudo systemctl enable ssh
Restart the service
sudo service ssh restart
3. Install essential tools
sudo apt install git
sudo apt install neovim
Install RetroPie
4. Download the official RetroPie installation script repository
git clone --depth=1 https://github.com/RetroPie/RetroPie-Setup.git
5. Launch the RetroPie configuration Menu
cd RetroPie-Setup
sudo ./retropie_setup.sh
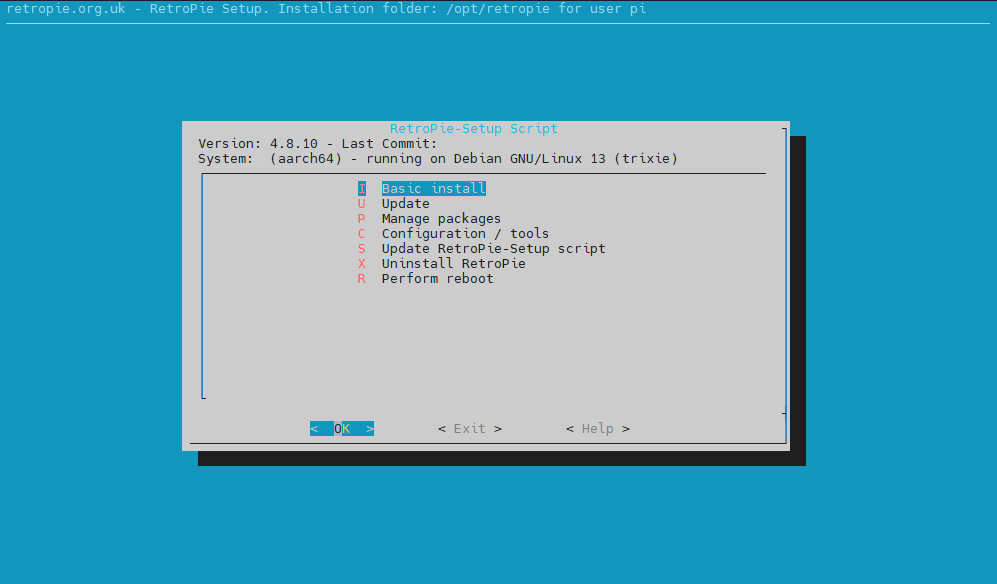
6. Basic installation
In the menu, click Basic install to start the installation. The entire process takes approximately 1 hour.
Launch and configuration
7. Access RetroPie
Method 1: Enter the following command in the terminal:
emulationstation
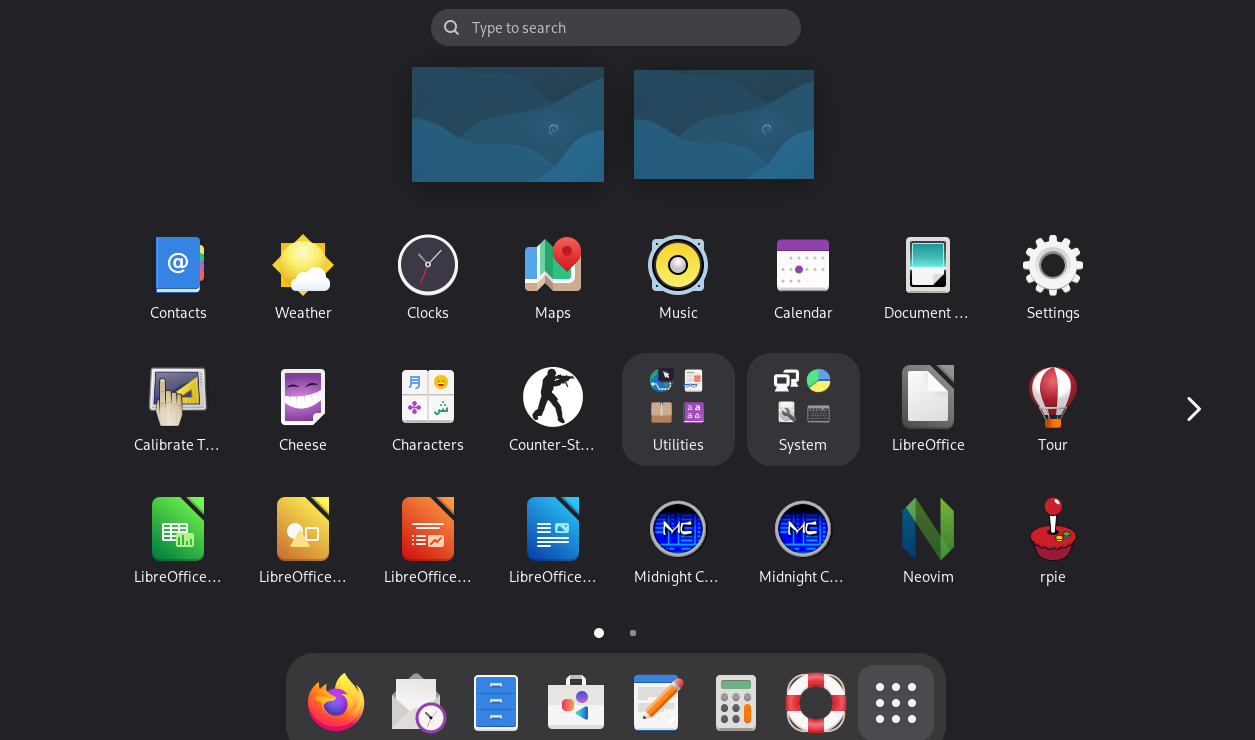
Method 2: In the desktop environment, locate the rpie icon and double-click to launch:
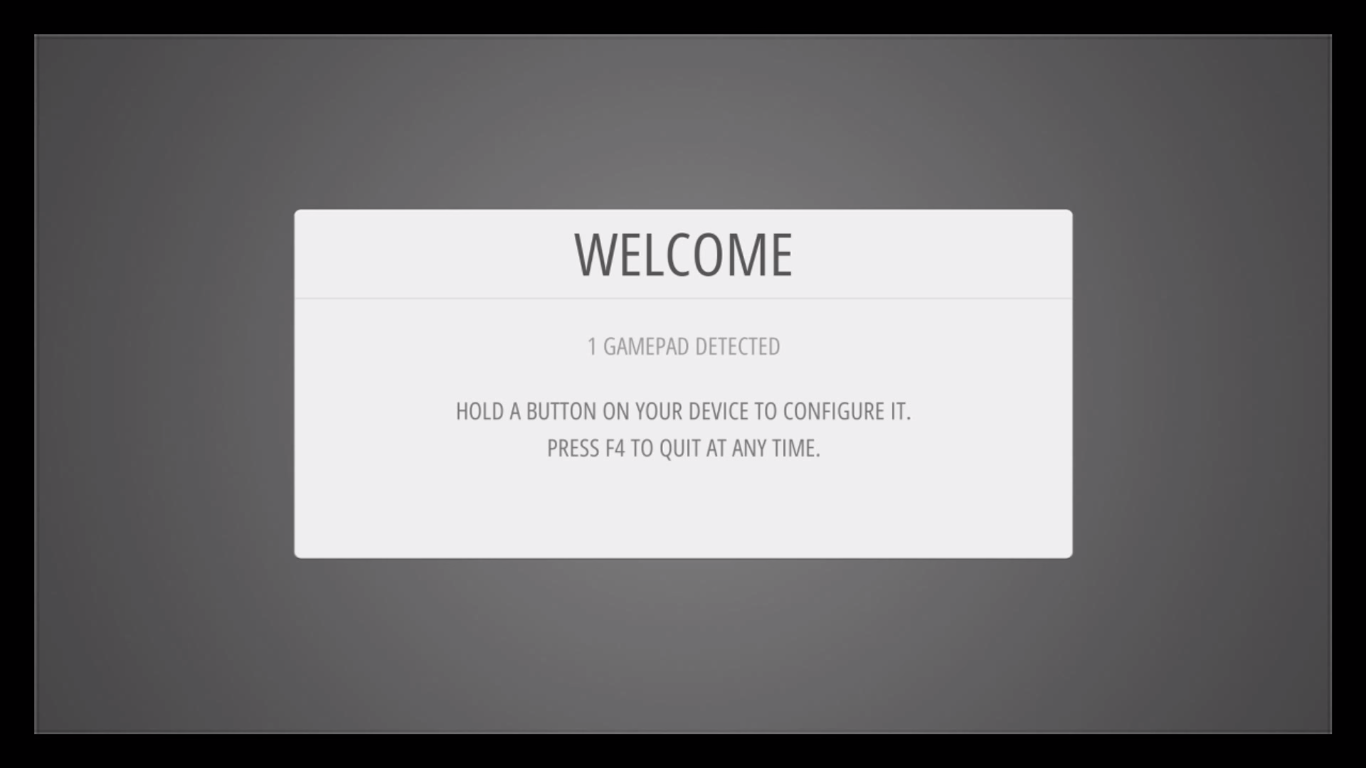
8. Initialize gamepad
When you open the emulator for the first time, the Welcome screen will appear, prompting you to configure a gamepad. Refer to the following for details: RetroPie Documentation
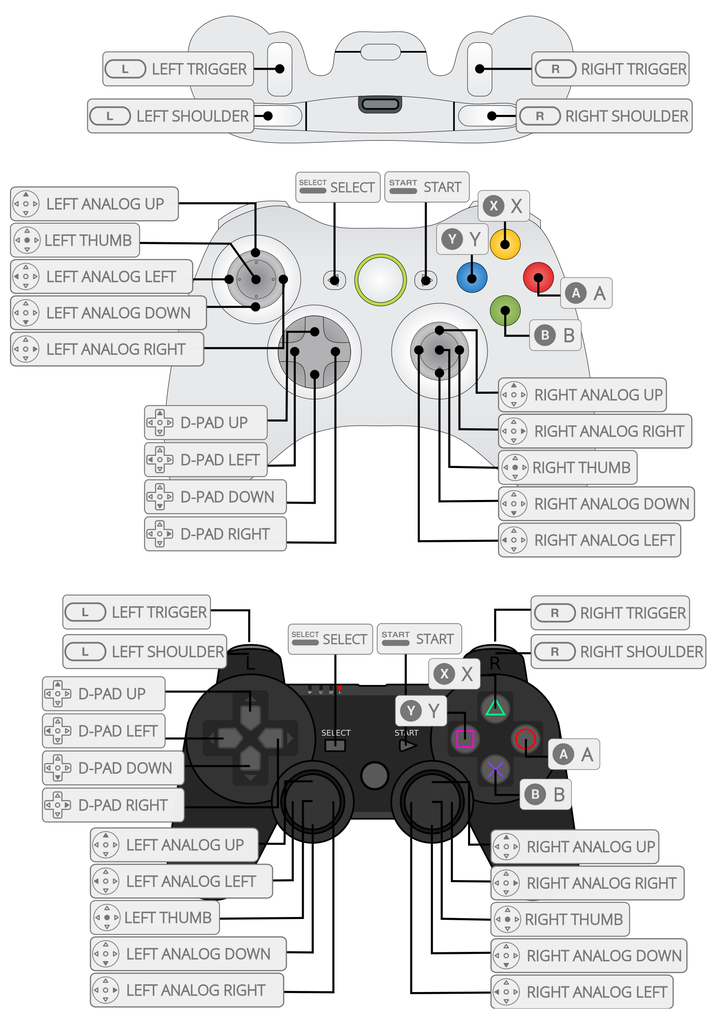
Gamepad button reference:
Exit the software:
- Normal exit: Press start → menu appears → select Quit → Quit emulationstation
System settings
9. Disable GPU rendering
Edit the environment variables file:
sudo vim /etc/environment
Enter i to enter edit mode, and comment on the following content:
__GLX_VENDOR_LIBRARY_NAME=mesa
MESA_LOADER_DRIVER_OVERRIDE=zink
GALLIUM_DRIVER=zink
VK_ICD_FILENAMES=/usr/share/vulkan/icd.d/freedreno_icd.aarch64.json
After finishing the edits, press Esc to exit the edit mode, then enter :wq to save and quit.
10. Restart the system
sudo reboot
Load game ROMs
What is a game ROM?
A ROM is a digital version of a game cartridge or disc. Loading a ROM in an emulator is equivalent to inserting the physical cartridge into a game console.
How to obtain game ROMs?
- Extract from game cartridges or discs that you legally own.
- Download free ROMs that are voluntarily made public by the developers.
ROM file path:
/home/pi/RetroPie/roms/
ROMs for different platforms must be placed in their corresponding subfolders. For detailed information, refer to RetroPie official documentation
Transfer ROM file
After connecting to the device via SSH using MobaXterm on your PC, you can directly drag and drop ROM files into the target directory to achieve fast file transfer.
Launch games
Once the game ROMs are placed correctly, open RetroPie, where you will see that the corresponding platforms and games have been successfully detected.
Application demonstration
After completing the above installation, you can start playing your games.
The specific steps are as follows:
Enter RetroPie, method to access.
For the first time, you need to configure the gamepad buttons. For details on how to configure the gamepad buttons, please refer to the following.
After configuring the gamepad buttons, enter the main interface. At the bottom of the main interface, there is an operation instruction for the interface buttons.
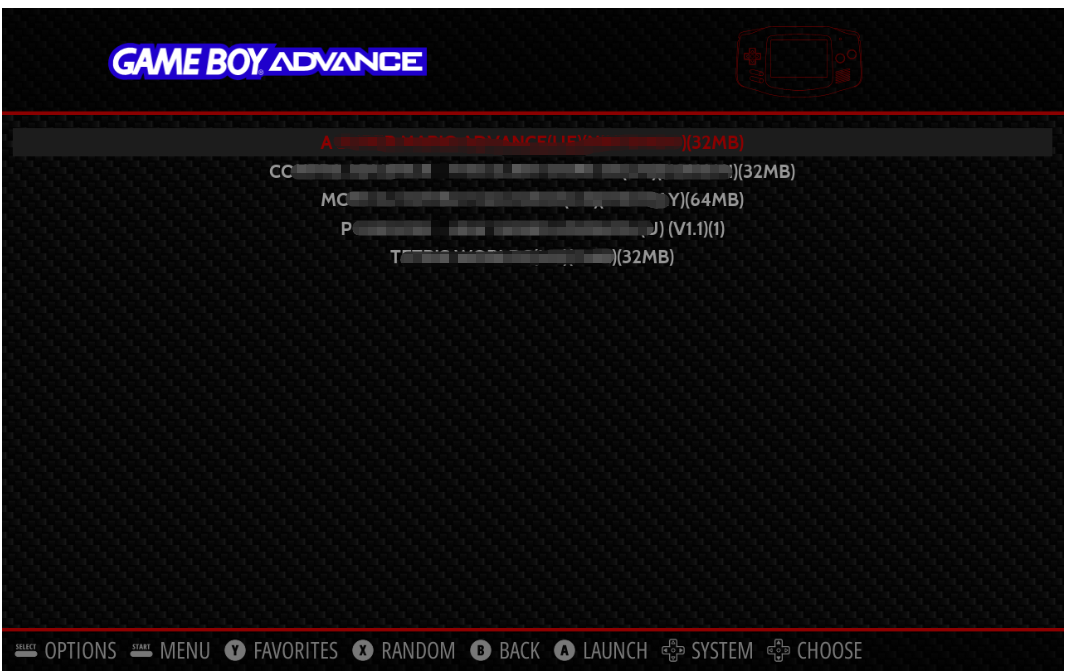
Let's take the GBA game as an example. The game ROM files have already been transferred, for details please refer to transfer ROM file.
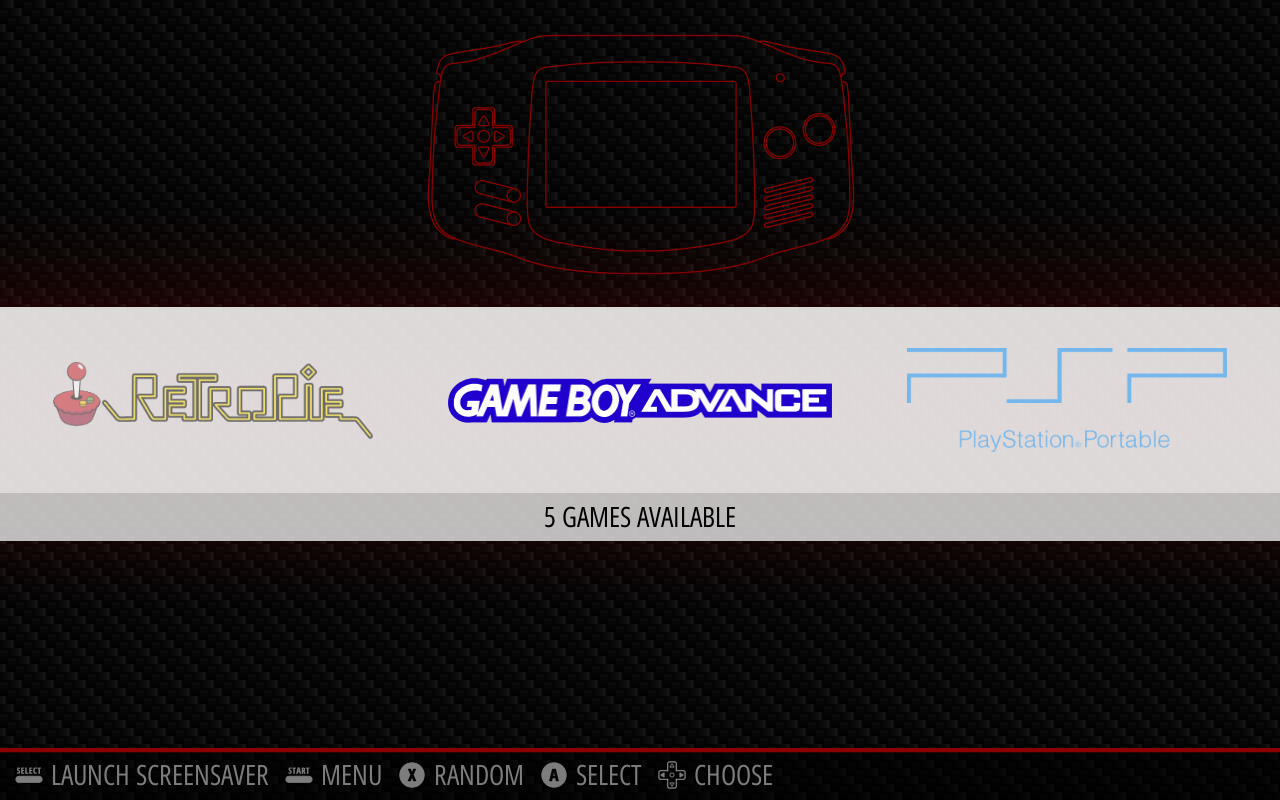
Press the left and right buttons to select to the
GAMEBOYADVANCEinterface. ClickAto enter. Then, you can see the installed GBA game ROM. Use the up and down buttoms to select the corresponding game file, and then clickAto start the game.
- The picture below shows the actual running screen of the game. Please note: The key operations for different games may vary.
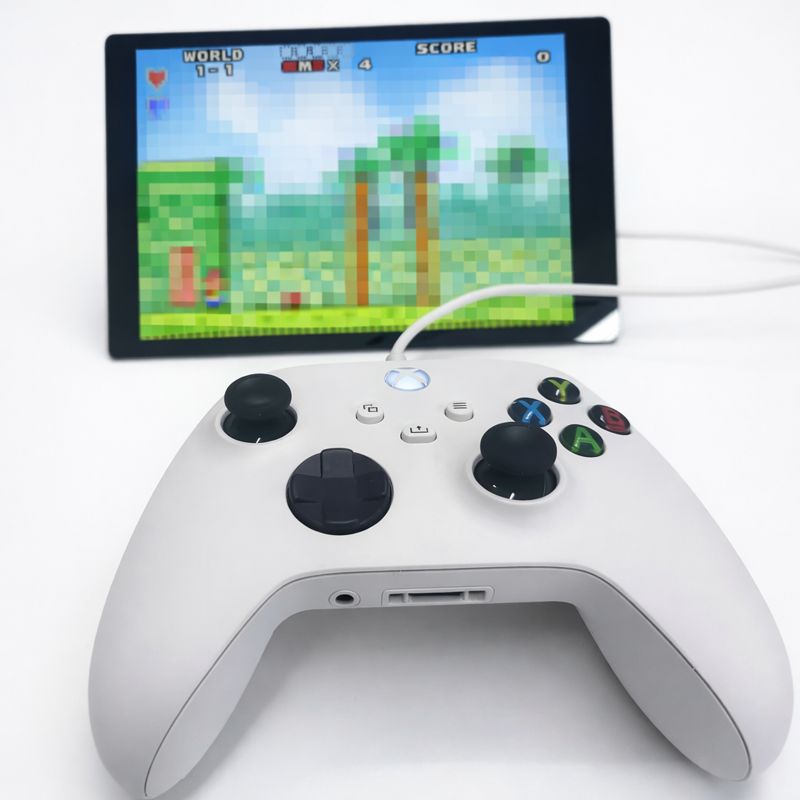
- The methods of exiting the game:
- Use the gamepad to enter the game settings menu and exit via the game's built-in option.
Hot + select, the specific key is the one set in the previous gamepad mapping.
Technical Support and Contributions
If you encounter any issues during use, please submit technical inquiries on the Quectel Official Forum. Our technical support team will respond promptly.