
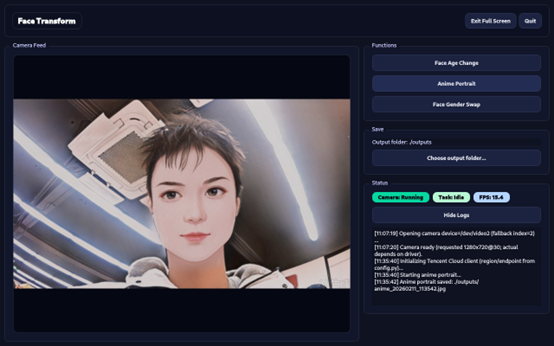
Face transformation
This document introduces the face transformation function based on a USB camera and its usage method. This function implements face effect processing through cloud interfaces and provides a graphical interactive interface to help users quickly deploy and verify effects. After completing environment preparation, dependency installation, and parameter configuration, you can run the project on the Quectel Pi H1 smart single-board computer to reproduce the face transformation effect and output the results.
Core Supported Functions:
- Face Age Transformation: Generate face effects of different age stages and synthesize videos for playback;
- Portrait Anime Stylization: Convert portraits into anime-style images;
- Face Gender Conversion: Generate gender conversion results for a single face in the form of a full image.
In addition, the project supports automatic identification and activation of camera devices, and outputs running status and log information, making it easy for users to monitor task progress and troubleshoot problems.
Development Resource Summary
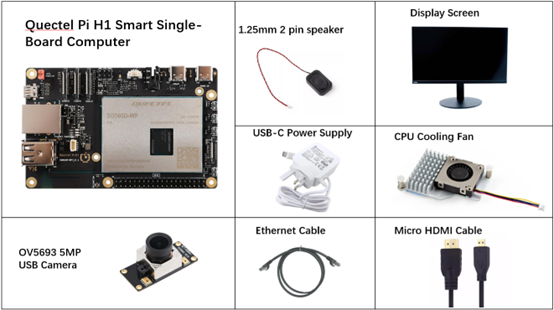
Development Component List
| Accessory Name | Quantity | Specifications |
|---|---|---|
| Quectel Pi H1 smart single-board computer | 1 | Quectel Pi H1 smart single-board computer |
| USB Camera Module | 1 | OV5693 5MP USB Camera Module |
| USB-C Power Cable Charger | 1 | 27W USB Type-C Interface Charger 1.2m Cable Length China Standard Power PD Power Suitable for Raspberry Pi 5 |
| CPU Heat Sink Fan | 1 | Raspberry Pi 5 Official Active Cooler with Thermal Pad |
| Micro HDMI Cable | 1 | Specification: Micro HDMI 2.0; Cable Length: 1m; Interface: HDMI-A (male)-HDMI-D (male) |
| Ethernet Cable | 1 | Cable Length: 1m; Transmission Rate: Gigabit |
| Display | 1 | 24-inch HDMI Monitor |
Component Physical Reference
Quick Start
Development Preparation
The Quectel Pi H1 smart single-board computer is pre-installed with the Debian 13 system image, eliminating the need for re-burning. You only need to complete the following steps to start development.
Hardware Connections
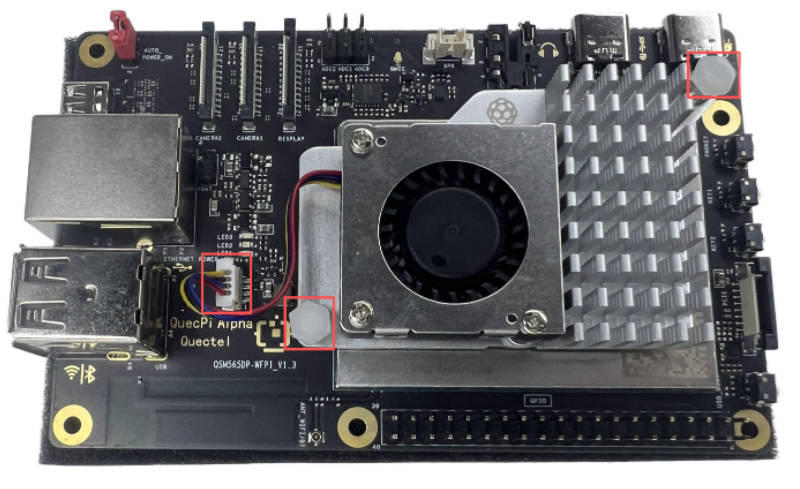
Cooling Fan Installation
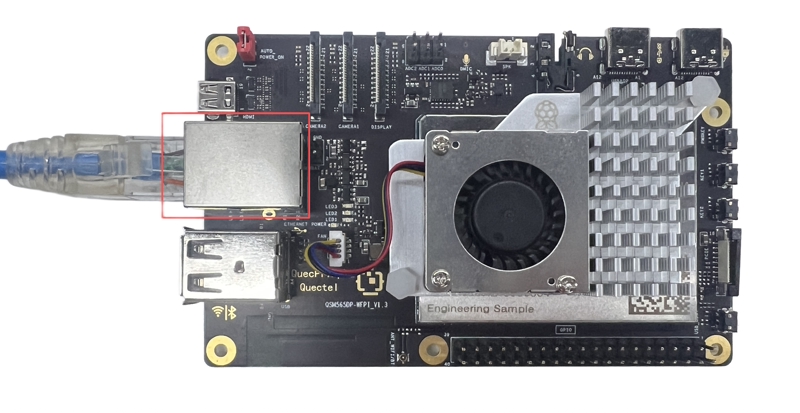
Insert the cable of the cooling fan into the FAN slot of the Quectel Pi H1 smart single-board computer, then fix the two ends of the cooler to the reserved mounting holes on the main control board. The schematic diagram is as follows:
Camera Connection
Connect the USB camera directly to the USB-A interface of the Quectel Pi H1 smart single-board computer.

Display Connection
Connect one end of the Micro HDMI cable to the Micro HDMI interface of the Quectel Pi H1 smart single-board computer, and the other end to the HDMI interface of the monitor.
Network Connection
Connect one end of the network cable to the Gigabit Ethernet port of the Quectel Pi H1 smart single-board computer, and the other end to the Ethernet port of a networked router to ensure the device can access the network.
Power Supply Connection
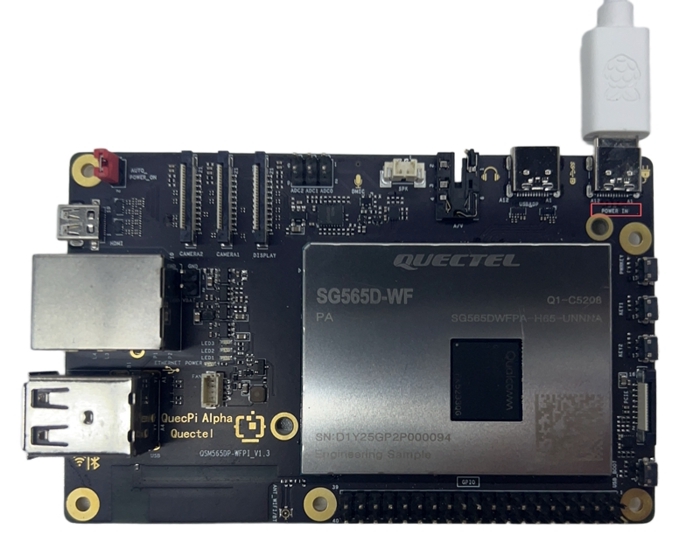
Connect the USB-A end of the USB-C power cable to the power adapter, and the USB-C end to the power interface marked "POWER IN" on the Quectel Pi H1 smart single-board computer.
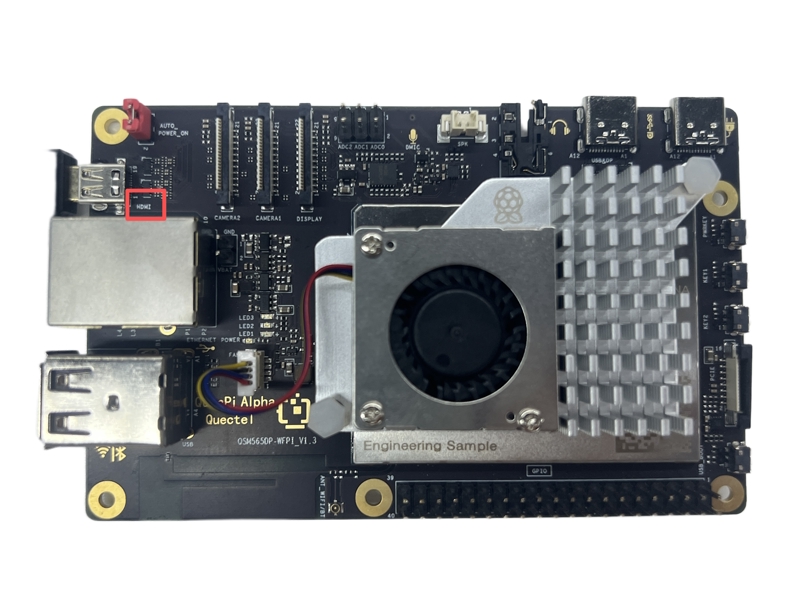
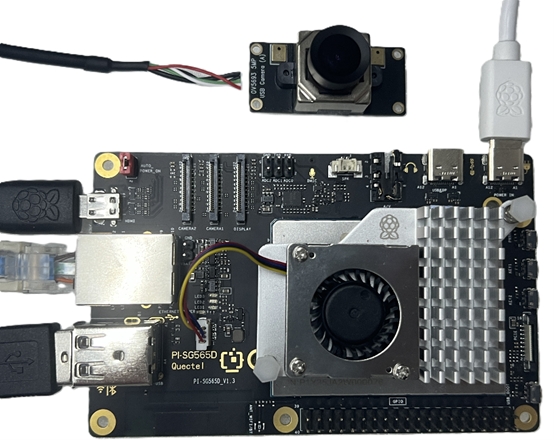
Reference for Completed Connection
After all hardware connections are completed, refer to the schematic diagram below:
Project Implementation
Update Software Sources
Execute the following command to update the system software sources:
sudo apt update
Install System Dependencies
Install basic dependency packages:
sudo apt install -y python3 python3-venv python3-pip ffmpeg git vim
Install dependencies related to the graphical interface:
sudo apt install -y libxcb-cursor0 libxkbcommon-x11-0 \
  libxcb-xinerama0 libxcb-icccm4 libxcb-image0 libxcb-keysyms1 libxcb-render-util0
Create a Virtual Environment
Create a new project directory:
mkdir -p ~/Project
Enter the project directory and create a Python virtual environment:
cd ~/Project
python3 -m venv .venv
Activate the Virtual Environment
source ~/Project/.venv/bin/activate
Download Sample Code
cd ~/Project
git clone https://github.com/Quectel-Pi/demo-face-transform.git
Update pip Source
pip install --upgrade pip
Install Project Dependencies
pip install -r requirements.txt
Note: Ensure you are in the virtual environment and execute this command in the
demo-face-transformdirectory (adjust the path ofrequirements.txtif the path does not match).
Configure Secret Keys
To use the face transformation service, you need to activate the relevant Tencent Cloud services first and obtain API call secret keys (SecretId and SecretKey). Acquisition path: Tencent Cloud Access Management Console.
Reference document:Tencent Cloud Portrait Transformation API Document
Method 1: Read secret keys through environment variables (example):
export TENCENTCLOUD_SECRET_ID="SecretId"
export TENCENTCLOUD_SECRET_KEY="SecretKey"
Method 2: Configure through the startup script
Edit the start.sh script and fill in the SecretId and SecretKey:
Run the Program
Configure the SecretId and SecretKey in start.sh first
cd demo-face-transform/src
chmod +x start.sh
./start.sh
Graphical Interface Remote Running Configuration
To enable SSH remote sessions to run local graphical interface programs normally, complete the following configurations:
1.Execute the permission configuration command in the local desktop terminal of the device
xhost +SI:localuser:pi
This command allows the local pi user to access the current X11 display service.
2.Set graphical display environment variables in the SSH remote session
export DISPLAY=:0
export XAUTHORITY=/home/pi/.Xauthority
After configuration, you can run programs that require a graphical interface in the SSH session.
Application demo
Technical Support and Contributions
If you encounter any issues during use, please submit technical inquiries on the Quectel Official Forum. Our technical support team will respond promptly.
Project open-source repository: https://github.com/Quectel-Pi/demo-face-transform
We welcome you to submit Issues to report problems or Pull Requests to contribute code improvements!