
Smart Video Monitoring System
This project is an smart video monitoring system developed based on the Quectel Pi H1 Smart Single-Board Computer. The system integrates the Frigate NVR (Network Video Recorder) platform and leverages computer vision technology to provide core functionalities including object detection, face recognition, and event recording.
In terms of device compatibility, the system supports flexible integration of multiple camera types:
- USB cameras: locally loaded.
- IPC (IP cameras): standardized device control via ONVIF protocol, with low-latency video streaming through RTSP protocol.
The system features a web-based visual management interface, enabling users to conveniently perform real-time monitoring and data management operations, making it suitable for applications such as home security and commercial surveillance.
Development Resources Summary
The listed development accessories are provided for reference only. Different development environments may vary. For example, if you are developing via SSH remote connection, the USB expansion dock may not be necessary, and the display monitor can also be replaced as needed.
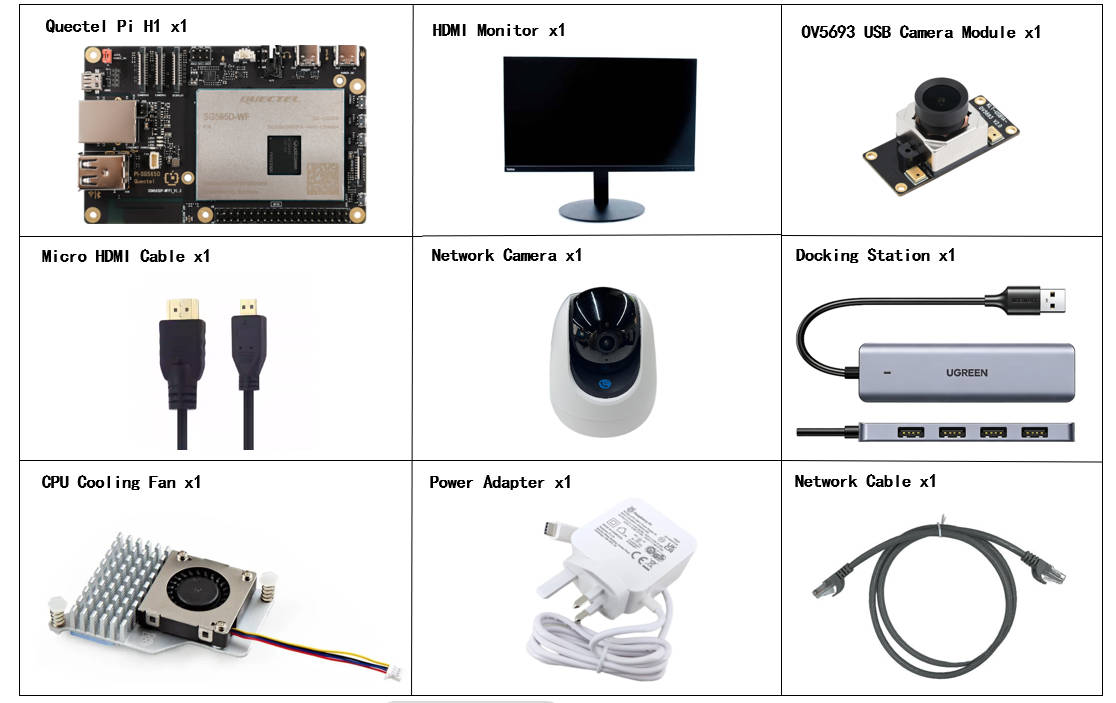
Development Accessories List
| Accessory Name | Quantity | Specifications |
|---|---|---|
| Quectel Pi H1 Smart Single-Board Computer | 1 | - |
| Power Adapter | 1 | 27W USB Type-C Interface Charger 1.2m Cable Length China Standard Power PD Power Suitable for Raspberry Pi 5 |
| HDMI Cable | 1 | Specification: HDMI 2.0; Length: 1m; Connector: HDMI-A (Male)-HDMI-D (Male) |
| Ethernet Cable | 1 | Length: 1m; Transmission Rate: Gigabit; |
| CPU Cooling Fan | 1 | Raspberry Pi 5 Official Active Cooler with Thermal Pad |
| USB Hub | 1 | UGREEN USB3.0 Hub |
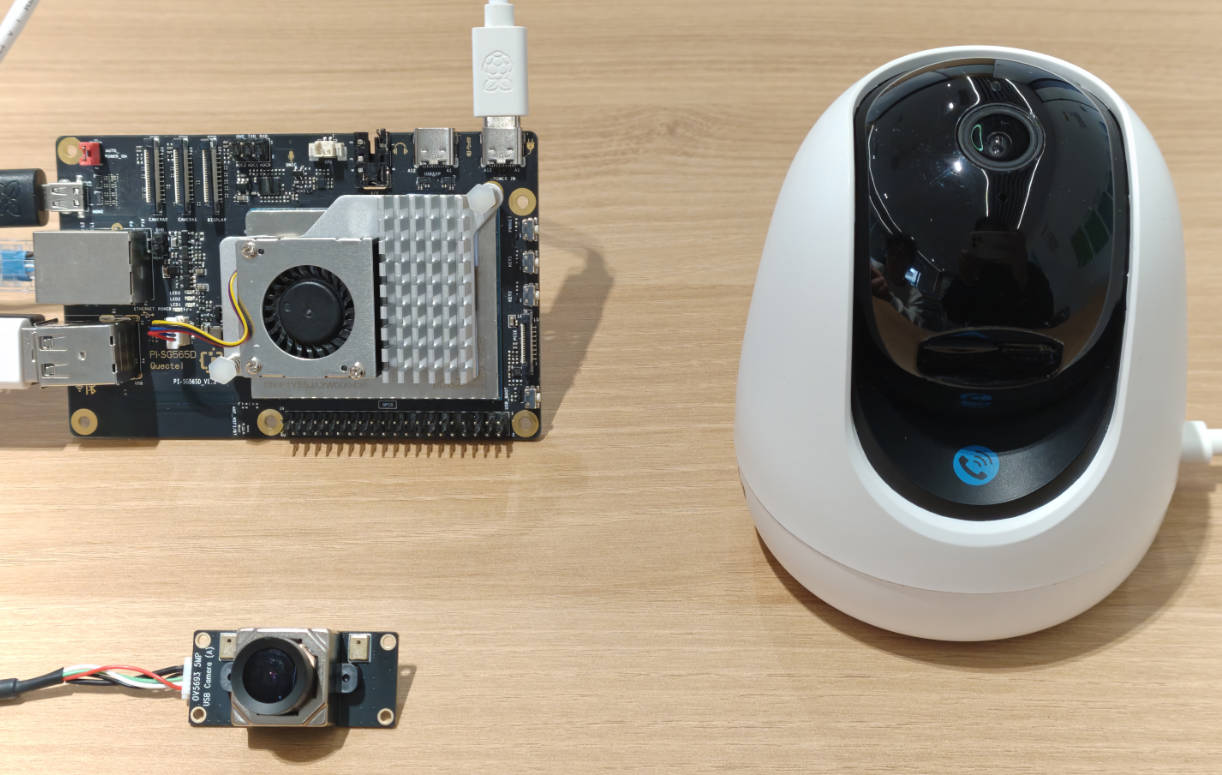
| Network Camera | 1 | Tenda Indoor Home Surveillance Camera |
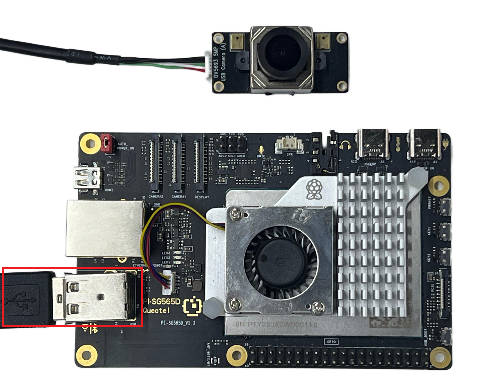
| USB Camera | 1 | OV5693 5MP USB Camera Module |
| Display | 1 | 24-inch HDMI Monitor |
Reference Images of Accessories
Quick Start
Development Preparation
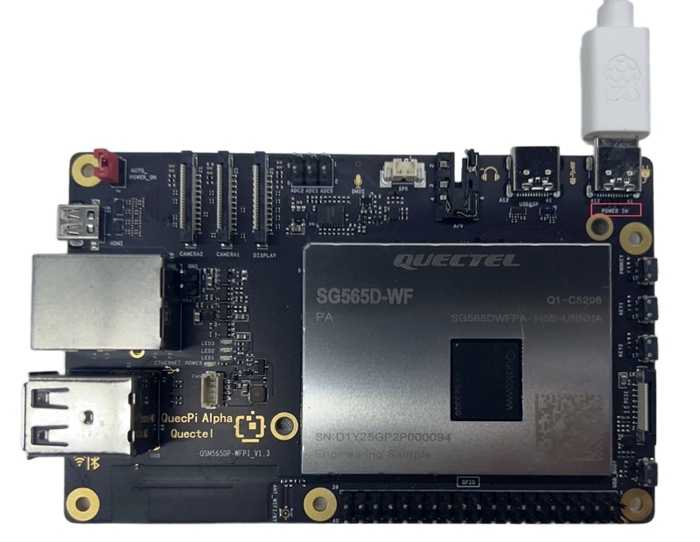
The Quectel Pi H1 Smart Single-Board Computer comes pre-installed with the Debian 13 system image by default, so there's no need to flash a new image. Simply follow the steps below.
Hardware Connection
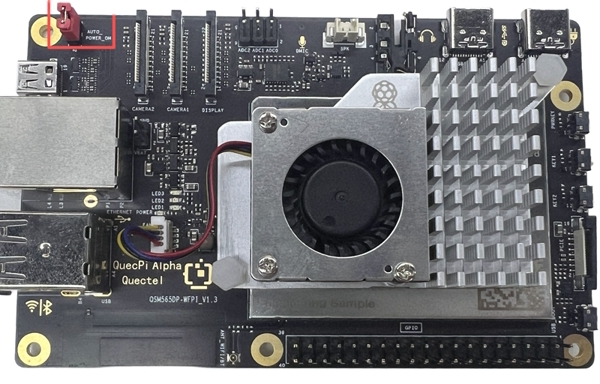
Cooling Fan Installation
First, insert the cooling fan's ribbon cable into the FAN slot on the single-board computer, then secure both ends of the cooler into the reserved holes on the single-board computer, as shown below:

Display Connection
Connect one end of the HDMI cable to the HDMI port on the single-board computer and the other end to the HDMI port on the monitor.
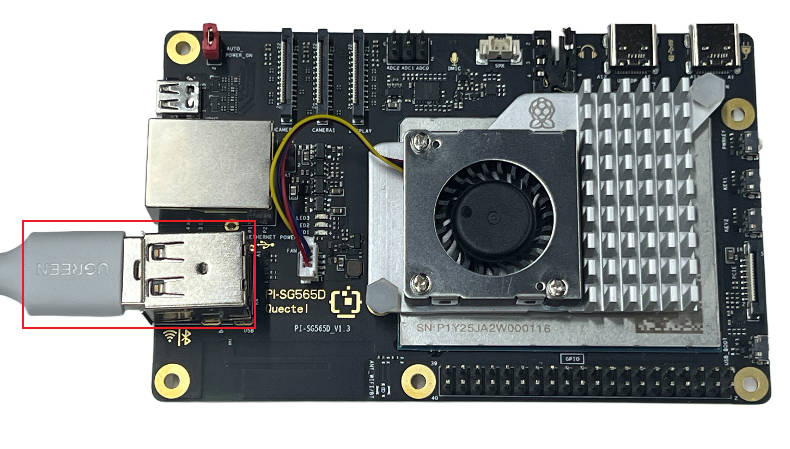
Input Device Connection
Connect the USB keyboard and mouse to the USB ports on the hub, then connect the hub to the USB port on the single-board computer. For wireless input devices, simply insert the receiver into a USB port on the hub.
Network Connection
Connect one end of the Ethernet cable to the Gigabit Ethernet port on the single-board computer and the other end to a port on your router (ensure the router is connected to the internet).
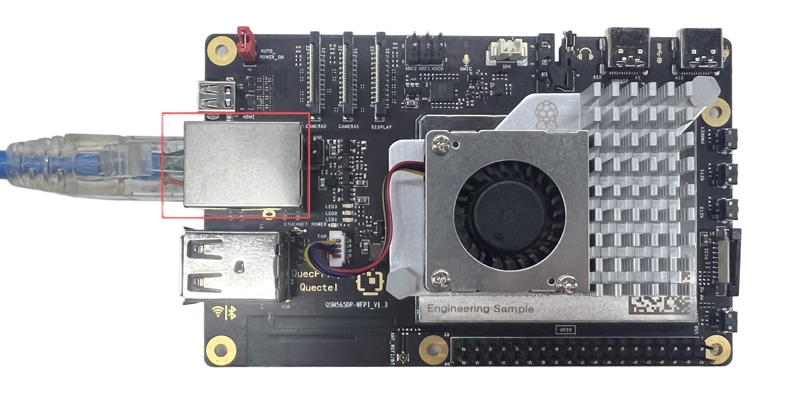
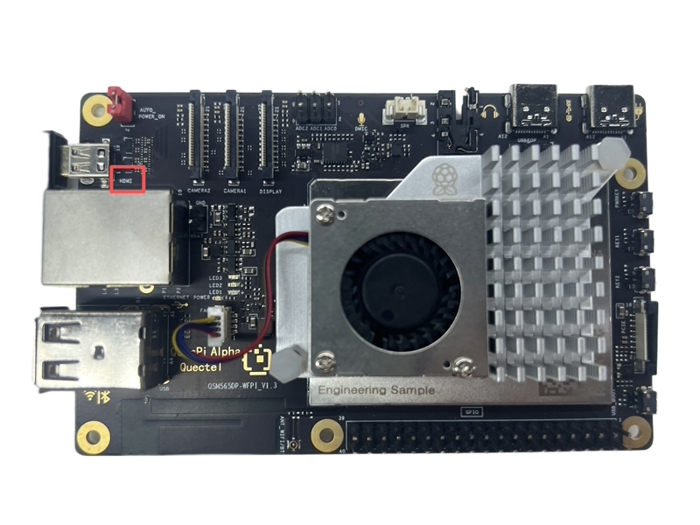
Jumper Cap Connection
Ensure the jumper cap is properly shorting the pins labeled AUTO_POWER_ON at the top-left corner of the single-board computer.
Power Connection
Connect the USB-A end of the power cable to the power adapter and the USB-C end to the power port on the single-board computer (usually labeled POWER IN).
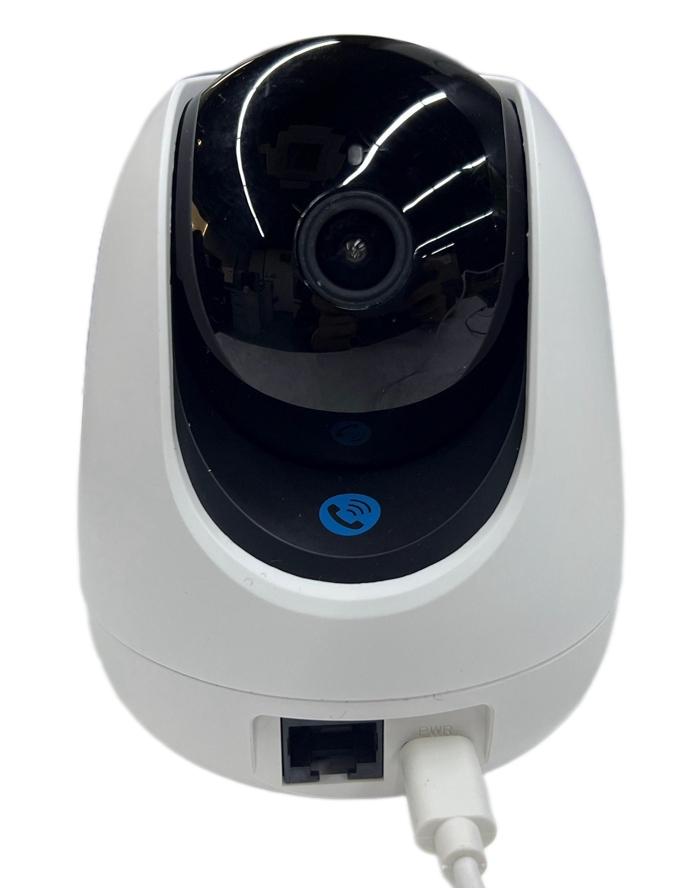
Network Camera Connection
Simply connect the network camera to its power source.
USB Camera Connection
Connect the OV5693 camera module to a USB port on either the single-board computer or the USB hub.
Completed Connection Reference
Project Implementation
Preparation Steps
For the first-time network connection of the network camera, you need to connect it to Wi-Fi or a router, and your smartphone must also be connected to the same router/hotspot Wi-Fi. Then add the camera device through the Tenda app. Please refer to the network camera's quick installation guide for details.
Note: Ensure that both the single-board computer and the network camera are on the same local network; otherwise, you won't be able to access the camera's RTSP video stream.
Docker Installation
# Remove all conflicting packages
sudo apt remove $(dpkg --get-selections docker.io docker-compose docker-doc podman-docker containerd runc | cut -f1)
# Set up Docker apt repository
sudo apt-get update
sudo apt-get install curl
sudo install -m 0755 -d /etc/apt/keyrings
sudo curl -fsSL https://download.docker.com/linux/debian/gpg -o /etc/apt/keyrings/docker.asc
sudo chmod a+r /etc/apt/keyrings/docker.asc
echo "deb [arch=$(dpkg --print-architecture) signed-by=/etc/apt/keyrings/docker.asc] https://download.docker.com/linux/debian $(. /etc/os-release && echo "$VERSION_CODENAME") stable" | sudo tee /etc/apt/sources.list.d/docker.list > /dev/null
# Install Docker packages
sudo apt install docker-ce docker-ce-cli containerd.io docker-buildx-plugin docker-compose-plugin
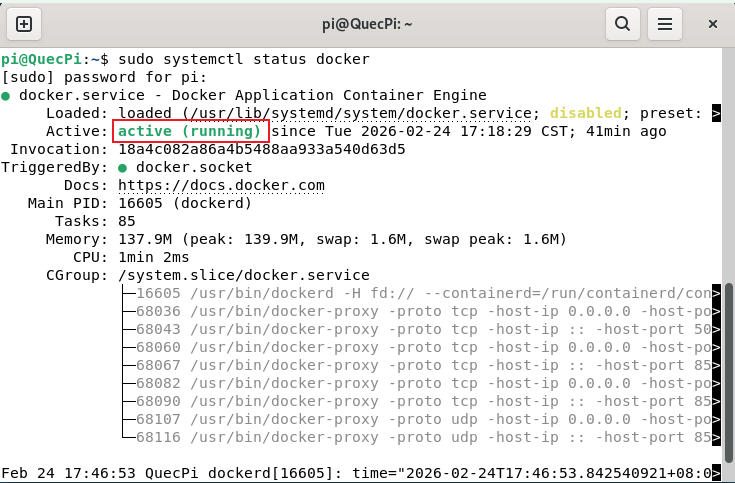
Start Docker Service
# Enable Docker service to start automatically
sudo systemctl start docker
# Verify that Docker is running
sudo systemctl status docker
If you see the following output, Docker has started successfully:
Deploy Frigate System
# Create a frigate folder in the home directory and create configuration files
mkdir ~/frigate
cd frigate/
mkdir storage config
Click here to download the configuration files, then use the SCP command to upload the files to the ~/frigate directory. Refer to the Remote Access SCP File Copy section. Execute the following command to install Frigate.
Note: Ensure the docker-compose.yml file is in the ~/frigate directory; otherwise, the commands below cannot be executed.
sudo docker compose up -d
Install Project Dependencies
Run the following command in the system terminal to install project dependencies.
pip install --upgrade pip
pip install onvif-zeep wsdiscovery opencv-python pyyaml
Camera Device Discovery and Configuration
In the ~/frigate directory, grant execute permissions to the camera_discover.py file. Running it will automatically scan and generate a config.yml file to configure USB cameras and network cameras supporting the ONVIF protocol.
chmod +x ~/frigate/camera_discover.py
python3 camera_discover.py
Note: If you cannot run the camera_discover.py file, please check if the CONFIG_PATH in the file correctly points to
~/frigate/config/config.yml.
Camera Backend Settings
In the single-board computer system, open the Firefox browser and enter the "IP address of the webcam". Use the default username: admin and password: admin123456 to enter the backend and set the video encoding type to H.264 and the audio encoding type to AAC.
Note: The IP address of the network camera can be found in the device information section of the Tenda app.
Start Frigate Service
Execute the following startup command in the system terminal:
sudo docker compose -f ~/frigate/docker-compose.yml down && sudo docker compose -f ~/frigate/docker-compose.yml up -d
After successful startup, open a browser and enter "IP address of the single-board computer:5000" to access the Frigate service.
Application Demonstration
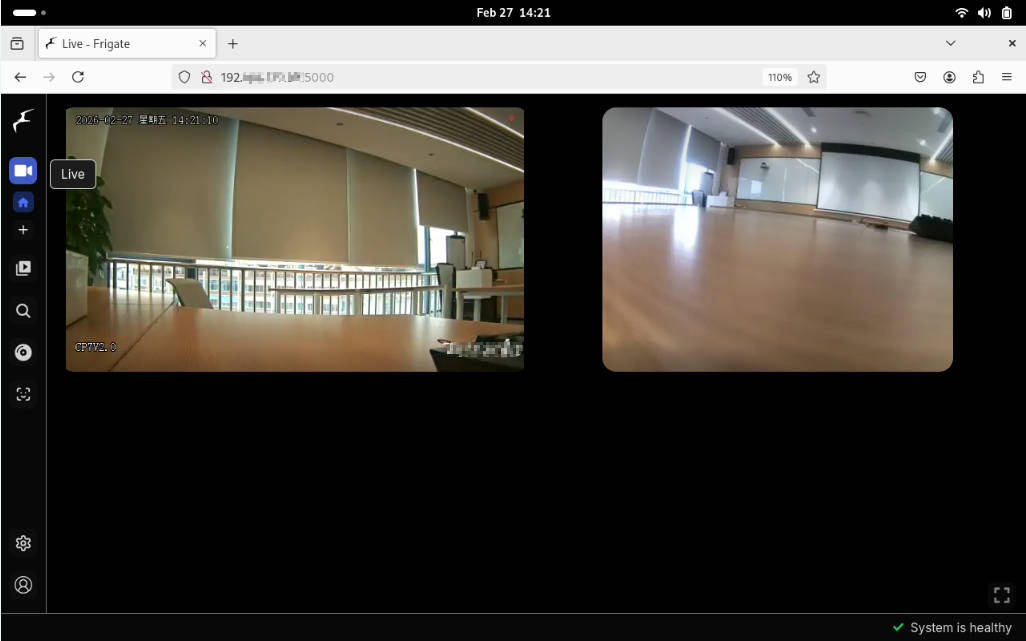
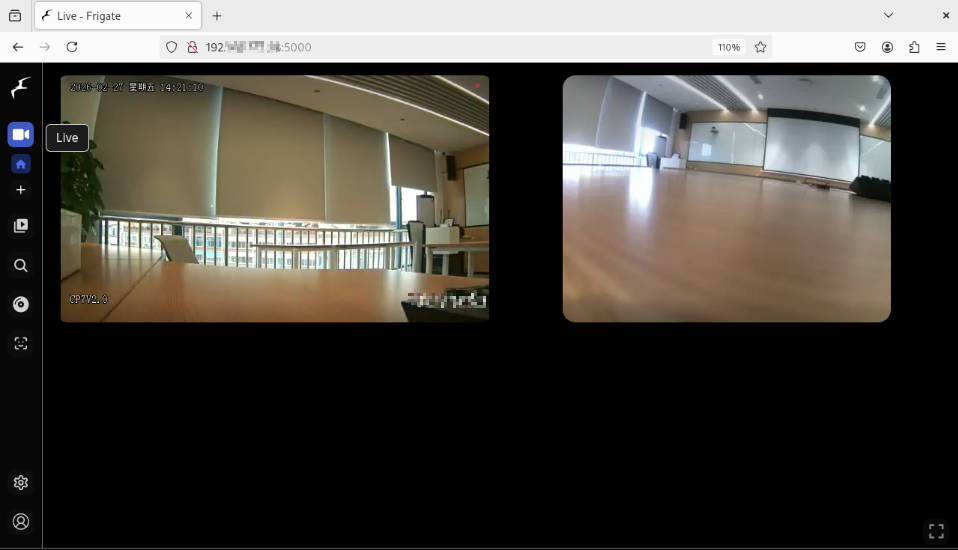
Real-time Monitoring Function Demonstration
On the Live page, you can view real-time monitoring footage from the system, supporting simultaneous display from multiple cameras:
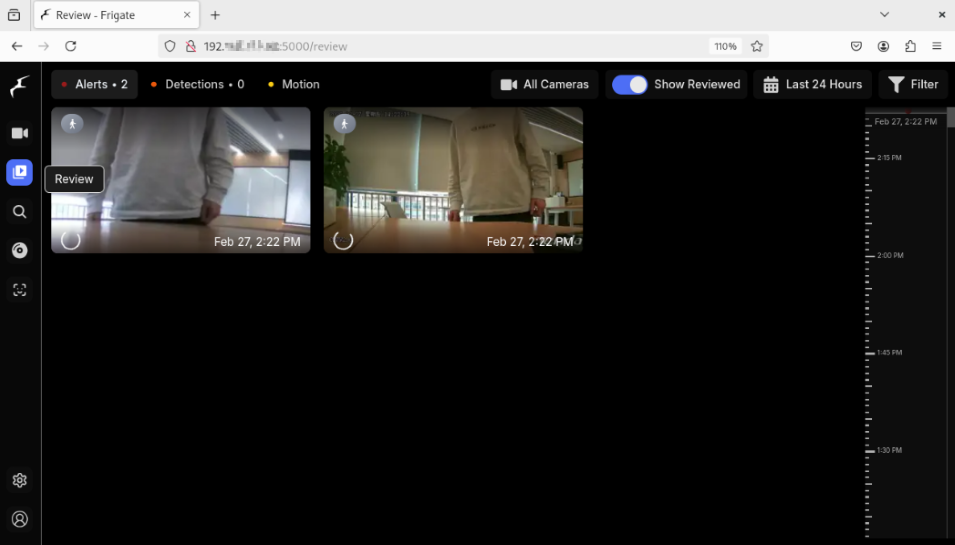
Review Function Demonstration
The Review page allows you to view security event alerts from different time periods. The system automatically detects and records objects (people, vehicles, etc.) that meet the specified conditions:
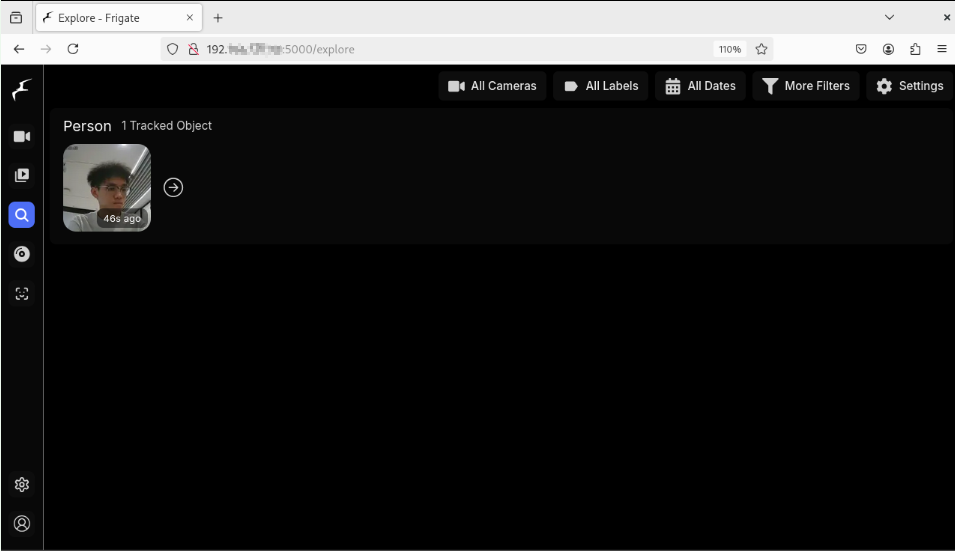
Object Tracking Function Demonstration
The Explore page displays the tracking objects configured in the configuration file, such as people, vehicles, etc., showing detection boxes and confidence levels:
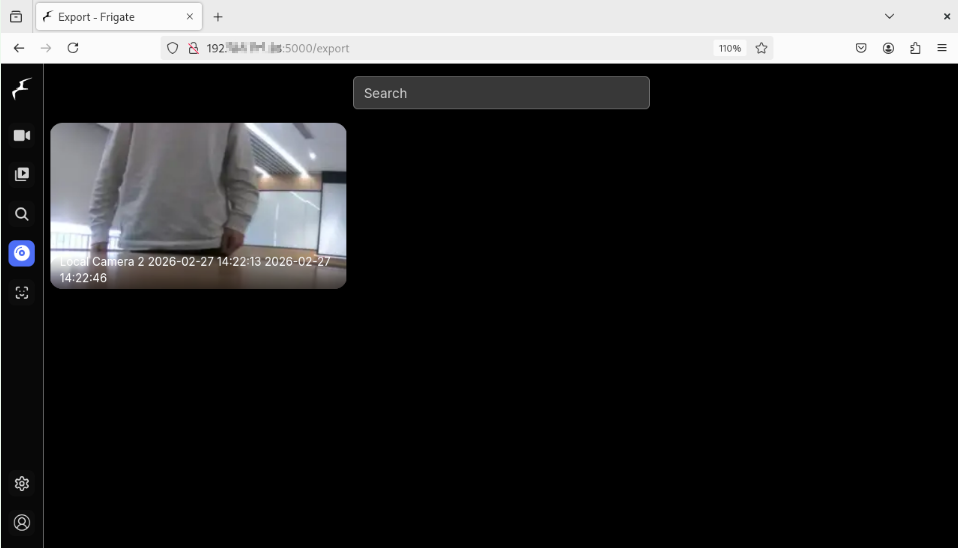
Video Export Function Demonstration
- On the Review page → Right-click (computer) or long-press (mobile) on a playback entry → Export;
- Or on the camera's History page → Click the export button.
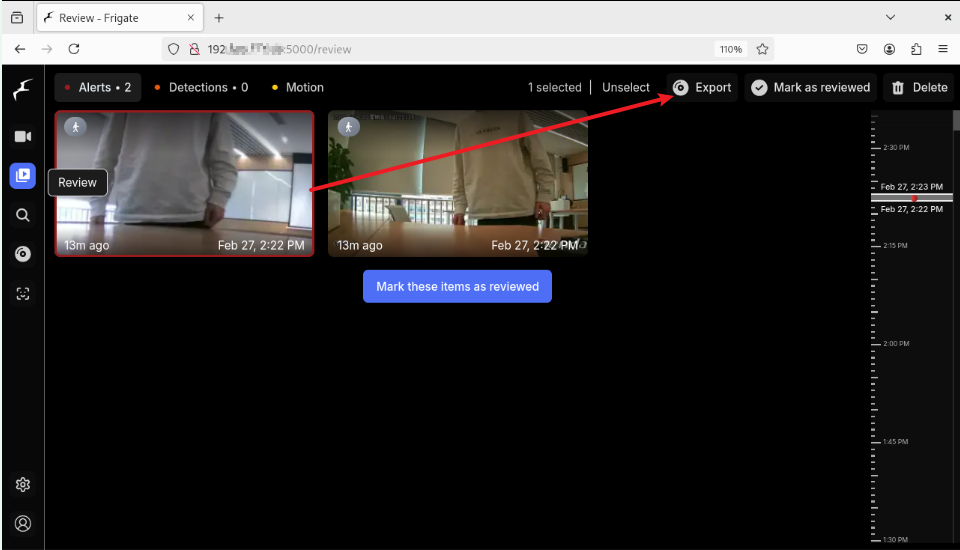
Exported videos can be managed and downloaded from the Export page in the main navigation bar.
Facial Recognition Function Demonstration
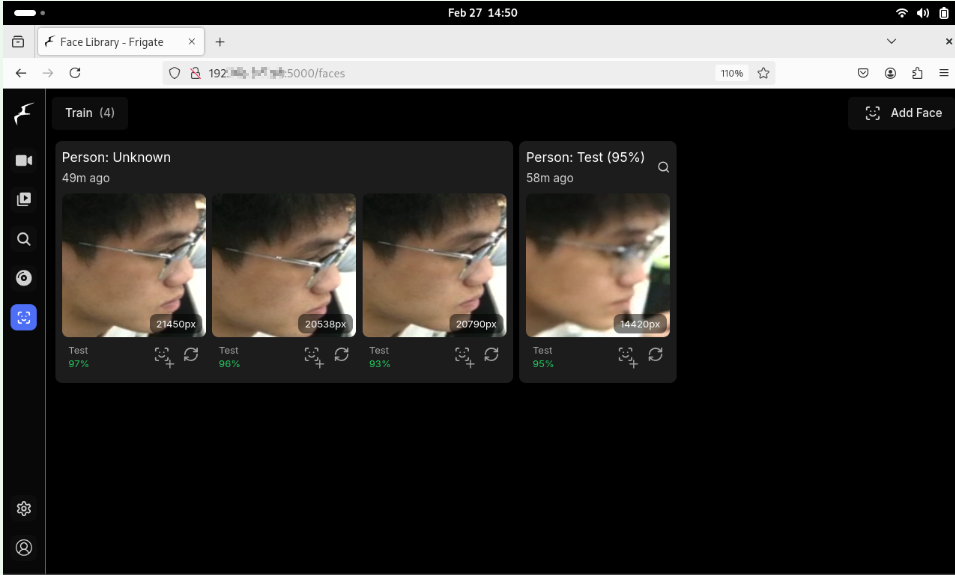
The facial recognition feature matches detected faces against pre-added facial data to identify known individuals. When a known person is recognized, their name is added as a sub-label.
On the Face Library page → Add Face → Enter Face Name → Upload Face Image → Next → Done to add a face. When Frigate detects and attempts to recognize a face, it appears in the Training tab of the face library, along with the associated recognition confidence level.
Note: For more features and usage examples, please refer to the Frigate official website.
Technical Support and Contributions
If you encounter any issues during use, please submit technical inquiries on the Quectel Official Forum. Our technical support team will respond promptly.