
Camera Distance Measurement Solution
This application is a project based on the Quectel Pi H1 intelligent control board. It captures images through a stereo camera, clicks on the target area in the preview interface, and measures the real-world distance from the camera to the object.
This project uses a stereo camera to simultaneously capture left and right images, calculates target distance using the stereo disparity principle, and provides auxiliary functions such as camera calibration and parameter adjustment. It can serve as a reference example for stereo ranging, stereo vision, and robot visual navigation applications.
Development Resources Summary
Development Accessories List
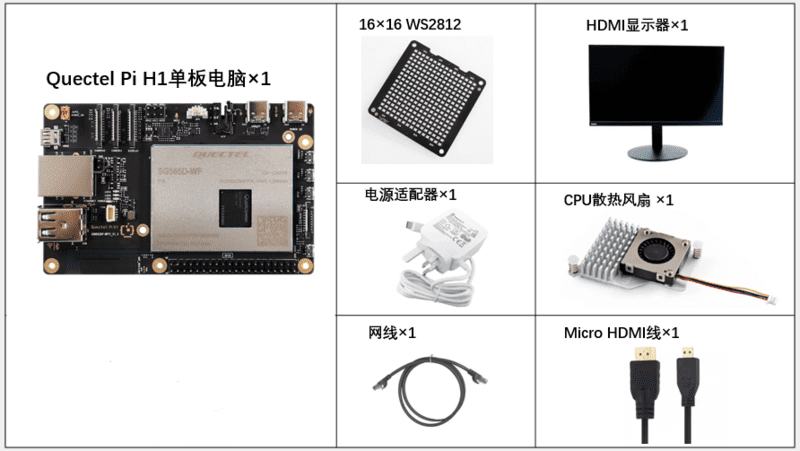
| Accessory Name | Quantity | Specifications |
|---|---|---|
| Quectel Pi H1 smart single-board computer | 1 | Quectel Pi H1 Smart Ecosystem Development Board |
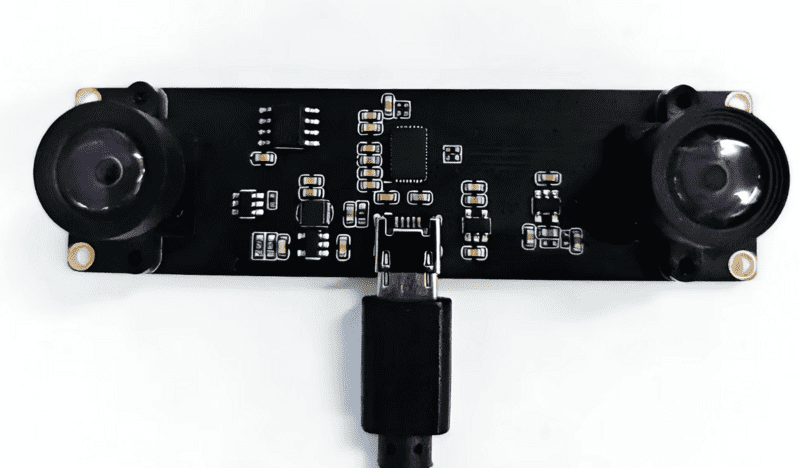
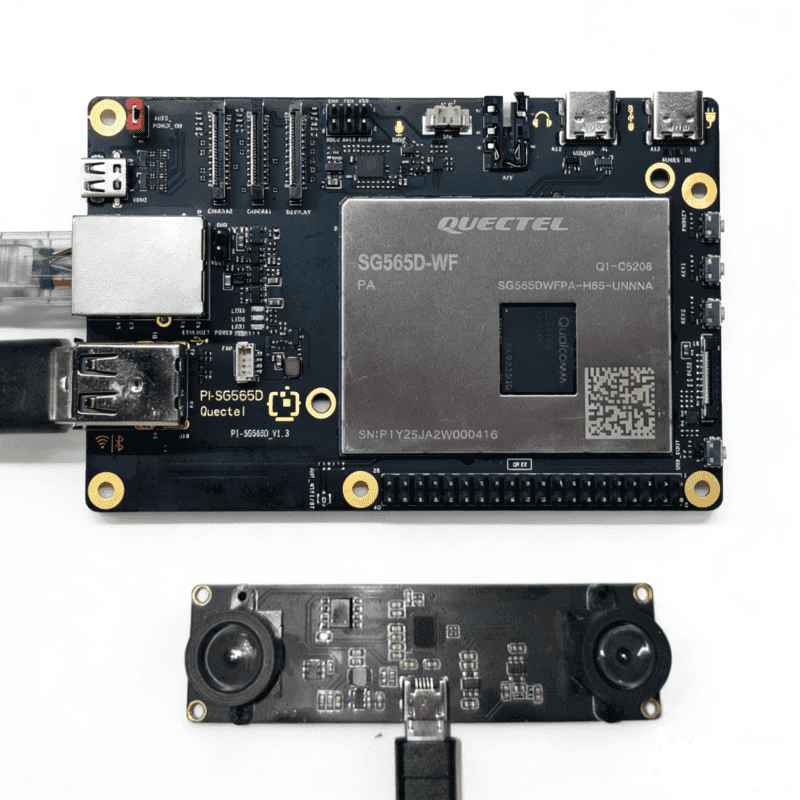
| USB Stereo Camera | 1 | Recommended resolution: 2560×720 (1280×720 for each eye); Output format: YUYV/MJPG |
| USB-C Power Supply | 1 | 27W USB Type-C Interface Charger 1.2m Cable Length Standard Power PD Power Supply Suitable for Raspberry Pi 5 |
| USB-C DP Display Cable /Micro HDMI Cable | 1 | Specifications: DP 1.4; Cable length: 1m; Interface: USB-C (male) - USB-C (male) Specifications: Micro HDMI 2.0; Cable length: 1m; Interface: HDMI-A (male) -HDMI-D (male) |
| CPU Cooling Fan(Optional) | 1 | Raspberry Pi 5 Official Active Cooler with Heatsink and Thermal Pad |
| Display Screen | 1 | 24-inch HDMI Monitor |
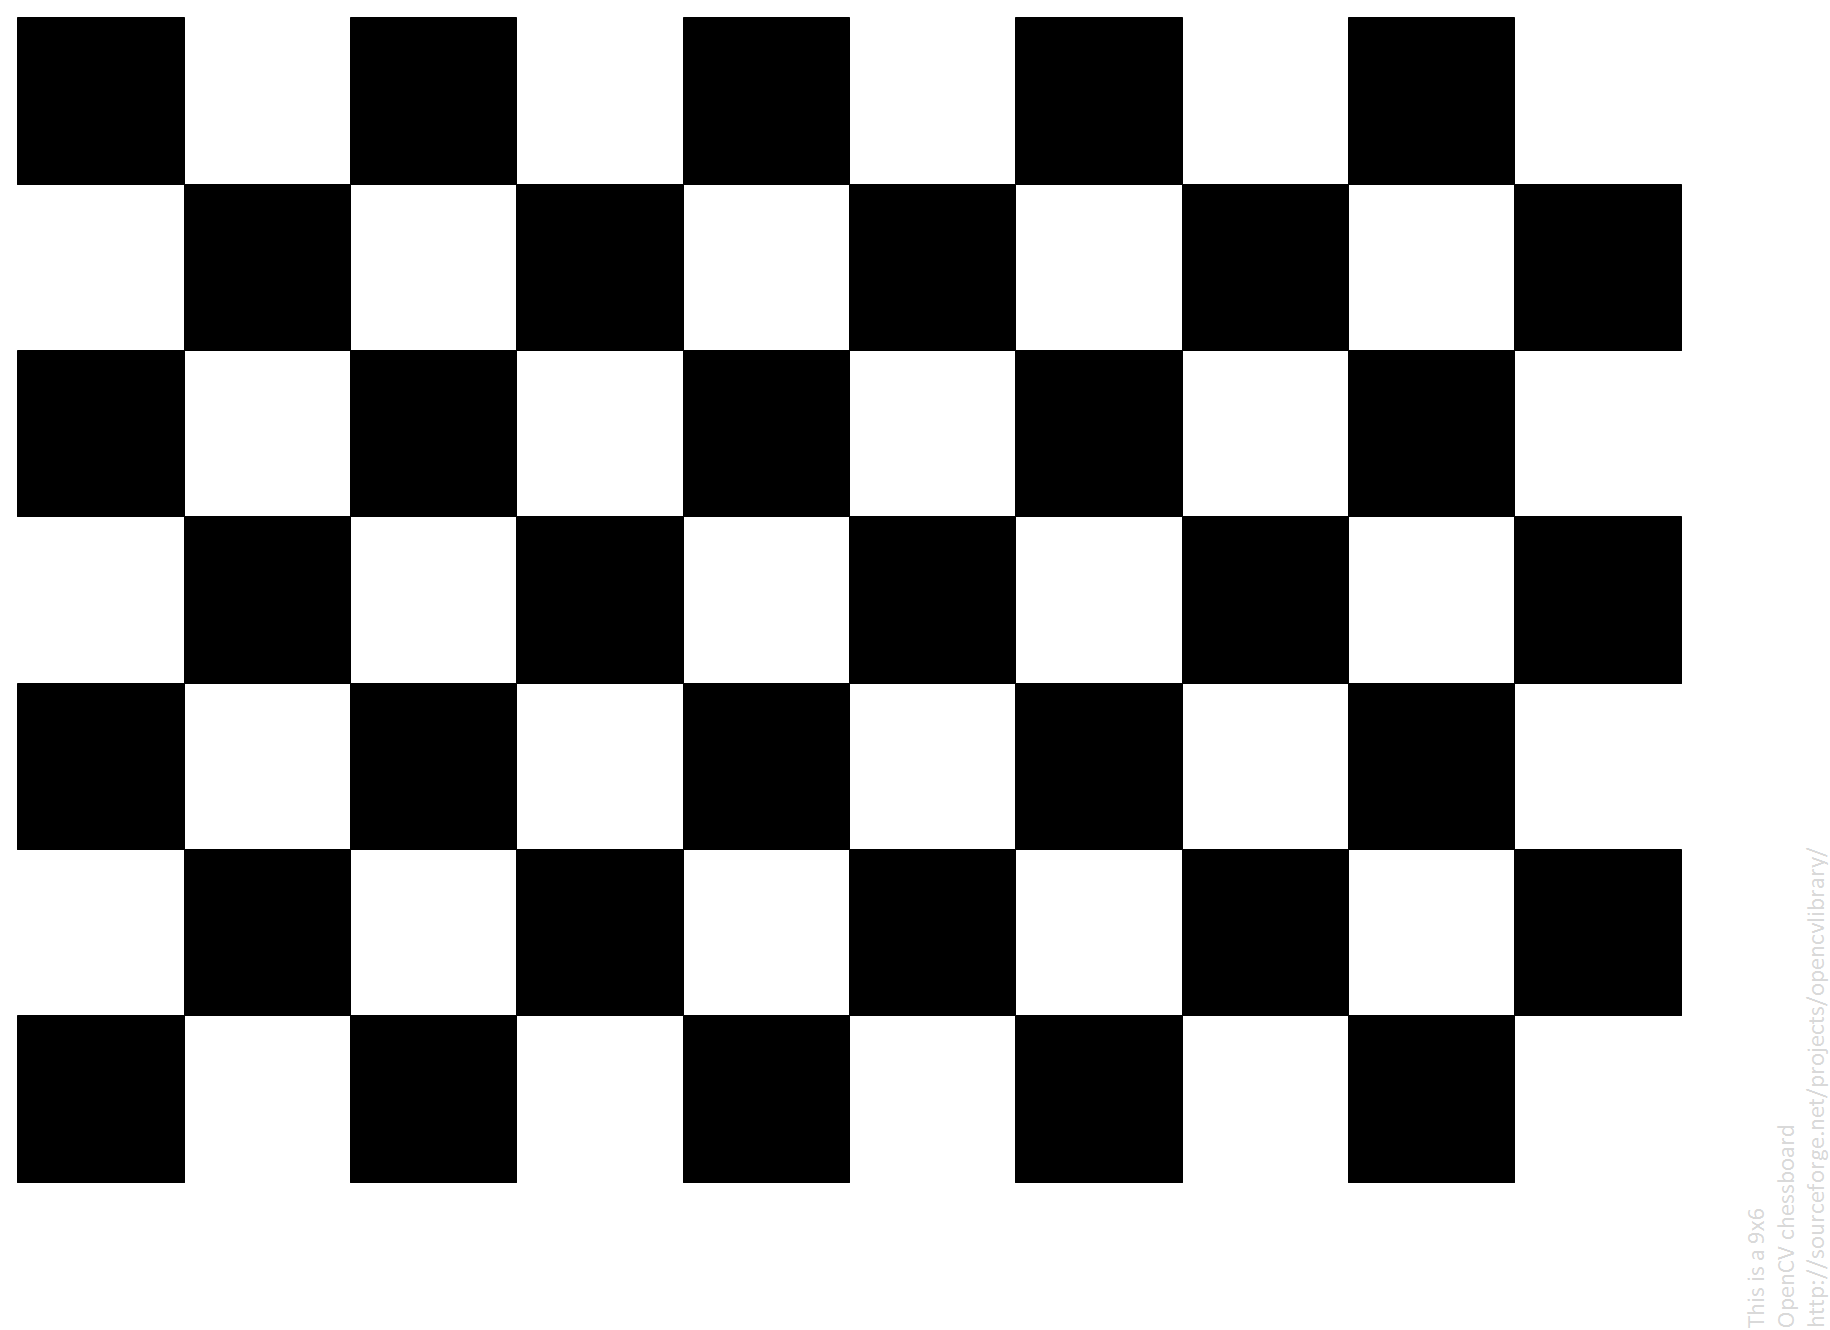
| Chessboard Calibration Board (Optional) | 1 | Specifications: 9×6 inner corner points (can be displayed on mobile phone screen) |
Accessories Physical Reference
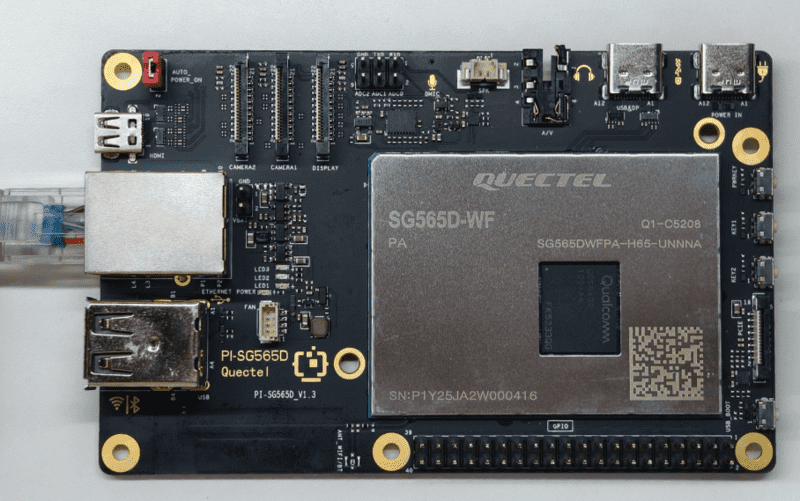
Quectel Kit
Stereo Camera
Chessboard Calibration Board
Quick Start
Development Preparation
The Quectel Pi H1 intelligent control board comes with Debian 13 system image by default, so there is no need to flash the image again. Just follow the steps below.
Hardware Connection
Display Connection
Connect one end of the Micro HDMI cable to the Micro HDMI interface of the intelligent control board, and the other end to the HDMI interface of the monitor.

Input Device Connection
Connect the USB keyboard and mouse to the two USB-A interfaces of the intelligent control board. If using wireless input devices, insert the receiver into the USB port.
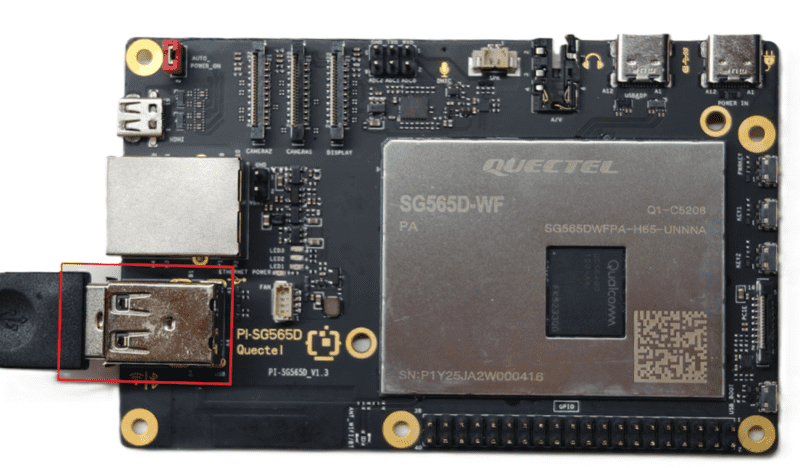
Stereo Camera Connection
Connect the USB stereo camera to the USB-A interface of the intelligent control board.
Network Cable Connection
Connect one end of the network cable to the Gigabit Ethernet port of the intelligent control board, and the other end to the router's network port (ensure the router is connected to the internet).
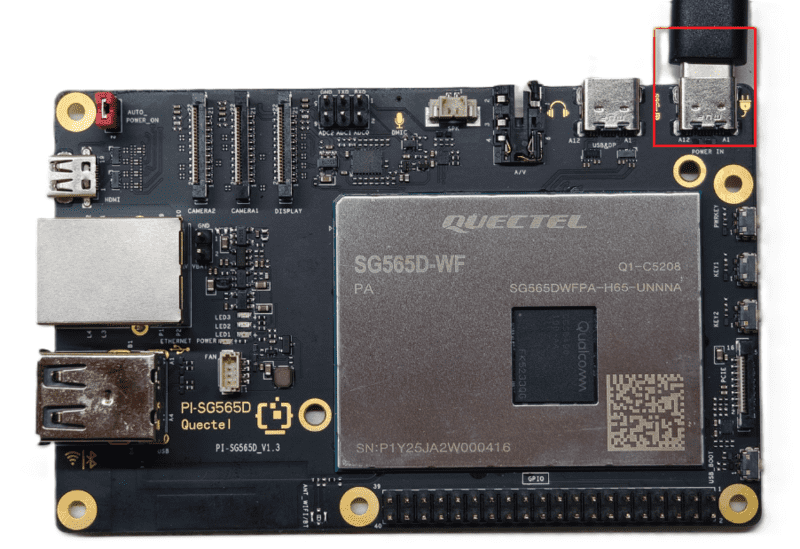
Power Connection
Connect the USB-A end of the USB-A power cable to the power adapter, and the USB-C end to the power port of the intelligent control board (usually marked POWER IN).
Project Implementation
Prerequisites Installation
After confirming network connection, open the terminal and enter the command:
sudo apt update && sudo apt install -y v4l-utils python3-pip
The above command will update the software sources and install some libraries required for the project to run, specifically including:
- v4l-utils: Provides
v4l2-ctland other camera tools for reading and setting camera parameters; - python3-pip: Python package manager for installing project dependencies.
Get Code
Extract the code to the device
Install Python Dependencies
pip install -r requirements.txt
Dependency package description:
- PySide6: Python binding for Qt6, used to build graphical user interfaces;
- opencv-python: OpenCV image processing library, used for camera capture, image processing, and stereo vision calculation;
- numpy: Numerical calculation library, used for matrix operations and calibration parameter processing.
Capture Calibration Images
Run the calibration image capture tool:
python3 tools/capture_calib_images.py
The program will automatically detect the stereo camera and display the preview screen. Follow the prompts:
- Place the chessboard calibration board at different positions and angles in front of the camera
- Press
skey to save the current image pair (15-20 pairs recommended) - Press
qkey to exit the capture program
Generate Calibration Parameters
After capturing, run the calibration parameter generation tool:
python3 tools/generate_calib_params.py
The program will automatically read the calibration images and calculate the stereo calibration parameters, generating the tools/stereo_calib_params.npz file.
Run Ranging Application
After completing calibration, run the main program:
cd src
python3 main.py
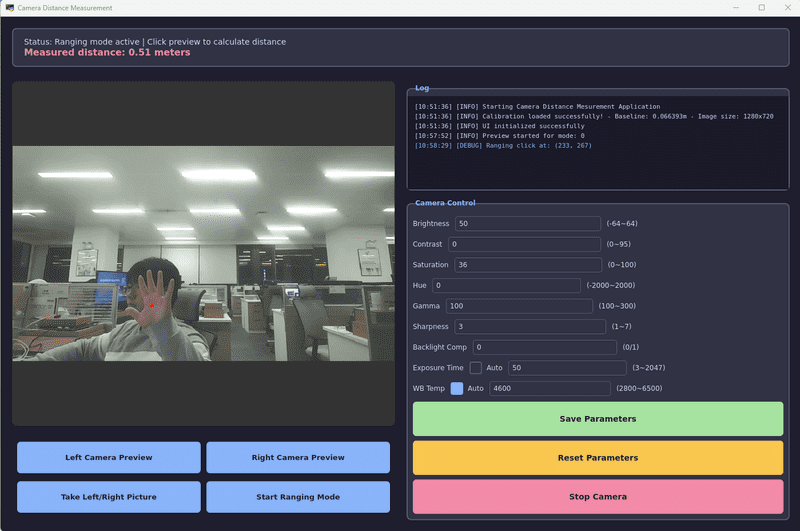
After the program starts, it will display a graphical interface providing the following functions:
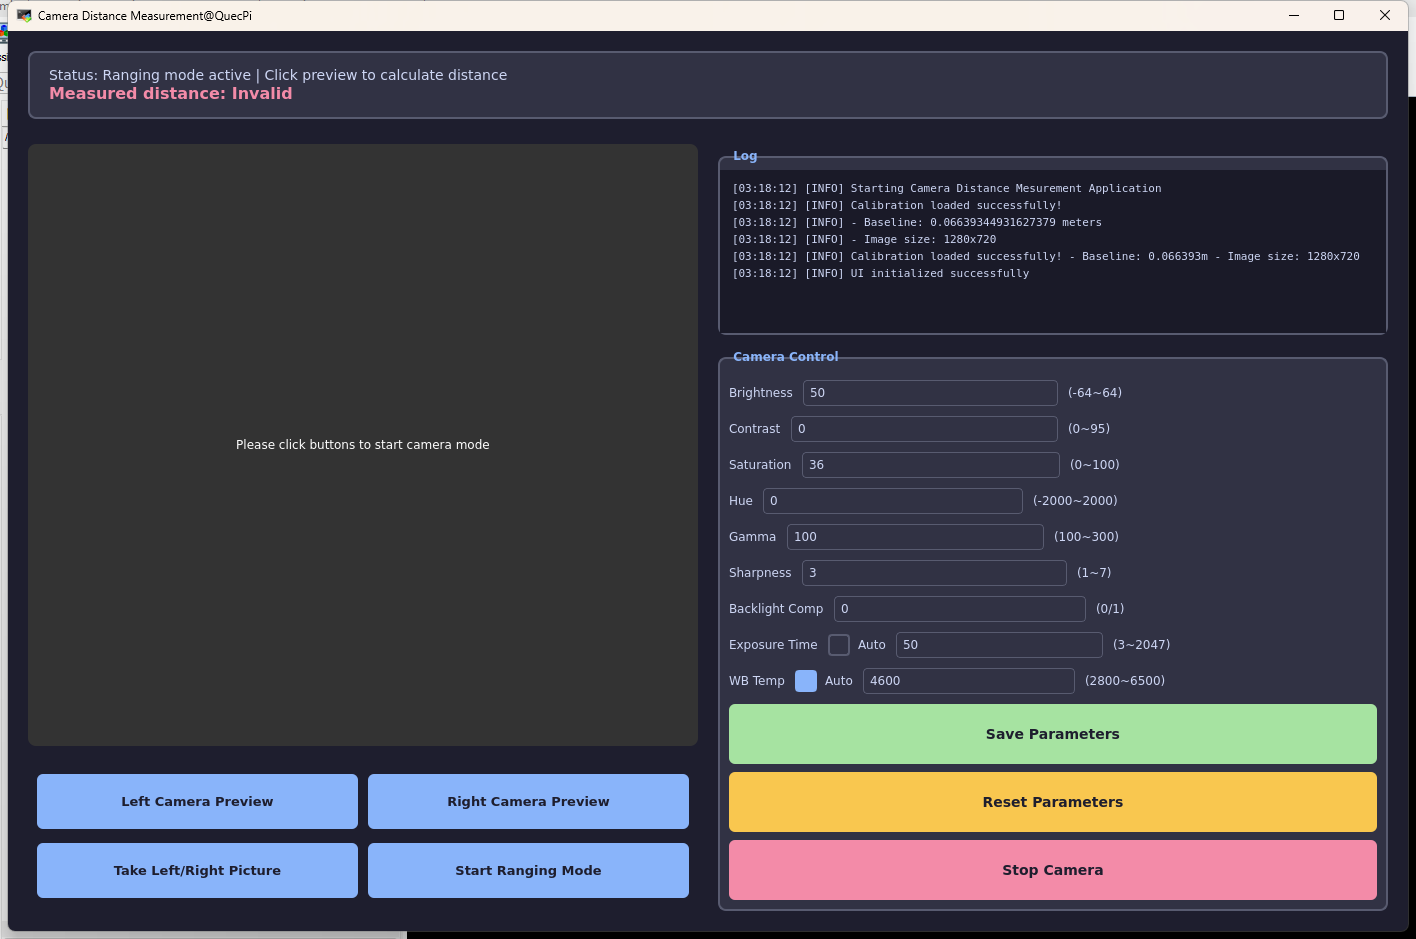
Function Button Description
| Button | Function Description |
|---|---|
| Left Camera Preview | Left camera separate preview, observe the image |
| Right Camera Preview | Right camera separate preview, observe the image |
| Take Left/Right Picture | Stereo photo capture, check if there is offset in left and right images, offset indicates stereo camera is working properly |
| Start Ranging Mode | Enter ranging mode, click on the preview screen to measure target distance |
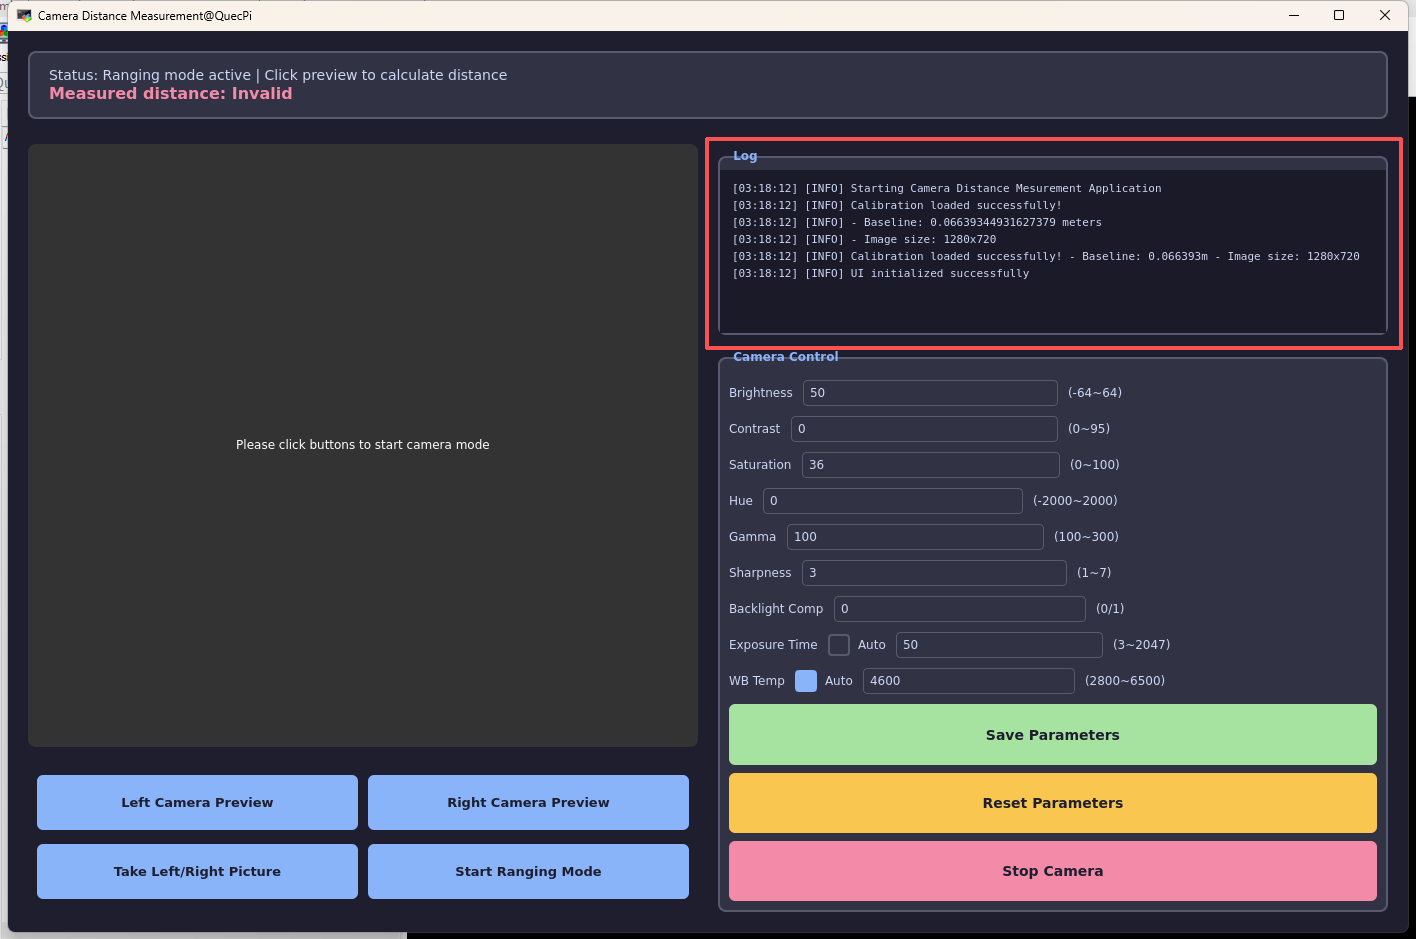
Log Display Area
The upper right area can output log information during application operation
Camera Parameter Adjustment
The right side of the program provides a camera parameter adjustment panel, where the following parameters can be adjusted (can also set range according to specific camera adjustable parameters):
| Parameter | Description | Range |
|---|---|---|
| Brightness | Brightness | -64 ~ 64 |
| Contrast | Contrast | 0 ~ 95 |
| Saturation | Saturation | 0 ~ 100 |
| Hue | Hue | -2000 ~ 2000 |
| Gamma | Gamma Value | 100 ~ 300 |
| Sharpness | Sharpness | 1 ~ 7 |
| Backlight Comp | Backlight Compensation | 0 / 1 |
| Exposure Time | Exposure Time | 3 ~ 2047 |
| WB Temp | White Balance Color Temperature | 2800 ~ 6500 |
Ranging Operation
- Click "Start Ranging Mode" to enter ranging mode
- Click on the target position on the preview screen
- Wait for the distance calculation result to be displayed in the top prompt bar
Application Demo
Precautions and Common Problem Solutions for Camera Distance Measurement
Precautions for Calibration Image Acquisition
Image Quality
Requirements:
- Sharpness Guarantee: Ensure the chessboard is fully visible in both left and right cameras, avoid motion blur
- Lighting Conditions: Avoid direct strong light and severe shadows, ensure uniform lighting
- Avoid Reflections: When using a mobile phone screen to display the chessboard, be careful to avoid screen reflections causing corner detection failures
Acquisition Strategy:
- Different Distances: Vary distances within 0.3m-2m range in front of the camera
- Different Angles: Left/right tilt ±30°, up/down tilt ±20°, rotation ±15°
- Different Positions: The chessboard should cover different areas of the frame: top-left, top-right, bottom-left, bottom-right, center, etc.
- Quantity Recommendation: At least 15 pairs of valid images, 20+ pairs recommended to improve calibration accuracy
Important Notes:
- Number of Inner Corners:
CHESSBOARD_SIZErepresents the number of inner corners, not the number of squares. For example, 9×6 inner corners correspond to 10×7 squares - Physical Dimension Accuracy:
SQUARE_SIZEmust match the actual square edge length, which directly affects baseline distance and ranging accuracy - Printing Recommendations:
- When printing paper chessboard, ensure it is flat without wrinkles
- When using mobile phone screen display, pay attention to accurate screen size measurement
- Recommended square edge length: 8-12mm
Methods to Improve Accuracy:
- Increase the number of calibration images (20+ pairs recommended)
- Ensure images cover more angles and positions
- Improve image sharpness, avoid blur
- Check if chessboard physical dimensions are set correctly
Verification Points:
- Baseline Distance:
baselineshould be close to the actual stereo camera physical spacing (usually 40-120mm) - Focal Length Consistency: Left and right camera focal lengths should be similar; large differences indicate calibration problems
- Distortion Coefficients:
dist_landdist_rvalues should be within reasonable range (usually absolute value <1)
Notes on Stereo Ranging Process
Ranging Principle and Formula
# Ranging formula: Z = (f × B) / d
# Where:
# - f: focal length (pixels)
# - B: baseline distance (meters)
# - d: disparity (pixels)
distance = (f * self._baseline) / disparity
Key Factors Affecting Ranging Accuracy:
- Disparity Calculation Accuracy: Affected by stereo matching algorithm and image quality
- Calibration Parameter Accuracy: Baseline distance and focal length parameters
- Target Point Features: Texture richness affects disparity calculation
SGBM Stereo Matching Parameter Tuning
stereo = cv2.StereoSGBM_create(
    minDisparity=0,               # Minimum disparity
    numDisparities=16*12,         # Disparity search range (must be a multiple of 16)
    blockSize=11,                 # Matching block size (odd number, 3-21)
    P1=8*3*11*11,                 # Disparity smoothing penalty term 1
    P2=32*3*11*11,                # Disparity smoothing penalty term 2
    disp12MaxDiff=1,              # Left-right consistency check maximum difference
    uniquenessRatio=10,           # Uniqueness ratio
    speckleWindowSize=100,        # Speckle filtering window size
    speckleRange=32,              # Speckle filtering range
    mode=cv2.STEREO_SGBM_MODE_HH  # High precision mode
)
Parameter Tuning Recommendations:
| Parameter | Tuning Principle | Impact |
|---|---|---|
numDisparities |
Adjust according to minimum ranging distance, larger values mean slower computation | Affects minimum ranging distance |
blockSize |
Increase when texture is sparse, decrease when texture is rich | Affects matching accuracy and speed |
P1/P2 |
P2 should be greater than P1, usually P2=4×P1 | Affects disparity map smoothness |
uniquenessRatio |
Larger values mean stricter matching | Reduces false matches |
speckleWindowSize |
Removes disparity map noise | Larger values provide stronger denoising |
Factors Affecting Ranging Accuracy
Effective Ranging Range
# Ranging range is limited by disparity search range
max_disparity = numDisparities  # 192 (16*12)
min_distance = (f * baseline) / max_disparity
Example Calculation:
- Focal length f = 695 pixels
- Baseline B = 0.0735 meters
- Maximum disparity = 192
- Minimum ranging distance = (695 × 0.0735) / 192 ≈ 0.27 meters
Disparity Validity Filtering
# Disparity filtering logic in code
for dy in range(-kernel//2, kernel//2 + 1):
    for dx in range(-kernel//2, kernel//2 + 1):
        d = disparity_map[y, x]
        if d > 0.5:  # Filter weak disparity noise
            disparity += d
            valid_count += 1
Notes:
- Disparity values too small (<0.5) usually indicate invalid matches
- Use 5×5 neighborhood averaging to reduce noise impact
- Prompt user to click again when valid points are too few
Distance Reasonableness Check
# Reasonableness verification of calculation results
z_3d = point_3d[2]
if 0.01 < z_3d < 100.0:
    distance = z_3d
else:
    # Calculate using formula when Z is unreasonable
    distance = (f * self._baseline) / disparity
Sources of Ranging Error:
- Calibration Error: Inaccurate baseline distance and focal length parameters
- Disparity Error: Stereo matching algorithm precision limitations
- Image Quality: Lighting, blur, insufficient texture
- Distance Factor: Greater distance means smaller disparity, larger relative error
Common Problems and Solutions
Calibration Related Issues
High Corner Detection Failure Rate
Symptoms:
Warning: Skip 5th pair - chessboard not detected in left image
Valid image pairs for calibration: 8 (need ≥10)
Solutions:
- Improve lighting conditions, avoid shadows and reflections
- Ensure chessboard is completely within the frame
- Increase image contrast
- Reduce chessboard size or increase shooting distance
- Use a clearer chessboard image source
Abnormal Baseline Distance
Symptoms:
Baseline Length: 0.1234 meters (should be approximately 0.06 meters)
Solutions:
- Re-measure actual square physical dimensions
- Check
SQUARE_SIZEparameter setting - Ensure chessboard plane is flat
- Perform calibration again
Ranging Related Issues
Ranging Result is 0 or Invalid
Symptoms:
Error: Ranging failed - No valid disparity points
Cause Analysis:
- Insufficient texture or repetitive texture in clicked area
- Clicked area too far or too close
- Poor image quality (blur, insufficient lighting)
- Calibration parameters not loaded
Solutions:
# Check if calibration parameters are loaded
if not self._is_calibrated:
    LogManager.append_log("Warning: No calibration loaded!")
- Ensure calibration parameter file is loaded
- Click on areas with rich texture
- Improve lighting conditions
- Adjust SGBM parameters to increase
numDisparities
Low Ranging Accuracy, Large Error
Symptoms:
Actual distance 1 meter, measurement result 0.8 meters or 1.2 meters
Solutions:
- Check calibration quality: Reprojection error should be <1.0
- Optimize SGBM parameters: Adjust
numDisparitiesandblockSizeaccording to ranging range - Improve image quality:
# Enhance contrast
clahe = cv2.createCLAHE(clipLimit=6.0, tileGridSize=(8, 8))
Poor Disparity Map Quality
Symptoms:
Disparity map full of noise, unable to identify object contours
Solutions:
Adjust preprocessing parameters:
# Enhance contrast
clahe = cv2.createCLAHE(clipLimit=6.0, tileGridSize=(8, 8))

# Enhance denoising
gray_left = cv2.GaussianBlur(gray_left, (5, 5), 0)
gray_left = cv2.medianBlur(gray_left, 5)
Adjust SGBM parameters:
# Enhance matching strictness
uniquenessRatio=15
speckleWindowSize=150
Check calibration parameters: Recalibrate to achieve better correction results
Technical Support and Contributions
If you encounter any issues during use, please submit technical inquiries on the Quectel Official Forum. Our technical support team will respond promptly.
Project open-source repository: https://github.com/Quectel-Pi/demo-camera-distance-measurement
We welcome you to submit Issues to report problems or Pull Requests to contribute code improvements!