
Smart home central control system
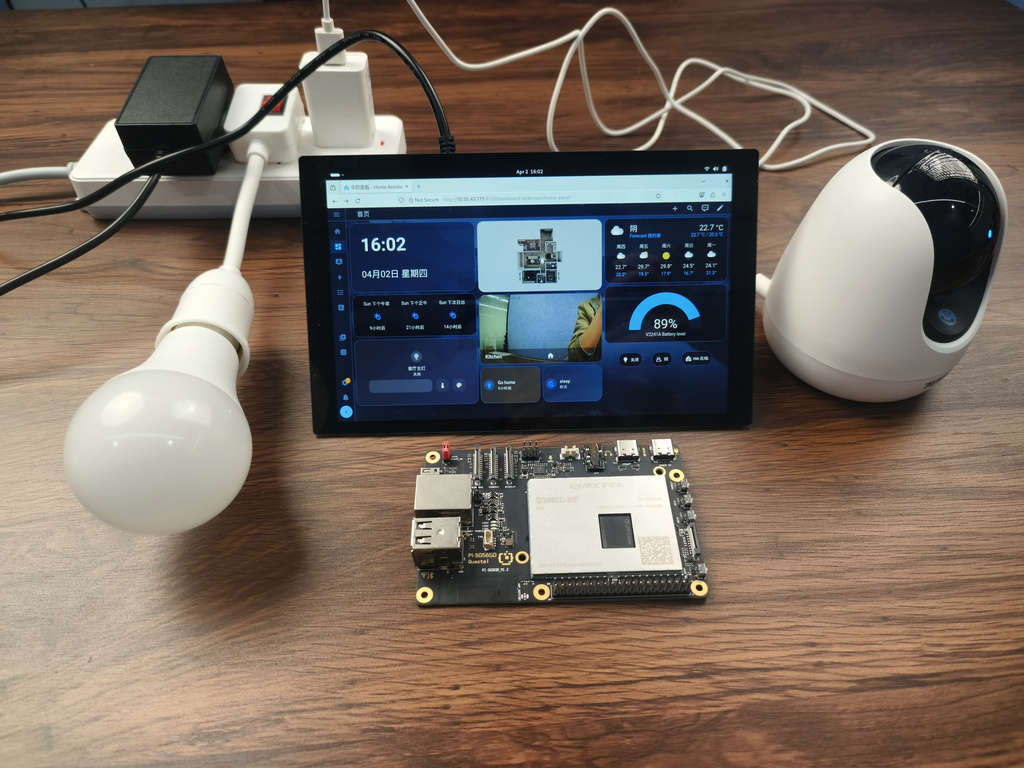
The smart home central control system is a home automation central control solution built on the Quectel Pi H1 smart main control board.
This project uses Home Assistant as the core platform and adopts Docker-based containerized deployment to locally complete device access, status display, scene linkage, and visualized control on Quectel Pi H1. The system supports centralized display of household information such as lighting, weather, battery level, and room status, and can be further expanded with Zigbee gateways, sensors, cameras, and more smart devices. It is suitable for scenarios such as home control panels, desktop control terminals, and lightweight edge smart home gateways.
This project mainly demonstrates the capabilities of Quectel Pi H1 in home automation, local service deployment, web-based visual interface hosting, and multi-protocol device access. It can serve as a reference example for smart home control centers, home information dashboards, and localized intelligent scene linkage systems.
Development Resources Overview
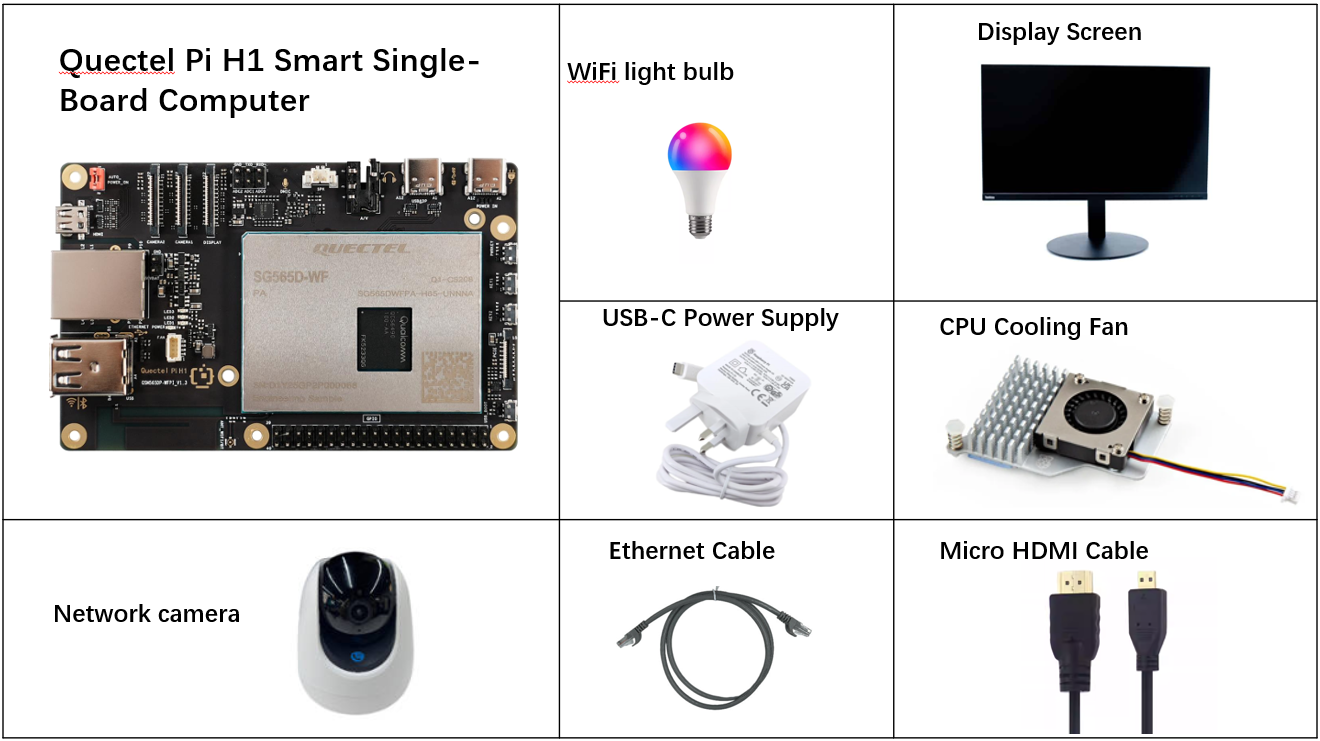
Development Accessories List
Note: The following is a recommended accessories list. The actual hardware configuration can be adjusted flexibly according to project requirements.
| Accessory Name | Quantity | Specifications |
|---|---|---|
| Quectel Pi H1 Smart Single-Board Computer | 1 | - |
| Power Adapter | 1 | 27W USB Type-C Interface Charger 1.2m Cable Length China Standard Power PD Power Suitable for Raspberry Pi 5 |
| Micro HDMI Cable | 1 | Micro HDMI 2.0 Standard, 1m Length, HDMI-A (Male) to HDMI-D (Male) |
| Ethernet Cable | 1 | Gigabit Ethernet Cable, 1m Length |
| CPU Cooling Fan | 1 | Raspberry Pi 5 Official Active Cooler with Thermal Pad |
| Network Camera | 1 | Tenda Indoor Home Surveillance Camera |
| WiFi light bulb | 1 | Smart Light Bulbs |
| Display | 1 | 24-inch HDMI Monitor |
Accessories Reference Images
Quick Start
The Quectel Pi H1 Smart Single-Board Computer comes preinstalled with the Debian 13 system image by default. No system reflashing is required. Follow the steps below to start development.
Hardware Connection
Complete the following hardware connections. The interface reference diagram is shown below:

Display connection: Connect one end of the Micro HDMI cable to the Micro HDMI port of the main control board and the other end to the Micro HDMI port of the display.
Network connection: Connect one end of the Gigabit Ethernet cable to the Gigabit Ethernet port of the main control board and the other end to a router port.
Alternative: connect to the same LAN over Wi-Fi.Input device connection: Connect a USB keyboard and mouse to the two USB-A ports on the main control board. For wireless input devices, plug the receiver into a USB port.
Power connection: Connect the USB-A end of the power cable to the power adapter and the USB-C end to the power port labeled POWER IN on the main control board.
Project Implementation
Install Basic Dependencies
Run the following commands to install the basic system dependency packages:
sudo apt update
sudo apt install -y ca-certificates curl gnupg
sudo install -m 0755 -d /etc/apt/keyrings
Install Docker
1.Add Docker's official GPG key:
sudo curl -fsSL https://download.docker.com/linux/debian/gpg -o /etc/apt/keyrings/docker.asc
sudo chmod a+r /etc/apt/keyrings/docker.asc
2.Add the Docker software repository:
echo \
  "deb [arch=$(dpkg --print-architecture) signed-by=/etc/apt/keyrings/docker.asc] https://download.docker.com/linux/debian \
  $(. /etc/os-release && echo "$VERSION_CODENAME") stable" | \
  sudo tee /etc/apt/sources.list.d/docker.list > /dev/null
3.Install the Docker suite:
sudo apt update
sudo apt install -y docker-ce docker-ce-cli containerd.io docker-buildx-plugin docker-compose-plugin
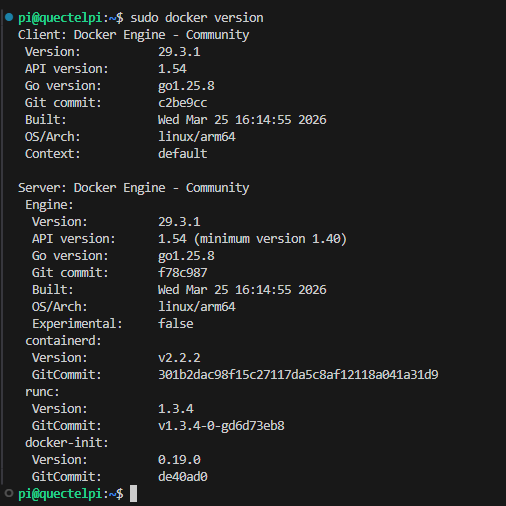
4.Enable Docker at boot and verify the installation:
sudo systemctl enable docker
sudo systemctl start docker
sudo docker version
Deploy Home Assistant with Docker Compose
The recommended container parameters provided on the official Home Assistant Linux installation page include:
ghcr.io/home-assistant/home-assistant:stablenetwork_mode: hostprivileged: true- Mount the configuration directory to
/config - Optionally mount
/run/dbus, which is required for Bluetooth-related features
Step 1: Create the deployment directory and configuration file
sudo mkdir -p /opt/homeassistant
cd /opt/homeassistant
sudo nano compose.yaml
Step 2: Write the Compose configuration
services:
  homeassistant:
    container_name: homeassistant
    image: ghcr.io/home-assistant/home-assistant:stable
    restart: unless-stopped
    privileged: true
    network_mode: host
    environment:
      TZ: Asia/Shanghai
    volumes:
      - /opt/homeassistant/config:/config
      - /etc/localtime:/etc/localtime:ro
      - /run/dbus:/run/dbus:ro
Step 3: Start the Home Assistant container
sudo docker compose up -d

Configure Firewall Rules
By default, port 8123 is not open and the Home Assistant console is accessible only locally. To allow access from other devices on the LAN, manually open the port:
1.Edit the firewall rule files:
sudo vi /etc/iptables/rules.v4
sudo vi /etc/iptables/rules.v6
2.Add the following rule to the files (replace port_number with the port to be opened, such as 8123):
-A INPUT -p tcp --dport port_number -j ACCEPT
3.Reload the firewall rules:
sudo systemctl daemon-reload
sudo systemctl restart iptables-restore.service
sudo systemctl status iptables-restore.service
Access the Home Assistant Console
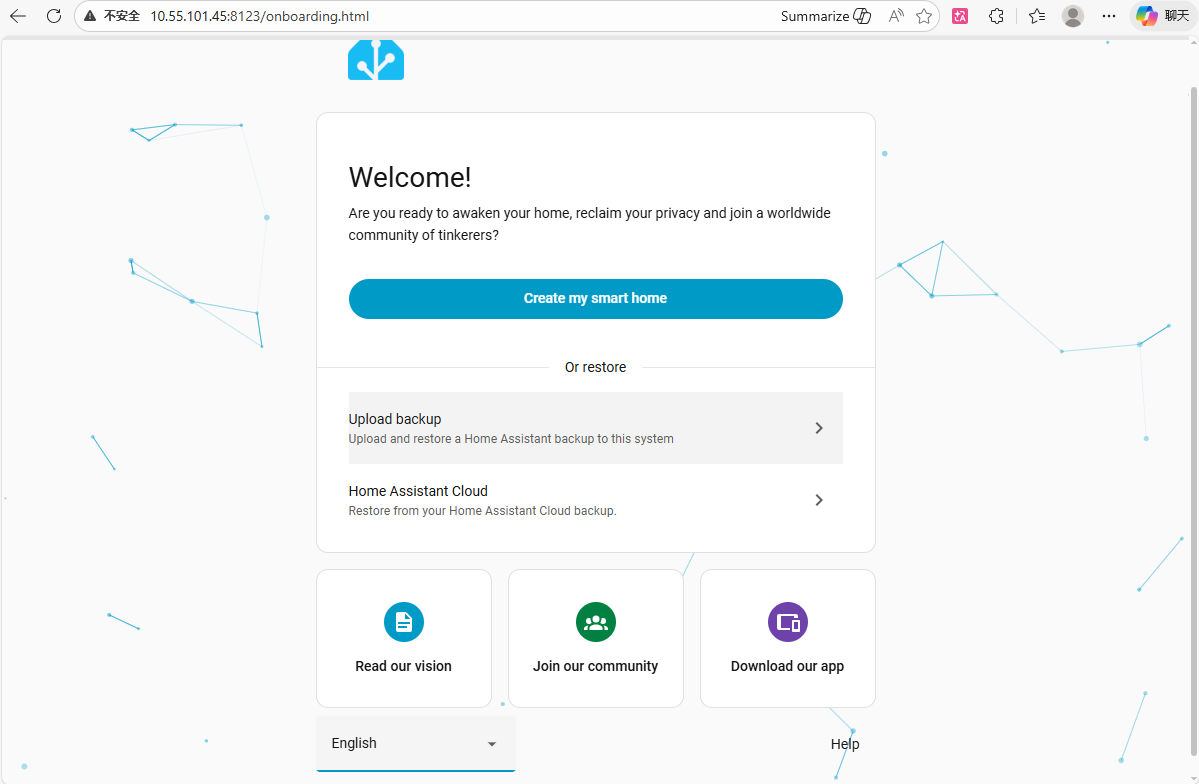
Open a browser within the LAN and visit the following address (replace <QuectelPi-IP> with the actual IP address of the main control board):
http://<QuectelPi-IP>:8123
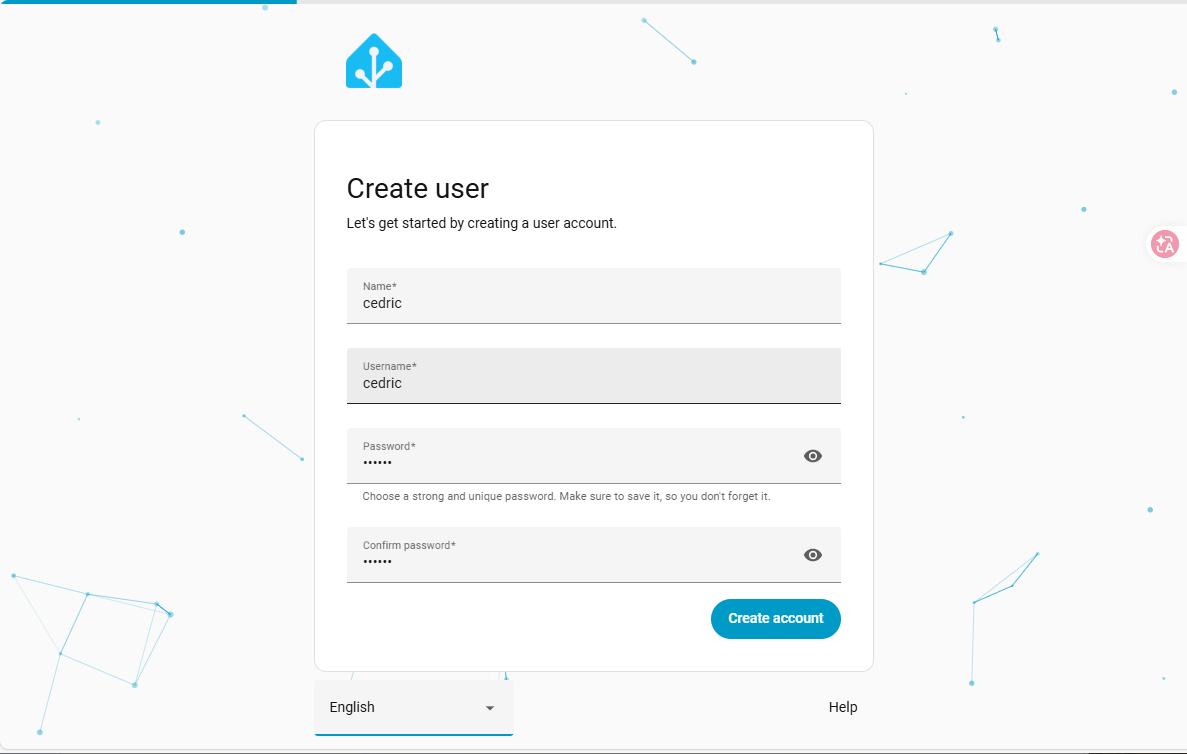
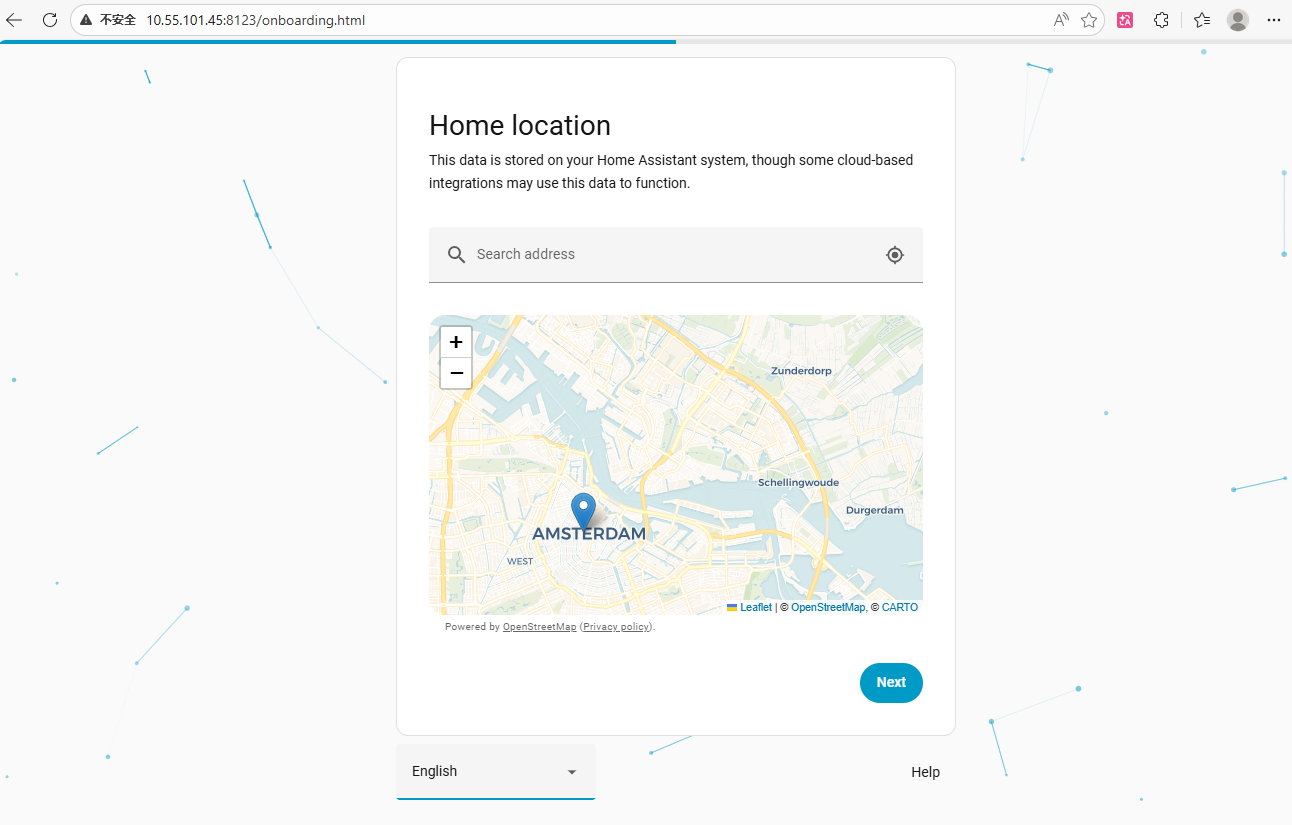
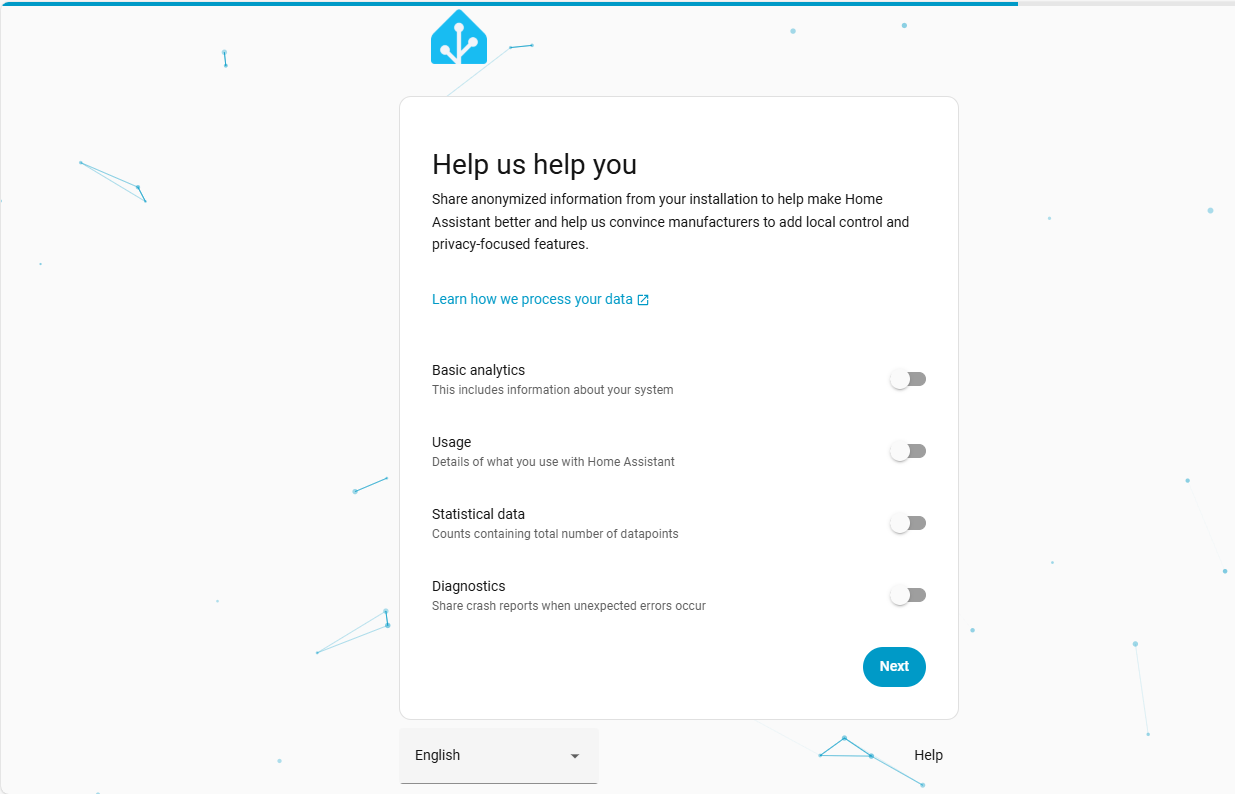
After entering the console, complete user creation and the initial setup to start using the system. The reference interface is shown below:

View Container Runtime Logs
sudo docker logs -f homeassistant
Integrate Smart Devices
Wi-Fi lights, cameras, and other smart devices can be integrated into Home Assistant for unified management. Follow these steps:
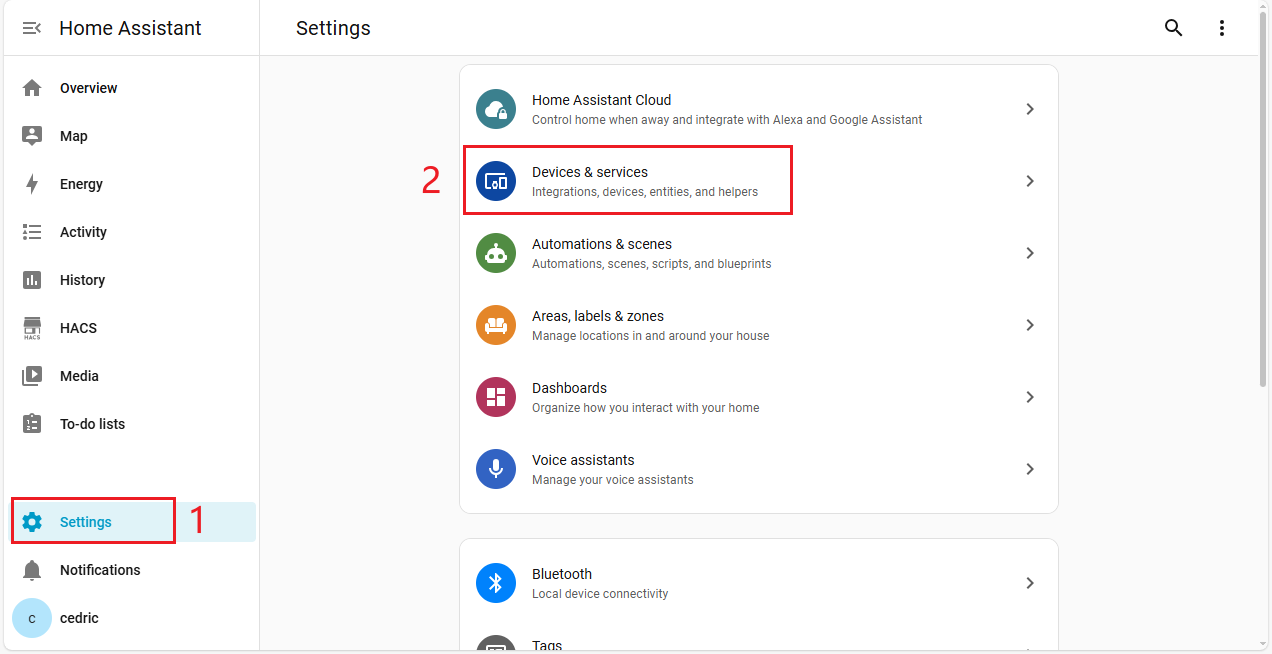
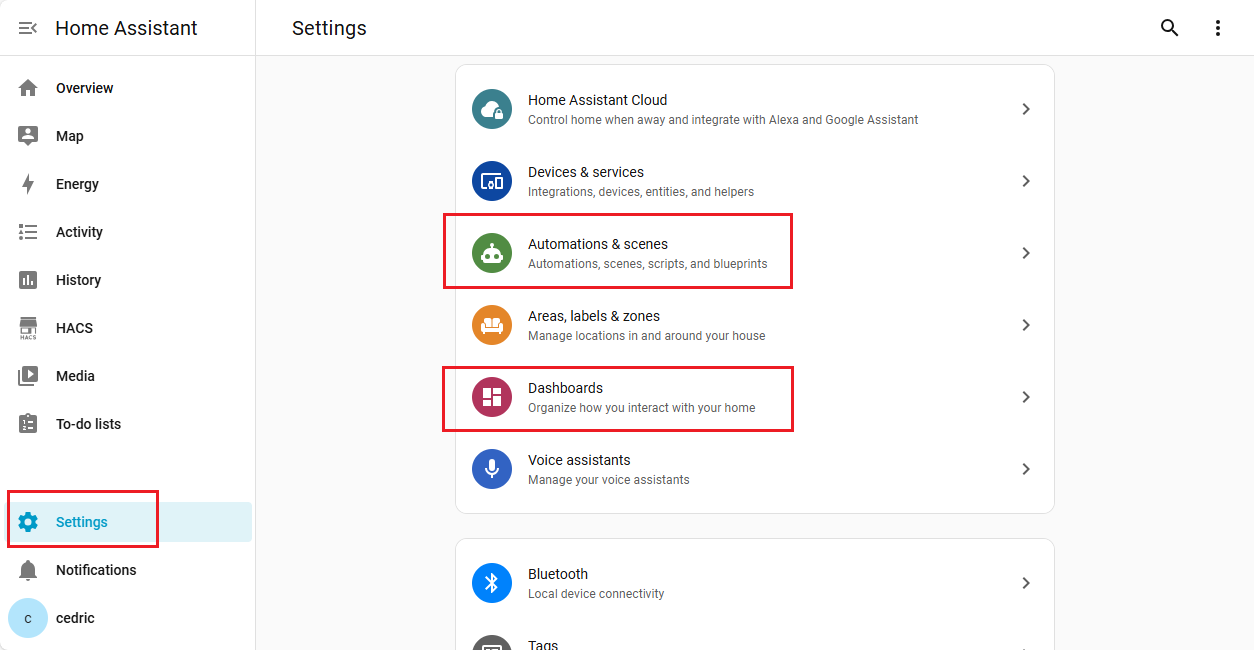
1.Open the Home Assistant console and click Settings.
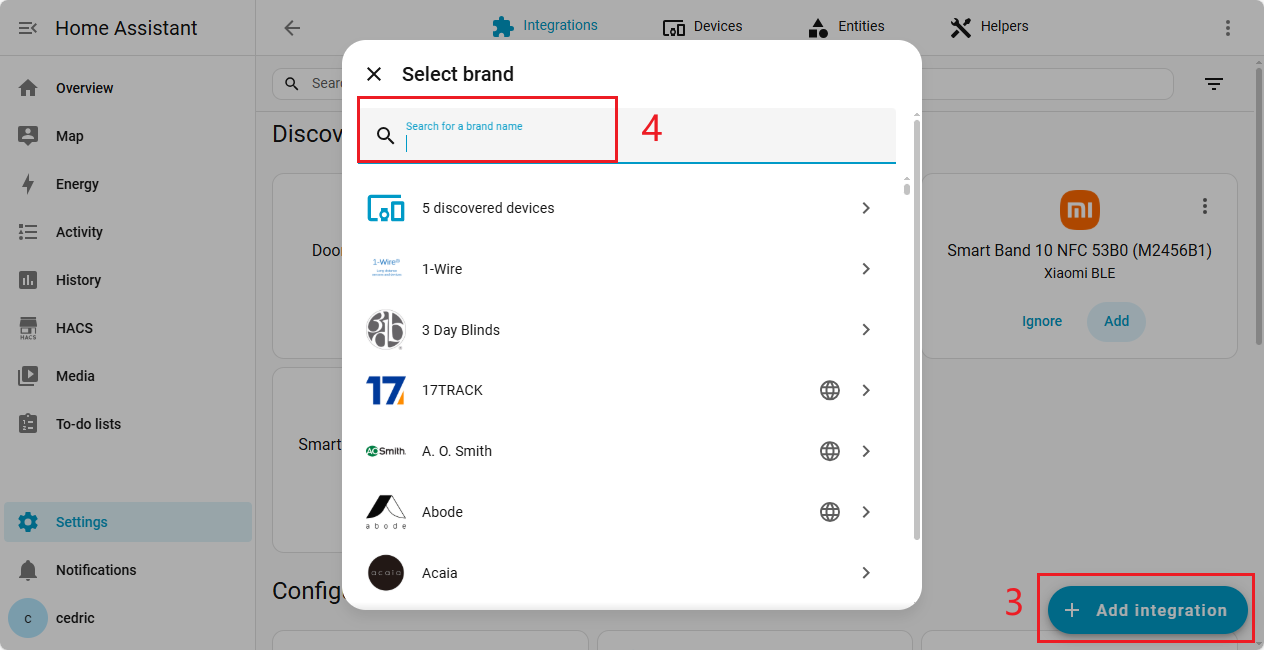
2.Select Devices & Services, then click Add Integration.
3.Search for the device brand name and follow the on-screen instructions to add the corresponding integration.
Install HACS (Home Assistant Community Store) as an Extension
Note: HACS is a community open-source plugin library. Please comply with its open-source license and related terms before use.
HACS can expand the Home Assistant plugin ecosystem. Install it as follows:
# Check the container running status
sudo docker ps --format "table {{.Names}}\t{{.Image}}\t{{.Status}}"
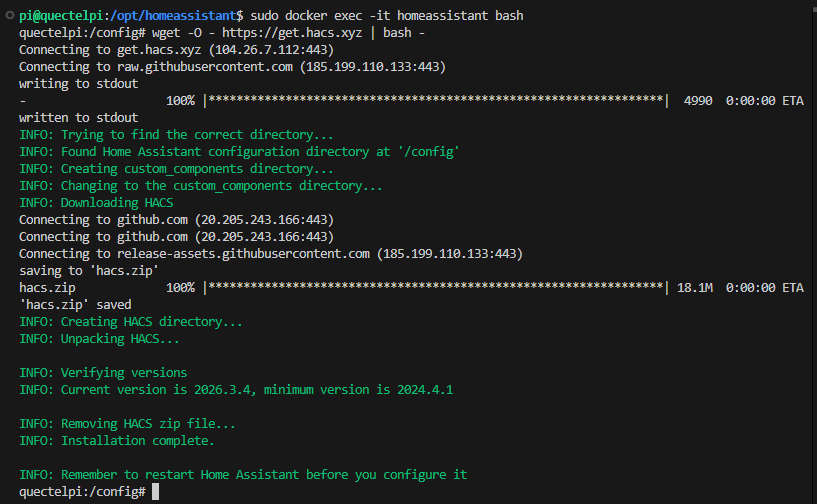
# Enter the Home Assistant container
sudo docker exec -it homeassistant bash
# Run the official HACS installation script
wget -O - https://get.hacs.xyz | bash -
# Exit the container and restart Home Assistant
exit
sudo docker restart homeassistant
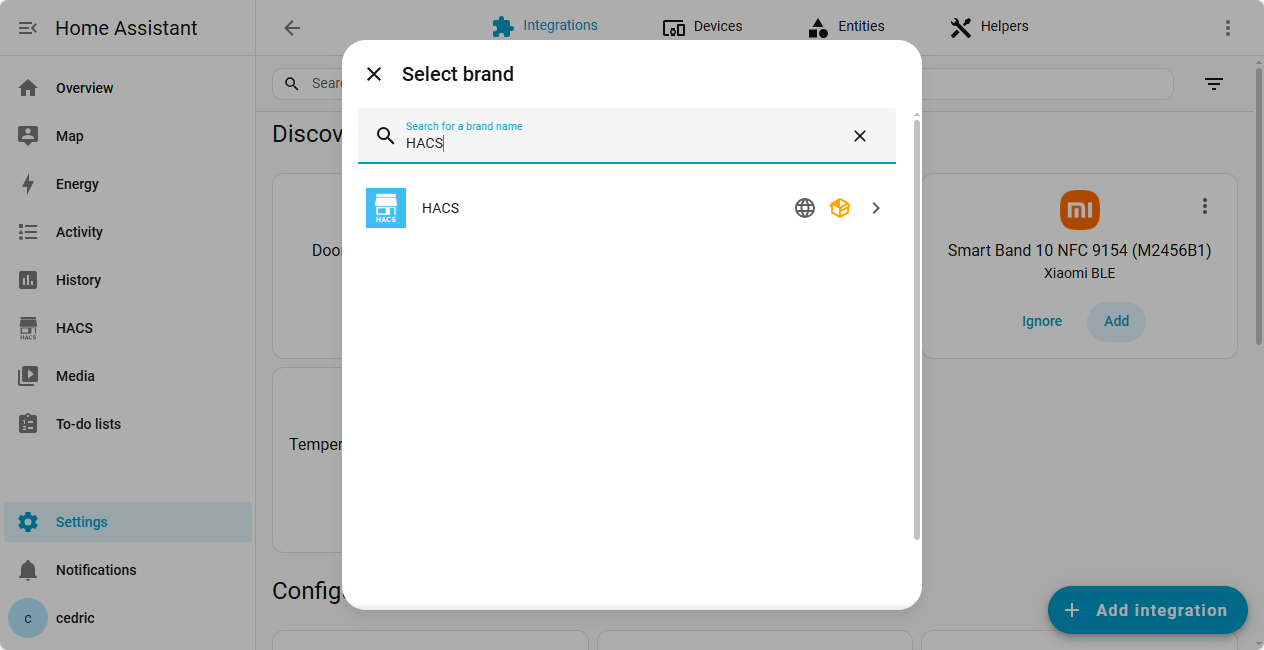
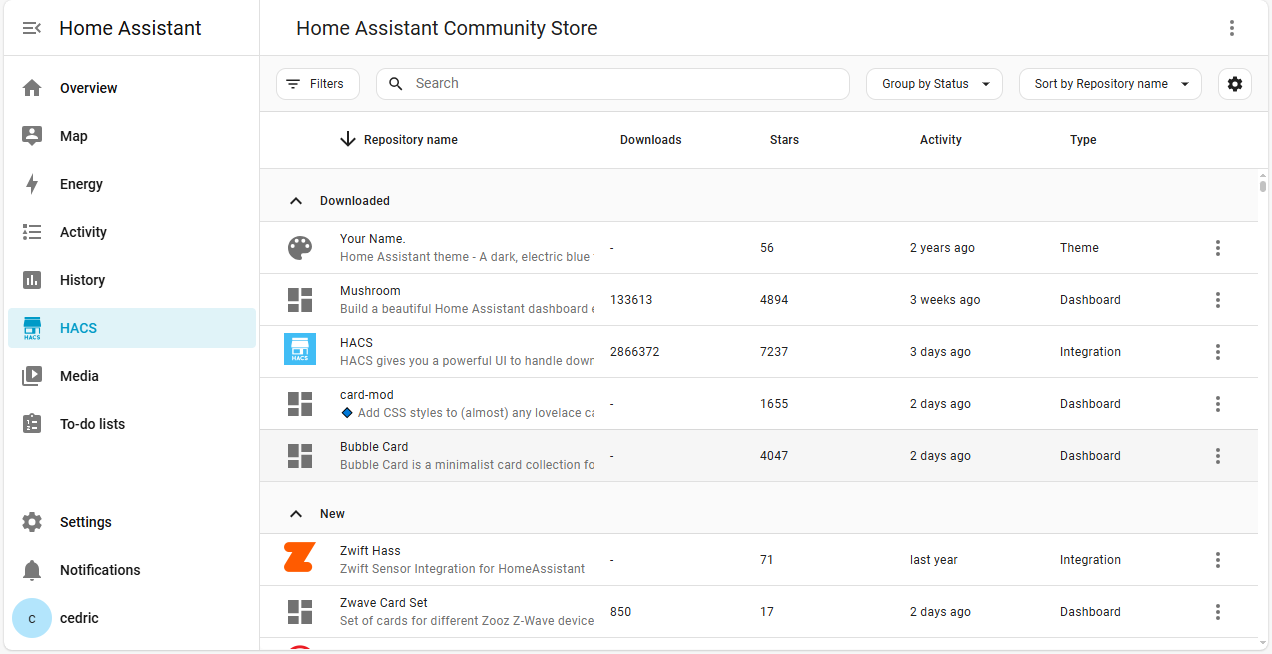
After installation, restart Home Assistant, then search for HACS in Settings → Add Integration and complete the setup:
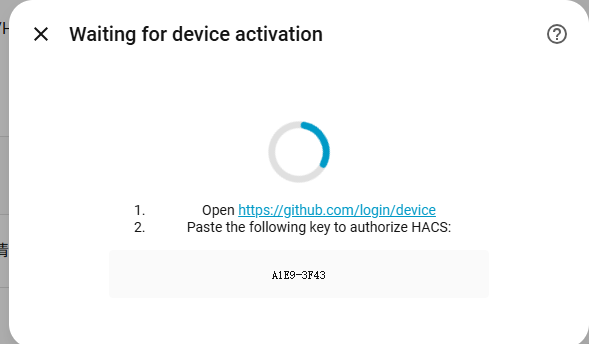
Using HACS requires signing in with a GitHub account for authorization. After authorization, community plugins can be downloaded:
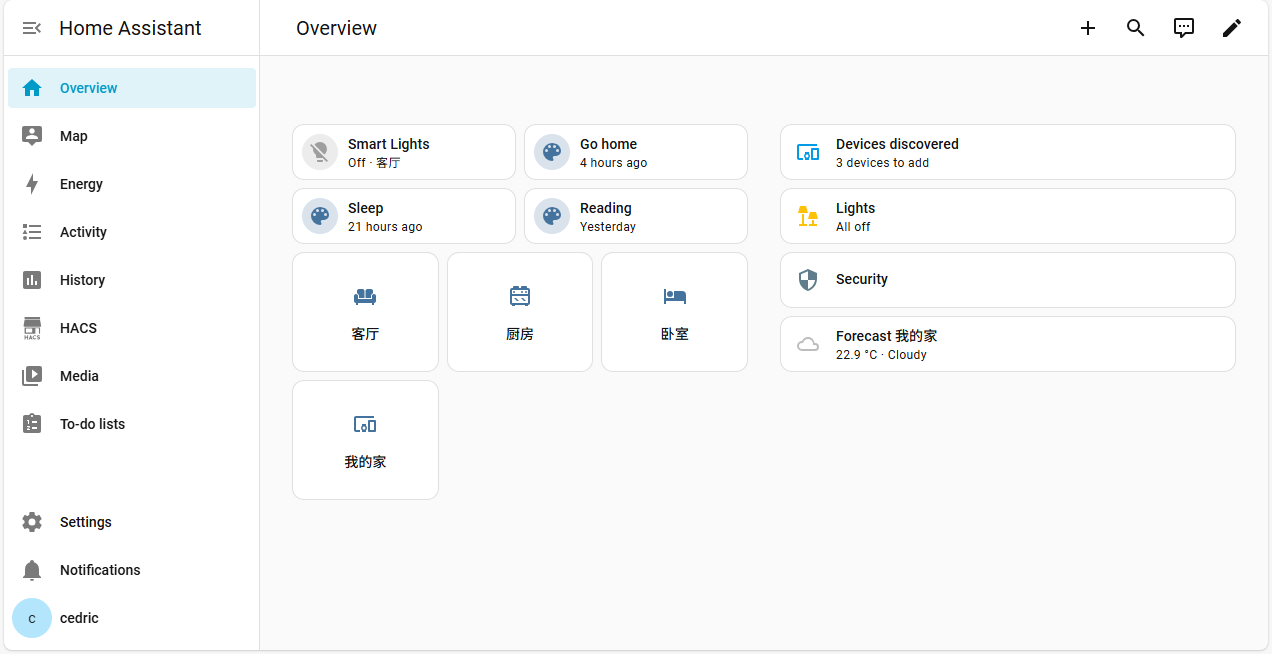
Create Scenes and Dashboards
Scene: Save the status of smart devices to enable one-click linkage control of multiple devices.
Dashboard: Centrally overview all devices and their associated area information.
For detailed configuration, refer to theofficial Home Assistant documentation
Notes
- This document is adapted for the Debian 13 environment on the Quectel Pi H1 smart main control board. If the system version differs, some commands may need adjustment.
- Network cameras, Wi-Fi lights, and other accessories are optional for demonstration scenarios and can be added or removed based on actual deployment requirements.
- If the container fails to start, prioritize checking the following issues: port 8123 already in use,
/opt/homeassistantdirectory permissions, and network mode configuration. - HACS is a community open-source plugin library. Please comply with its open-source license and related terms before use.
Application Demo
FAQ
The Docker installation command fails and reports that packages cannot be found
Solution:
- Run
sudo apt update && sudo apt upgrade -yagain to update the system sources. - Check whether the Docker repository setup command was entered correctly, and redo the repository configuration steps if necessary.
Other devices on the LAN cannot access the Home Assistant console
Solution:
- Recheck the firewall rules, confirm that the rule allowing port 8123 has been added, and restart the firewall service.
- Check the network connections of all devices to ensure they are connected to the same router via Wi-Fi or wired network.
- Run
ifconfigto query the actual IP address of the main control board, then replace the incorrect IP and try again.
HACS is installed, but it cannot be found in Add Integration
- Re-enter the container and run the HACS installation script again, ensuring that the script completes without errors.
- Run
sudo docker restart homeassistantto restart the container. - Check the network connectivity of the main control board by running
ping github.comto ensure GitHub is reachable.
Technical Support and Contributions
If you encounter any issues during use, please submit technical inquiries on the Quectel Official Forum. Our technical support team will respond promptly.