
Quick Start
Unboxing preparation
This chapter is based on the Quectel Pi M1 development kit to explain how to quickly get started with the Quectel Pi M1 smart single-board computer.
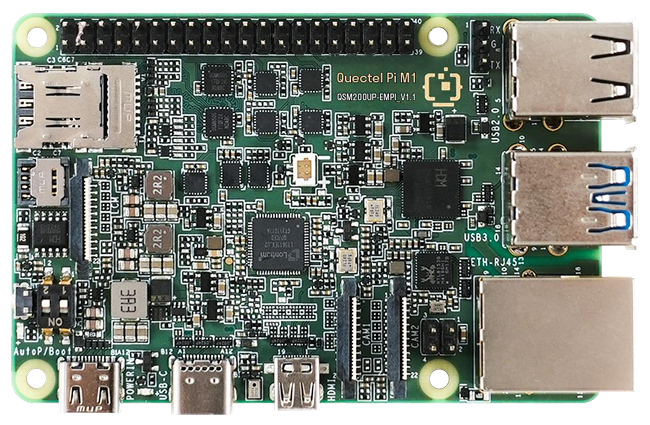
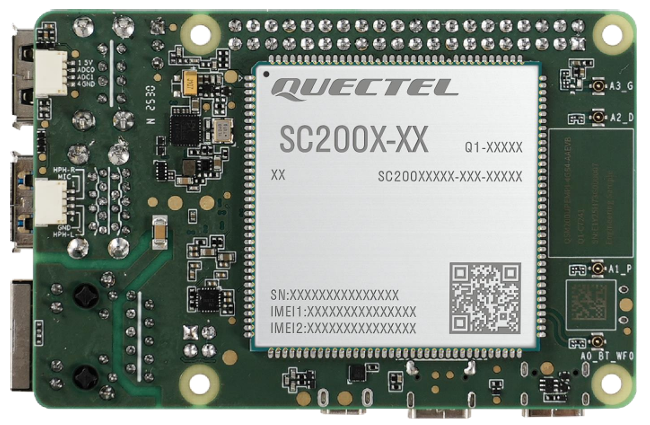
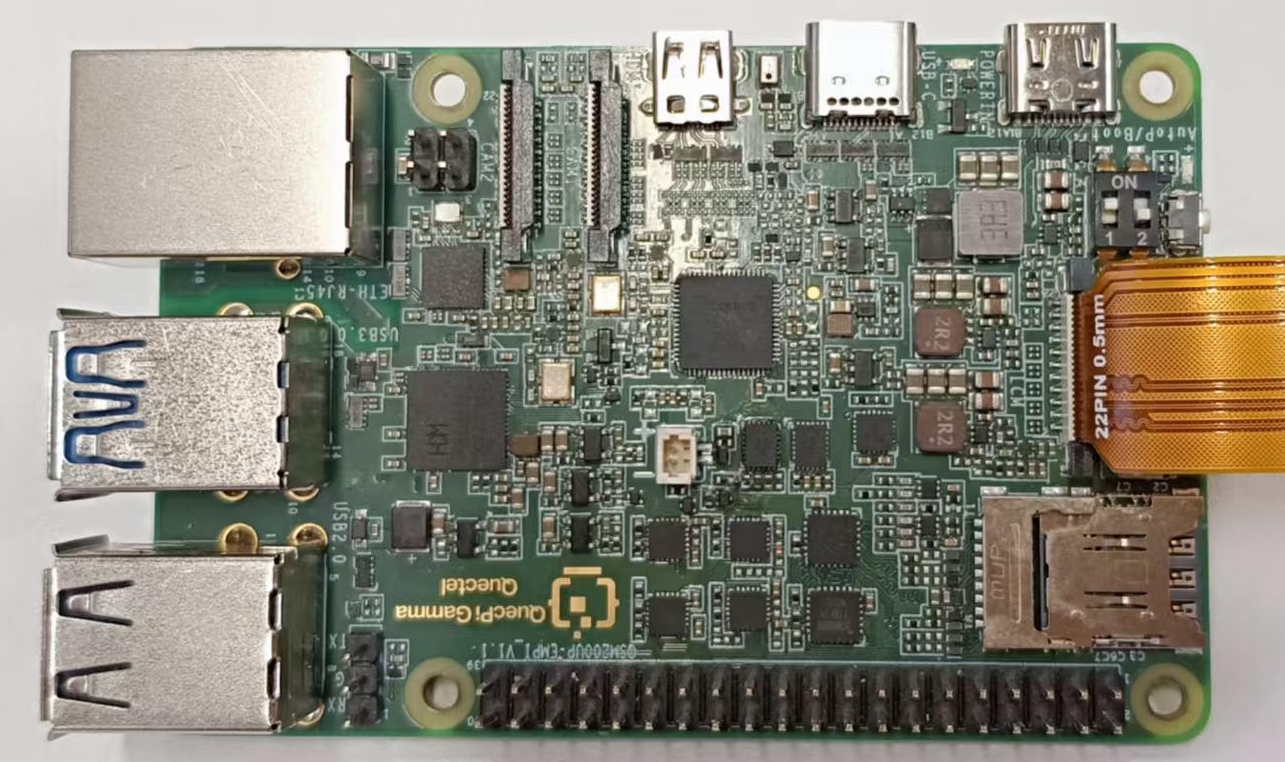
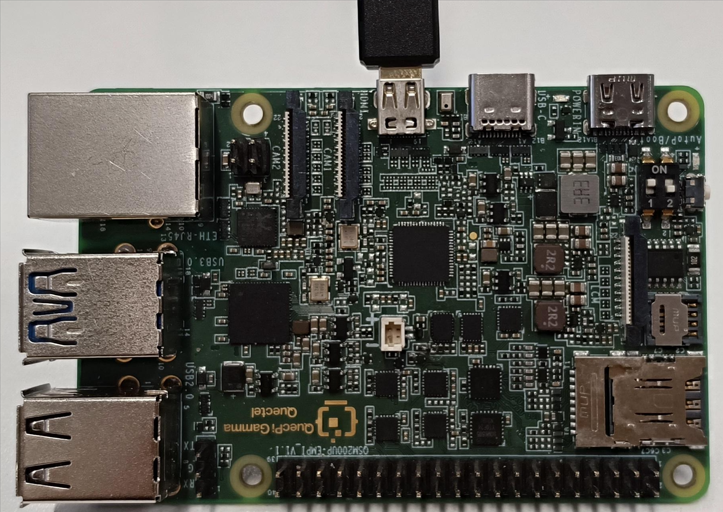
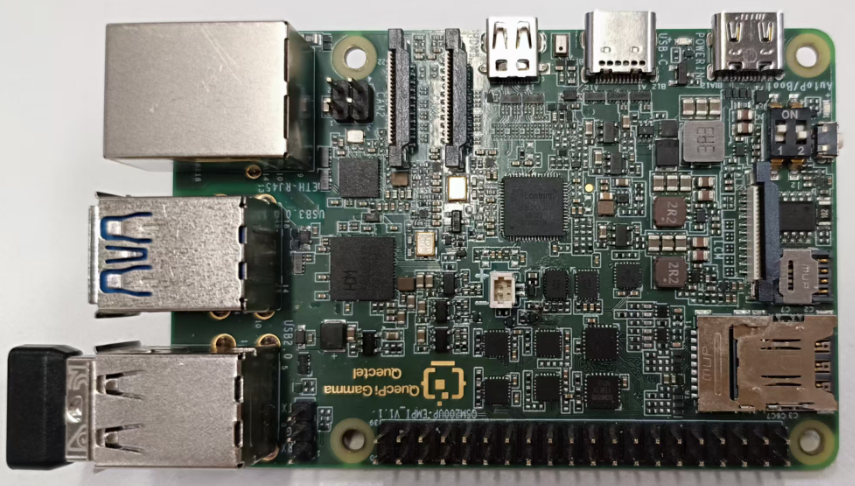
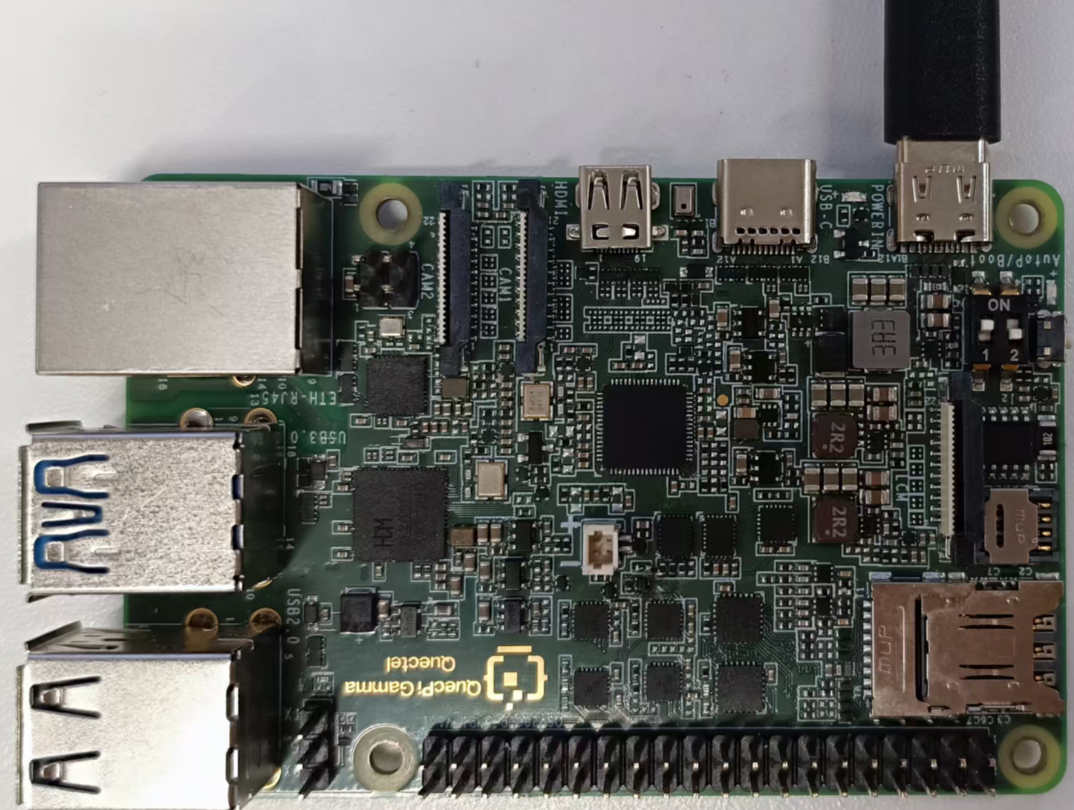
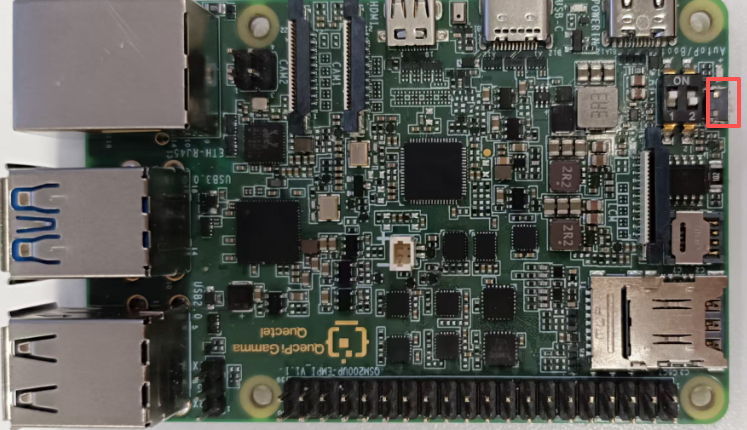
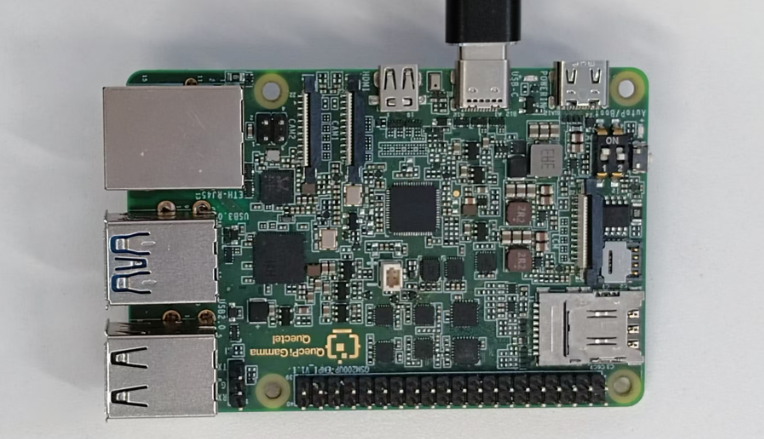
Physical product
Product top view and bottom view
Required accessories
- Complete Quectel Pi M1 development kit (verified against the "Kit list" to ensure nothing is missing).
- A power adapter supporting 5V/5A.
- A monitor supporting LCM or Micro HDMI (resolution recommended to be 1080P).
- USB keyboard + mouse (wired or wireless, need to be connected to the USB port of the smart single-board computer).
- A router with internet access (for network debugging of the single-board computer).
Precautions
Hardware usage guidelines (avoid damage)
Please use the USB-A power cable (5A) provided with the kit. Do not use power supplies with a current lower than 3A (such as mobile phone chargers), as it may cause insufficient power supply to the smart single-board computer and frequent crashes. If a high-power module (such as a motor)needs to be connected externally, it must be powered separately. Do not draw power from the smart single-board computer's USB port or GPIO port (to avoid overload and damage to the computer).
Always disconnect the smart single-board computer's power supply before plugging or unplugging accessories (such as camera cables or network cables). Hot-plugging may damage the interface chips. The USB-C interface is only for firmware flashing and host mode communication; do not use it to power the computer.
Operating temperature: -20 ~ +70 °C. do not use in high-temperature (e.g., direct sunlight), humid (humidity > 80%), or dusty environments. Before operation, please touch a metal object to discharge static electricity. Avoid directly touching the chip pins on the smart single-board computer with your hands.
System and software precautions
- Only official system images are supported. Flashing images from other smart single-board computers (such as Raspberry Pi) is prohibited, because this will cause driver incompatibility,boot failure, and other problems;
- When installing software, prioritize using the apt command to download from official sources to avoid installing packages from unknown sources, preventing system infection or crashes.
Hardware connection
⚠️ Warning: Please disconnect all power supplies during the connection process to avoid hardware damage caused by hot-plugging interfaces!
Display connection
- Option 1 (high-definition): Connect one end of the FPC cable to the MIPI interface of Quectel Pi M1, and the other end to the MIPI interface of the display.
- Option 2 (compatible): Connect one end of the Micro HDMI cable to the Micro HDMI interface of Quectel Pi M1, and the other end to the Micro HDMI interface of the display.
Peripheral connection
Connect the USB keyboard and mouse to the two USB-A interfaces of Quectel Pi M1; for wireless keyboard and mouse, insert the receiver into the USB port.
Network connection
Connect the network cable between the network port of Quectel Pi M1 and the LAN port of the router.

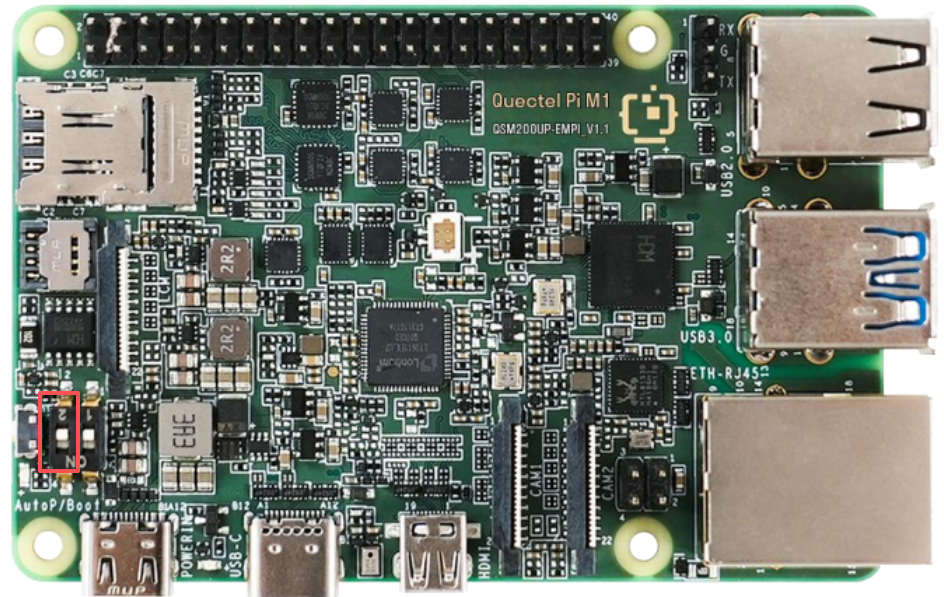
AutoP DIP Switch
Toggle the AutoP DIP switch to ON to enable the power-on auto-start function.
Power connection
Finally, connect the USB-A end of the USB-A power cable to the power adapter, and the USB-C end to the power port of Quectel Pi M1 (usually marked POWER IN).
System startup
Start the system
⚠️ If the DIP switch marked with AUTO_P silkscreen was not turned on during the hardware connection process, you need to first long-press the PWRKEY button on the right side of Quectel Pi M1, then connect the power until the system starts.
- Power on the display and confirm that the display input source has been switched to the corresponding interface (such as USB-C or HDMI).
- Power on Quectel Pi M1 (plug in the power cable). At this time, the power indicator (usually red) of Quectel Pi M1 will be on steadily, and the system indicator (usually green) will blink, indicating that the system is starting.
- Wait about 1 minute, and the display will show the system desktop.
System login
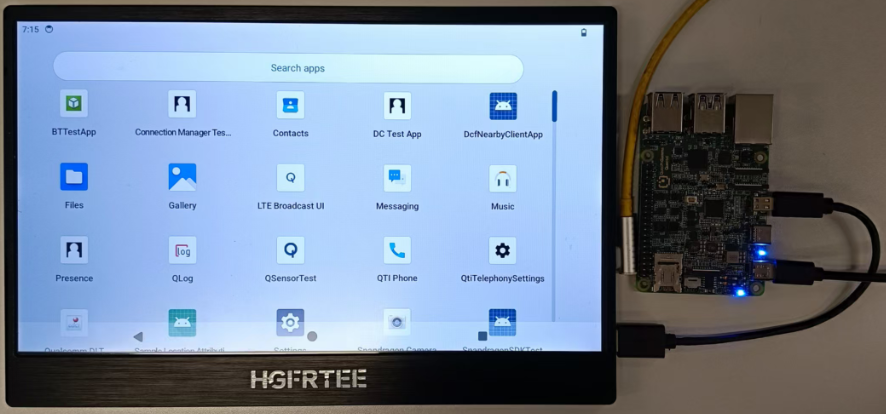
System desktop
Basic configuration
Function verification
After startup, quickly verify whether the core accessories are working properly:
- Display verification: Confirm that the display can clearly show the desktop, and window dragging is smooth without freezing or screen distortion;
- Network verification: Open a browser and enter any URL (such as www.google.com), or enter ping 8.8.8.8 in the terminal (to test external network connectivity). If data packets are returned, the network is normal;
- USB peripheral verification: Enter characters with the keyboard and drag windows with the mouse to confirm that the keyboard and mouse respond normally, or insert a USB drive to see if the system file manager shows the USB storage device.
Regional settings
System Language: Click sequentially Settings > System > Languages > System Languages > + Add a Language
Then select the language, and drag the selected language to the top.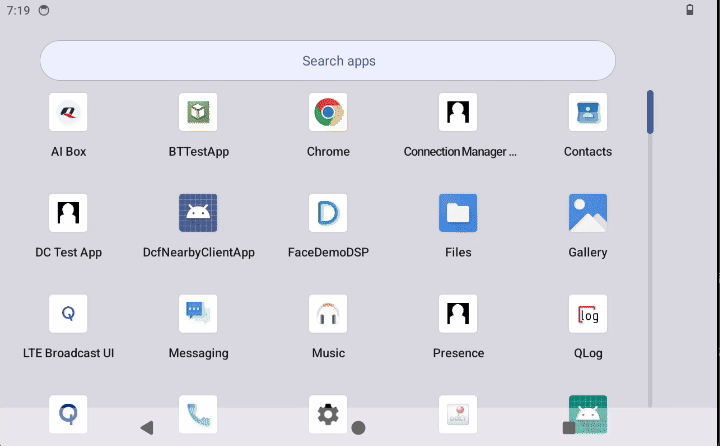
Input method editor and keyboard layout: Use the system default configuration.
Settings > System > Keyboard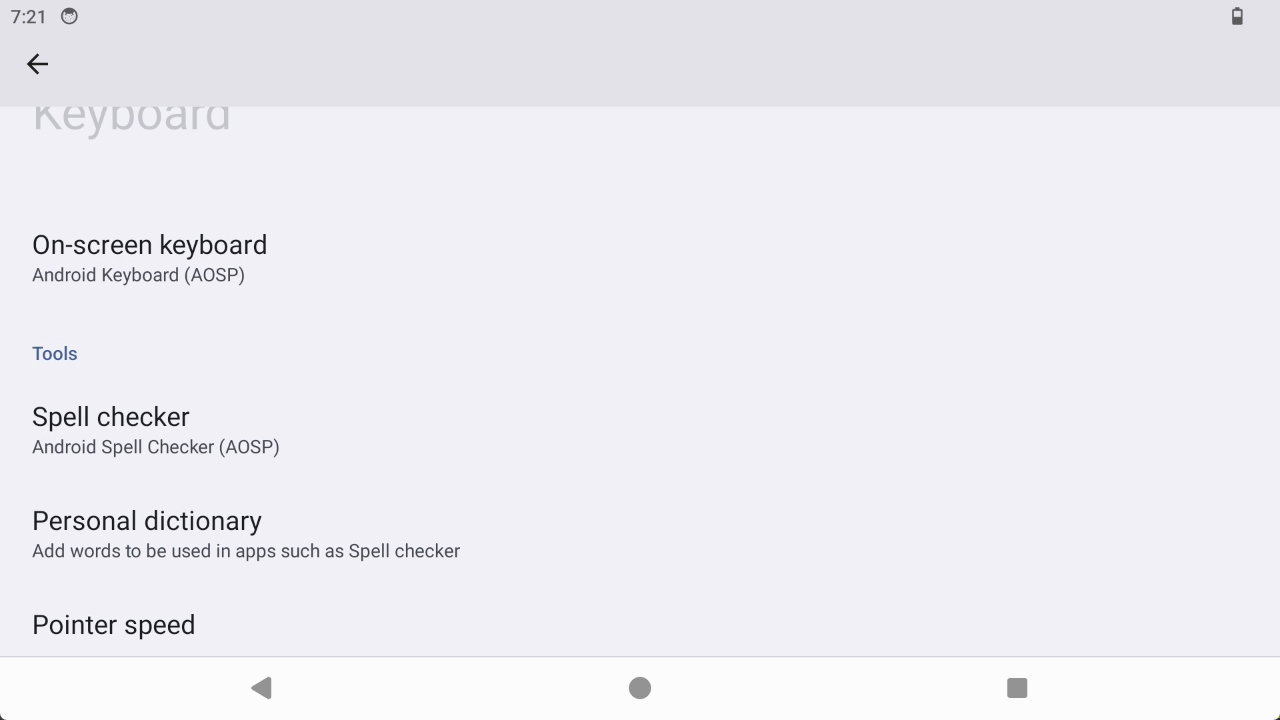
Network settings
Wi-Fi connection
Settings > Network & internet > Internet > Wi-Fi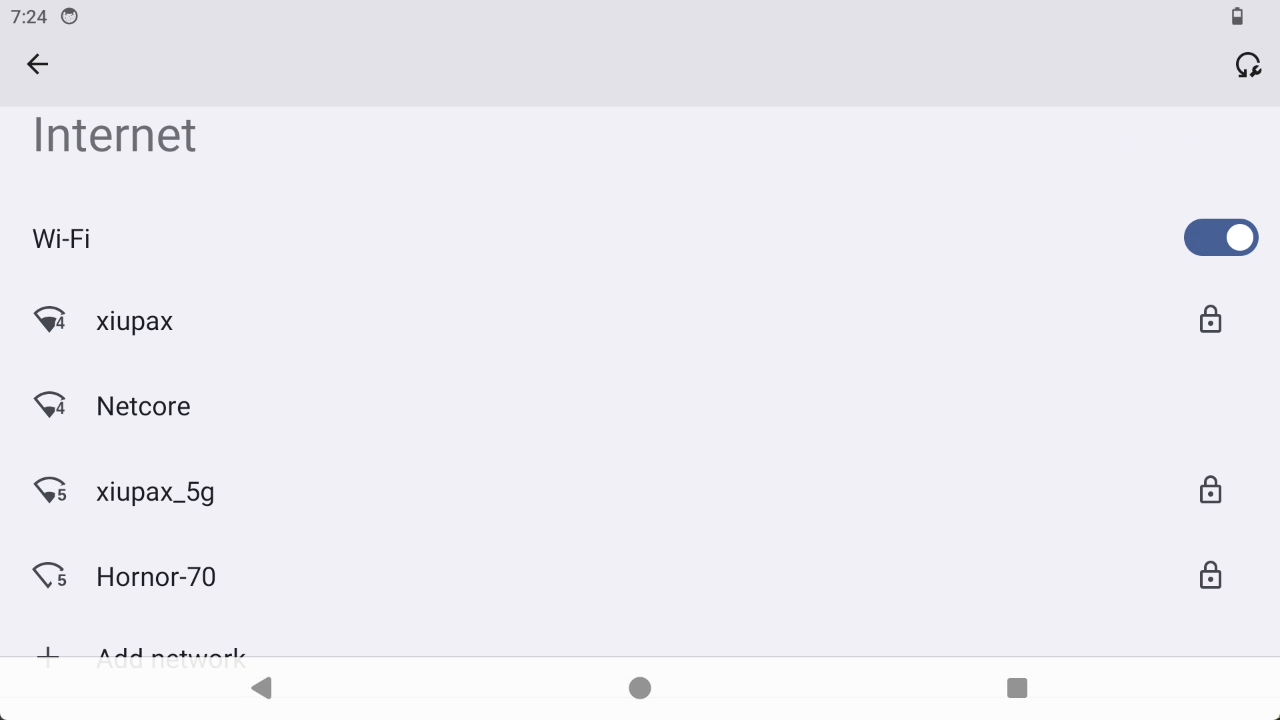
Network sharing
Settings > Network & internet > HotSpot & tethering > Wi-Fi Hotspot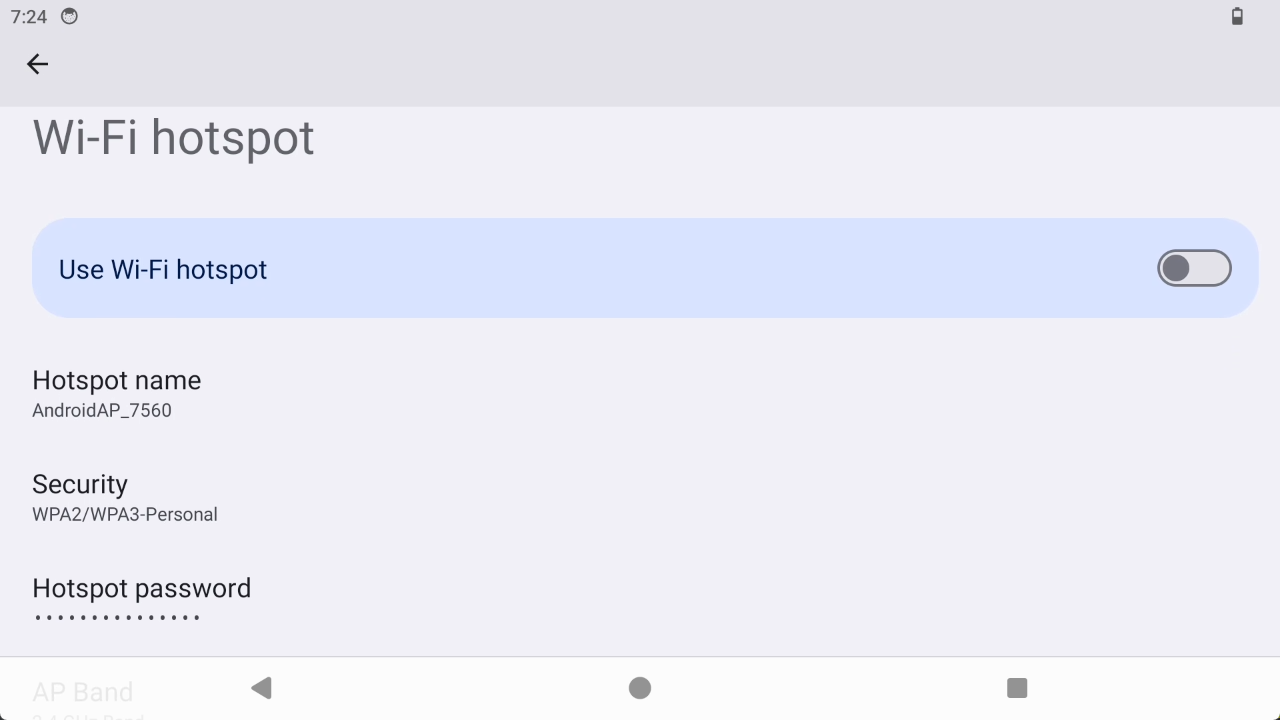
ADB
Hardware connection
Prepare a USB to Type-C cable, connect the Type-C end to the USB-C interface of Quectel Pi M1, and the other end to the host computer.
Tool and driver installation
Install ADB driver
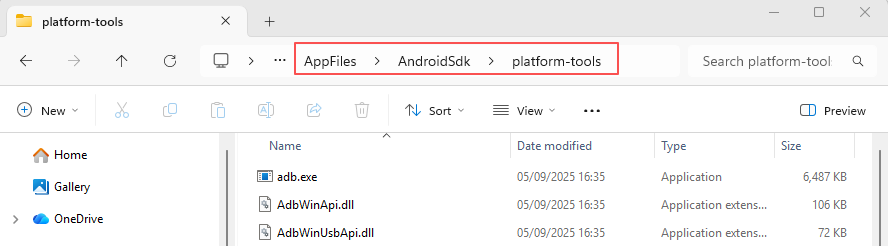
Download the platform-tools tool on your computer and extract it.
Open the folder where the platform-tools tool is located, enter cmd in the top path box, and press Enter to open the adb terminal.
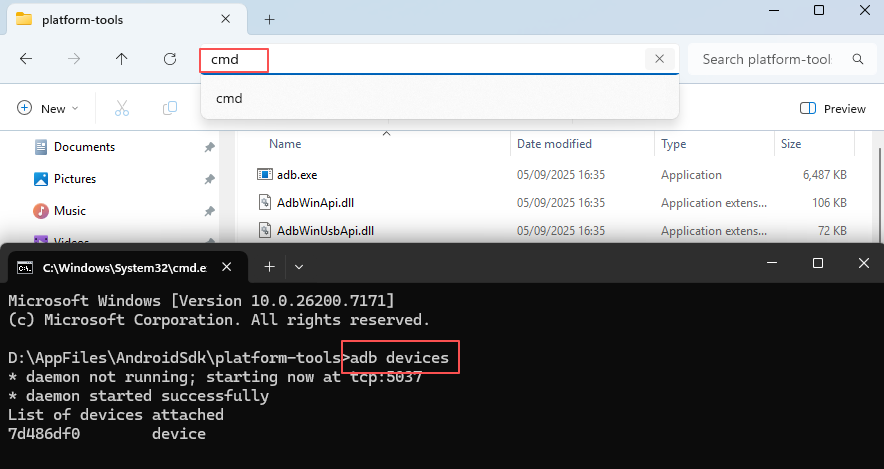
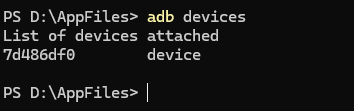
If the Android system is used (where adb is disabled by default), the device will not be found when you first use adb, please enable ADB debugging first.View connected devices
adb devicesFile Transfer
Download files from device
# Usage: adb pull <device file path> <computer storage path>
adb pull /data/local/tmp/11.txt ./
Upload files to device
# Usage: adb push <computer file path> <device storage path>
adb push ./123.txt /data/local/tmp/
Enable ADB debugging
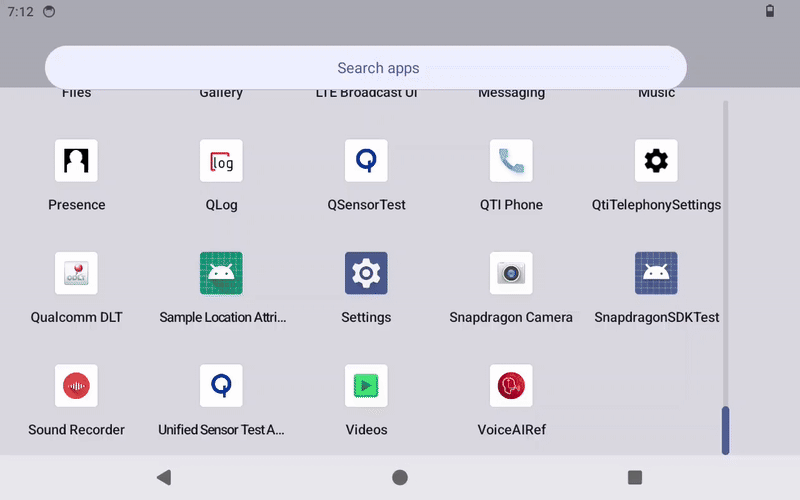
Operation steps: Click sequentially Settings > About phone > Build number. Then click the Build number continuously 7 times, a prompt will appear: You are now a developer!
Then go back, click sequentially System > Developer options > USB debugging (Allow USB debugging).
Successful enabling:
Purpose
Android Debug Bridge (ADB) is a set of command-line tools provided by the Android SDK for establishing communication between computers and Android devices (real devices/emulators), enabling core capabilities such as device debugging, management, and development testing.
Serial port control panel
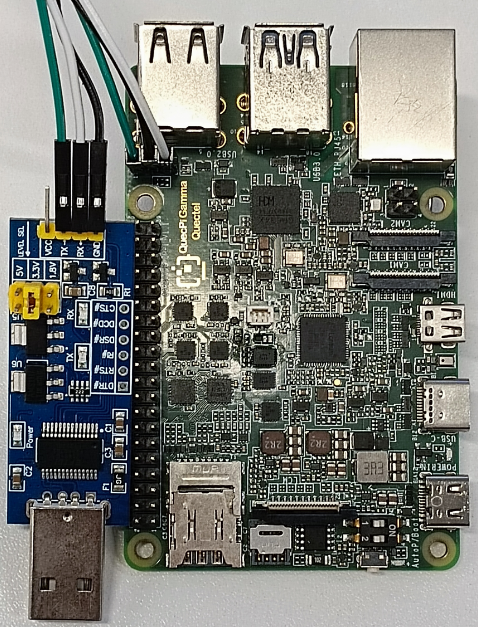
Hardware connection
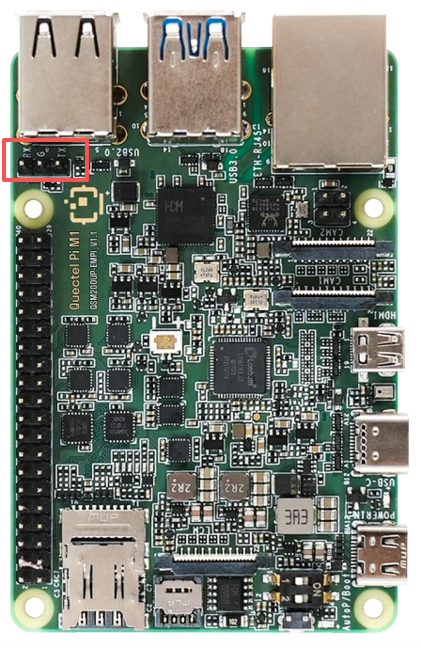
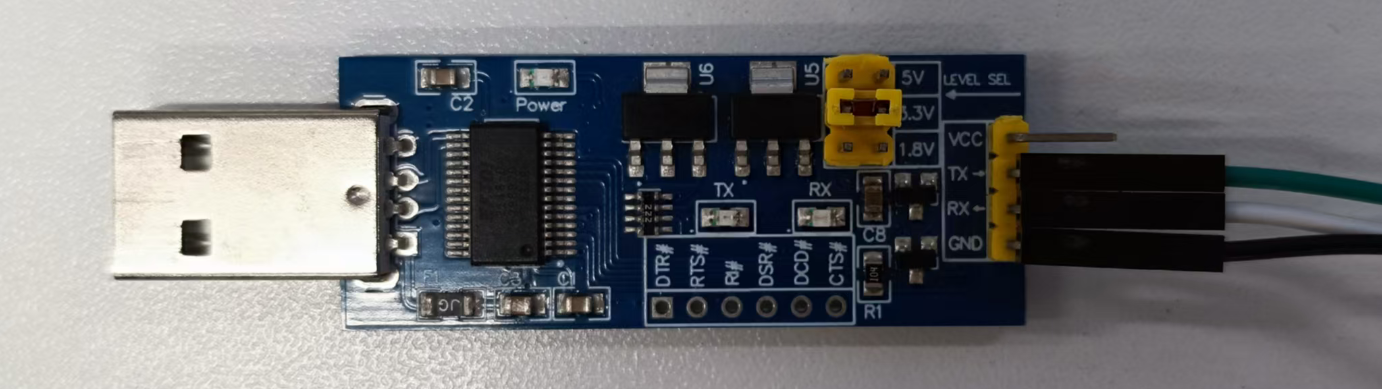
⚠️When using a USB serial data cable to log in via serial port to a smart single-board computer, please ensure the pin connections are correct. Incorrect pin connections may damage the hardware of the smart single-board computer.
Connection method
- Connect theGND pin of the Quectel Pi M1 smart single-board computer to the GND pin of the USB serial data cable.
- Connect theTXD pin of the Quectel Pi M1 smart single-board computer to the RXD pin of the USB serial data cable.
- Connect the RXD pin of the Quectel Pi M1 smart single-board computer to the TXD pin of the USB serial data cable.
Serial port login
Prerequisite: The CH340 driver must be installed on the system first; otherwise, the serial port will not be recognized.
It is recommended to use PuTTY software for serial port connection.
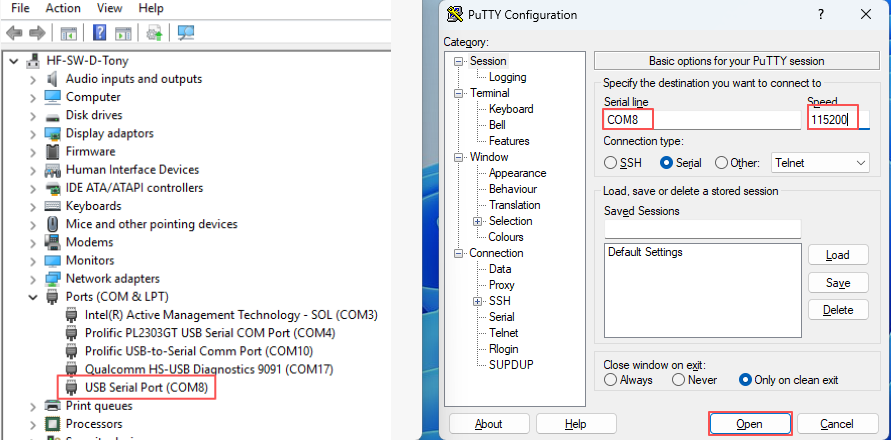
- Open Device Manager to view the serial port.
- Double-click to open PuTTY, configure to the USB serial port and set the baud rate to 115200, then click Open.
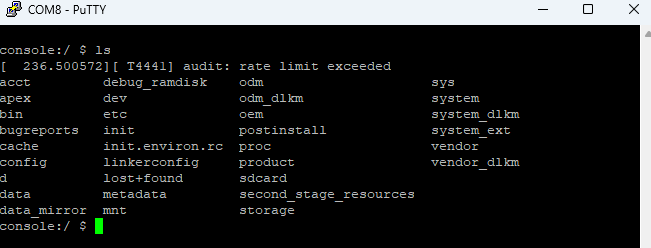
- Press Enter in the terminal interface, then enter
lsfor testing. If the command is successfully entered, it indicates that the serial port login is functioning properly. Subsequently, you can view logs and run debugging commands through the serial port.
Purpose
The serial port control panel is primarily used to view system logs, run commands, and as a backup method for system access when the graphical interface is unavailable through the serial port. It is an important tool for embedded Linux system development and maintenance, particularly suitable for low-level debugging and troubleshooting.