APK development
Development environment setup
Android Studio download
- Official designated download address:
Android Studio official download page
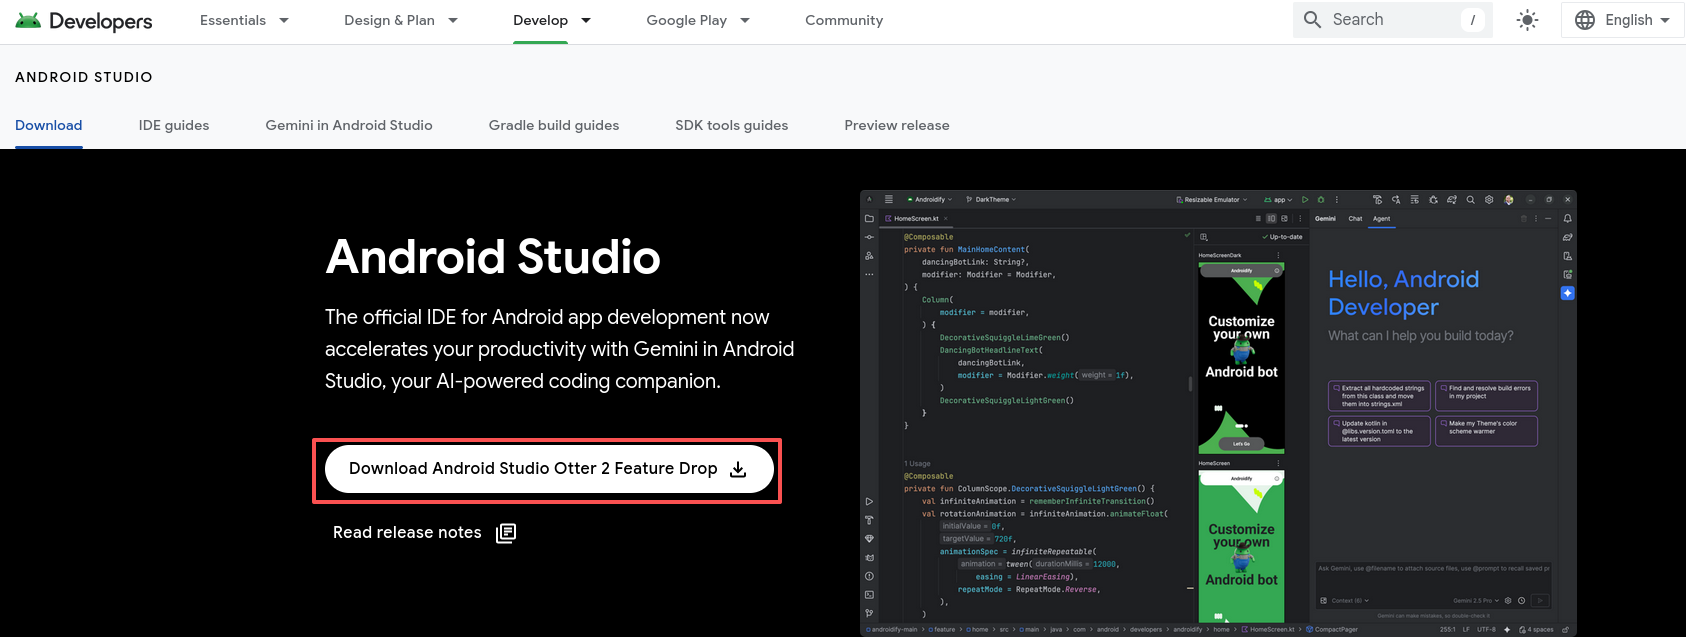
- Version selection: Prioritize downloading the *stable version* recommended by the official. The official download page will recommend a suitable IDE version based on the current operating system (such as the currently recommended "Android Studio Otter 2 Feature Drop"). You need to select the corresponding installation package according to the operating system (Windows/macOS/Linux).

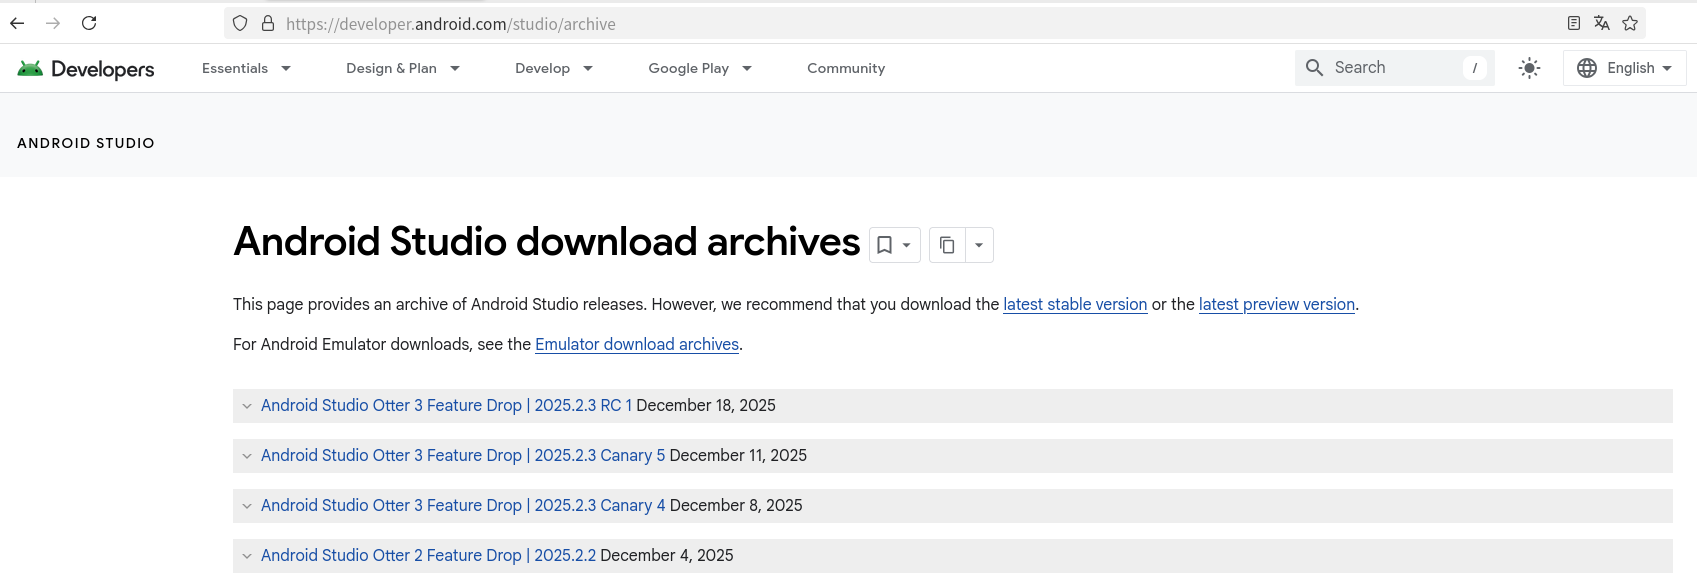
- If you are not used to the latest version, you can also find historical versions in the official download archives:
Android Studio installation process
Windows system
- Double-click the downloaded
.exeinstallation package to launch the installation wizard; - Check "Agree to the license agreement" and click "Next";
- Keep the default components (Android Studio + Android SDK), agree to all user agreements, and click "Next";
- Select a non-system drive as the installation path (it is recommended to reserve ≥20GB of space) and click "Next";
- After the installation is complete, click "Finish" to launch Android Studio.
macOS system
- Open the downloaded
.dmgimage file; - Drag the "Android Studio" icon to the "Applications" folder to complete the installation;
- Open Android Studio from the Launchpad, complete the system developer verification as prompted, and the subsequent installation steps are the same as above.
Linux system (taking the screenshot version as an example)
- Decompressed the downloaded
.tar.gzpackage to the target directory (e.g.,/opt/):tar -zxvf android-studio-2025.2.2.0-linux.tar.gz -C /opt/ - Enter the bin directory of the decompressed folder and execute the
studio.shscript to launch Android Studio;cd /opt/android-studio/bin/ ./studio.sh - The installation steps are the same as above.
Project creation
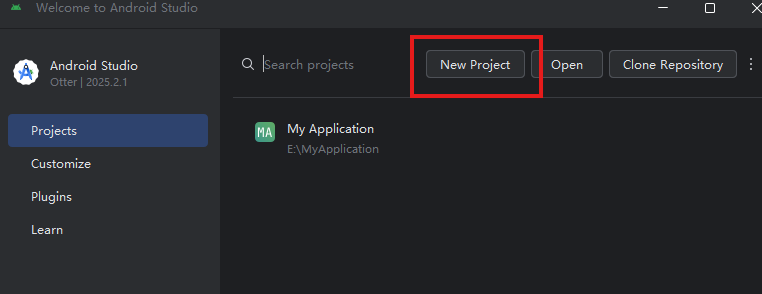
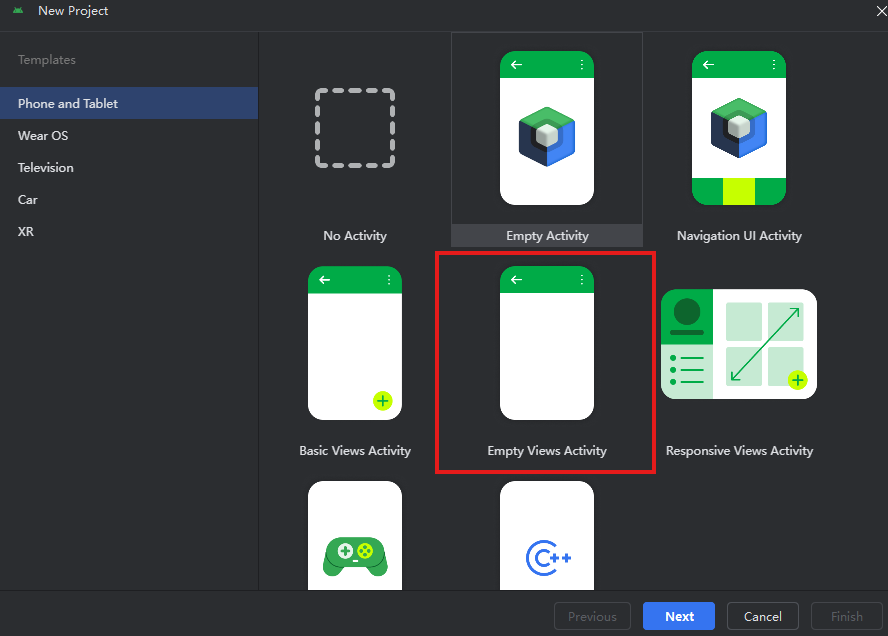
- Launch Android Studio: Click "New Project". When selecting a template, it is recommended to choose the cleanest Empty Views Activity template.
*Note: Selecting the "Empty Activity" template will generate a Compose UI project.*
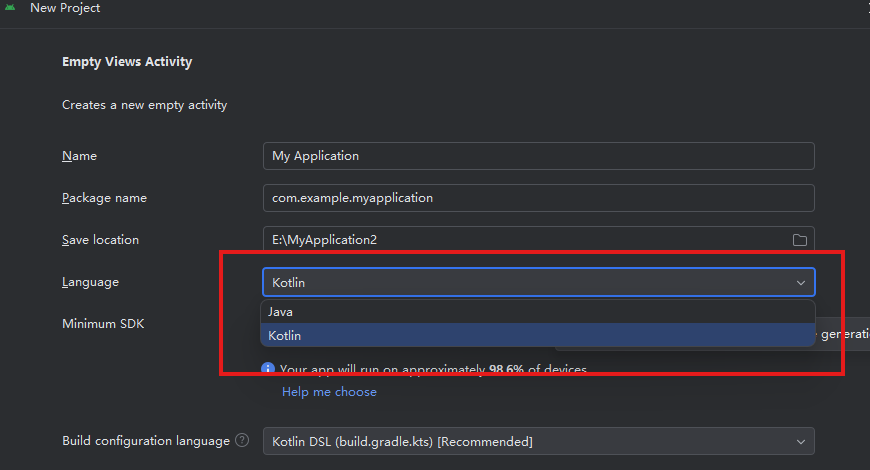
- Select language: Choose your development language here. Even if Kotlin is selected, Java can still be used within the project, as Android projects fully support mixed development with Java and Kotlin.
- Download dependencies & SDK: After completing the steps above, Android Studio will automatically open the project and download Gradle along with necessary dependencies. If prompted with "Missing SDK" on first launch, click "Next" to automatically download the Android SDK. Confirm the installation path and wait for the download to finish. The build time depends on network conditions.
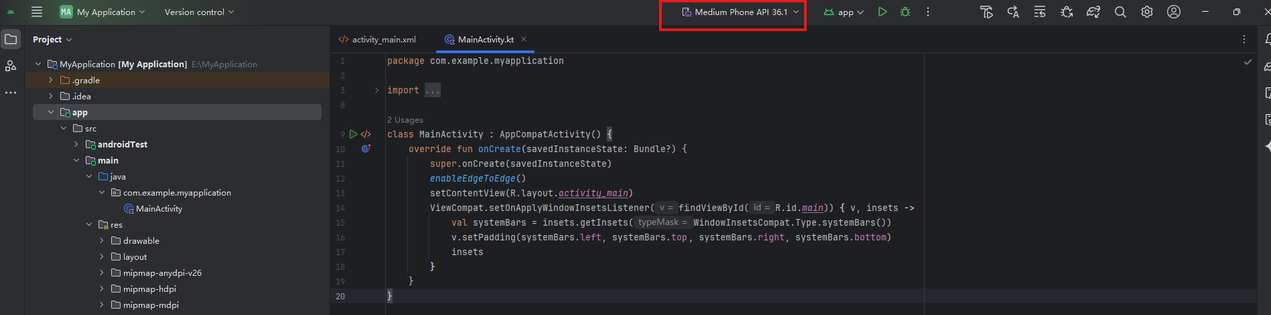
- Build & run: Once the Gradle build is complete, you will enter the main project interface where basic demo code has been generated. If there are no errors and the green "Run" button at the top is active, the build is successful. Click the button to compile and start the emulator. Alternatively, use the
adb connectcommand to run on a physical device.
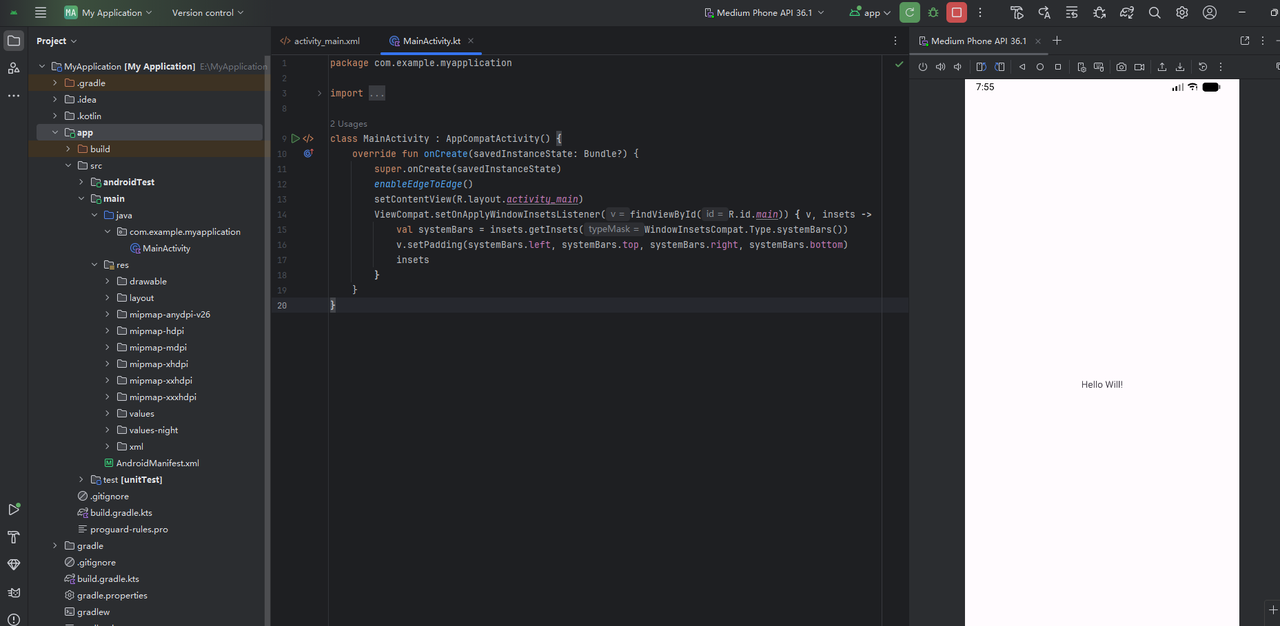
- Successful run: The application is now successfully running on the emulator, displaying a simple welcome screen. You are ready to start development.
APK debugging
APK packaging methods
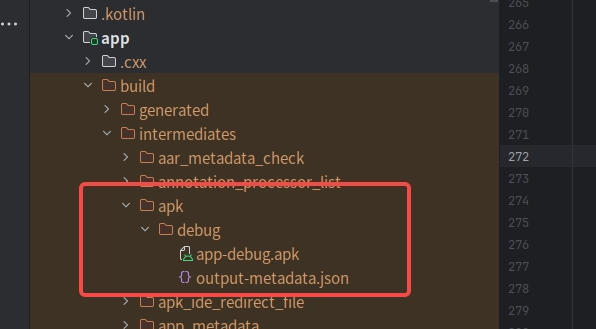
- Debug version: Clicking the green run button triggers Android Studio to compile, package, and install the the APK of Debug version (an emulator or physical device must be connected, otherwise a "no device" error will appear).
The generated APK is located at:project file path/app/build/intermediates/apk/debug/app-debug.apk
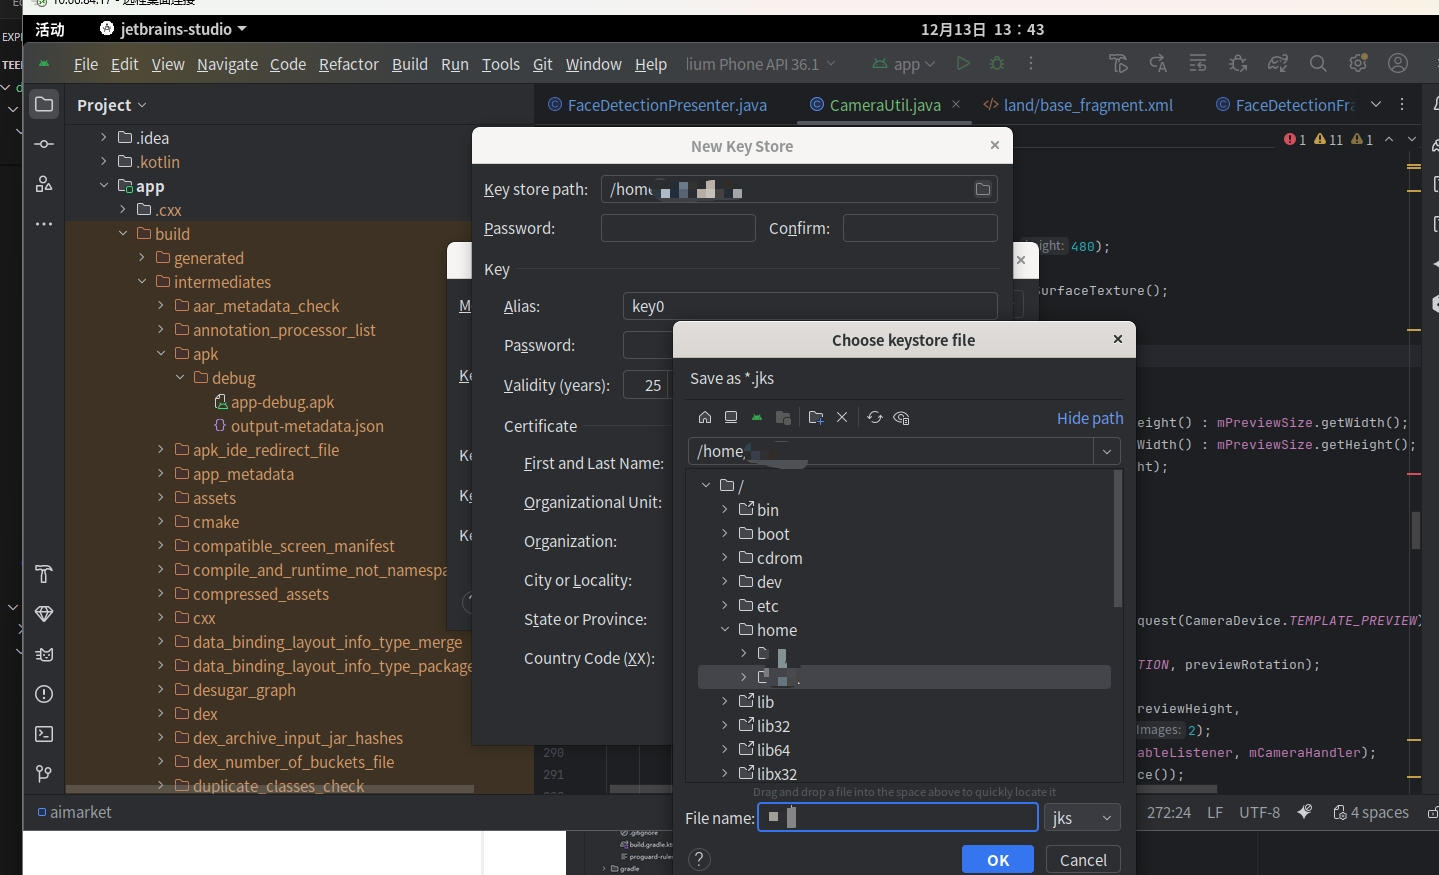
- Release (signed) version / manual build: If no emulator is connected, or if you want to package a signed Release version APK, go to Build > Generate Signed App Bundle or APK in the top menu bar. Select "Android App Bundle" or "APK" as needed and click "Next". You will be asked to select a keystore file (.jks or .keystore); if you don't have one, we will create a new one.
- Create keystore file: Name the keystore file (.jks by default) and choose a storage path.
- Set password: Set the password and Alias (customizable), then click OK to create it.
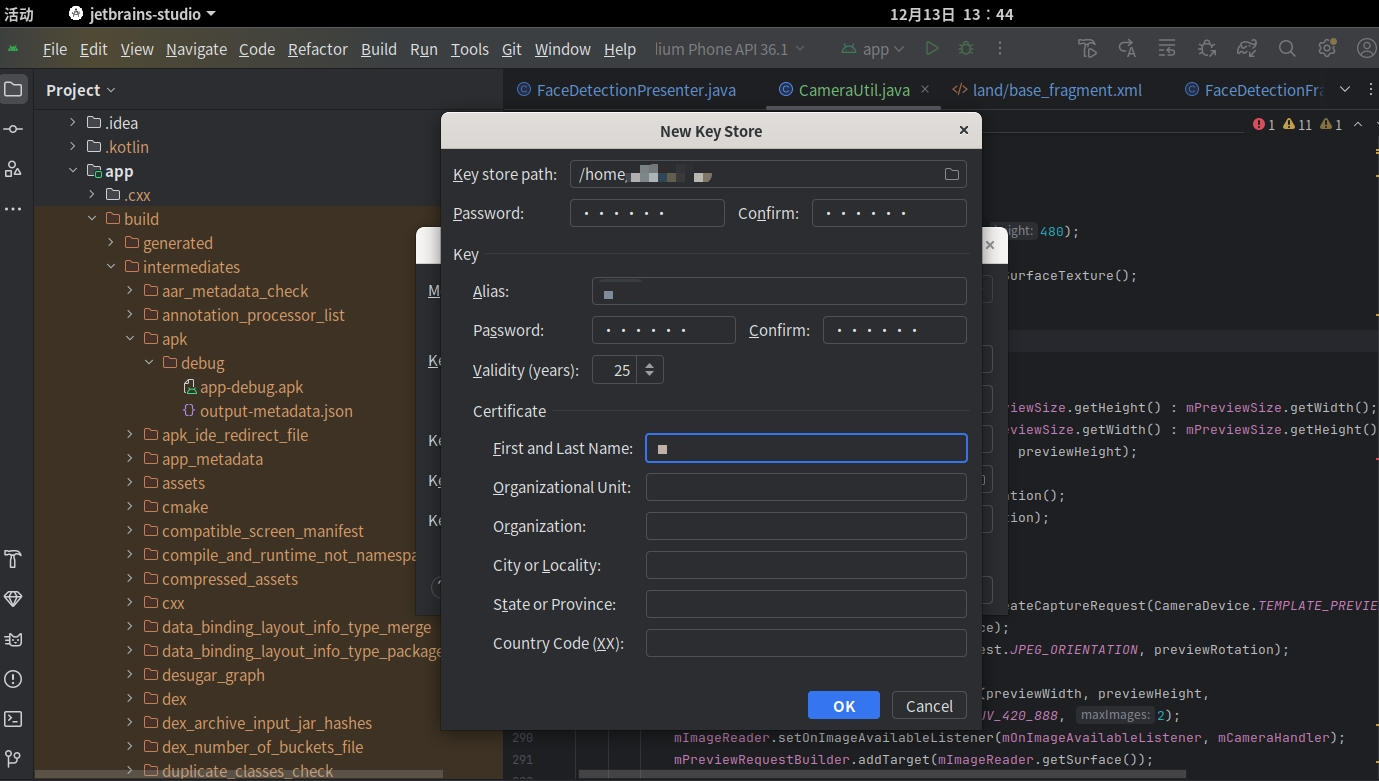
- Generate file: Select the "release" or "debug" build type. The system will use the current keystore file for packaging. The generated file is located in the
project file path/app/releasedirectory by default.
ADB tool environment configuration
ADB tool introduction
ADB (Android Debug Bridge) is the official Android debugging bridge tool provided by Google. It is one of the core tools for Android development and debugging. It facilitates a connection between a computer and an Android device (physical device or emulator) for operations such as debugging, file transfer, and command execution.
ADB environment variable configuration
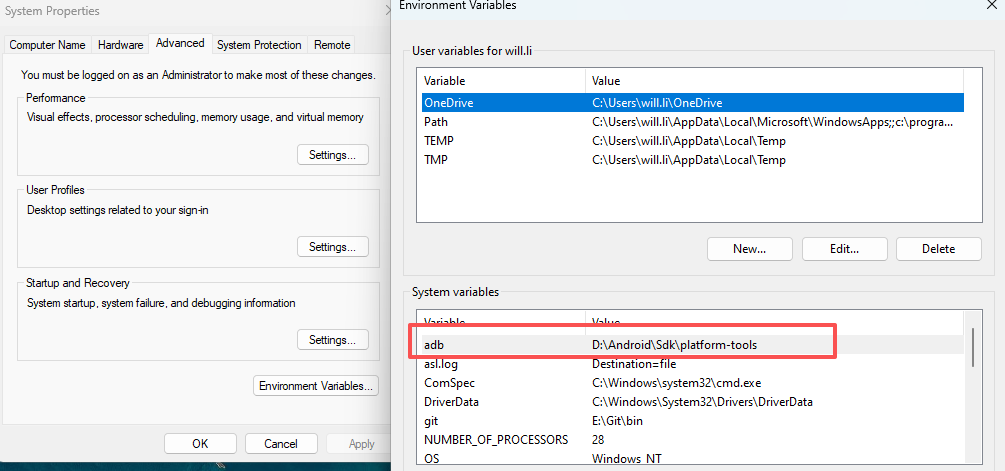
For Android developers, the ADB tool is very commonly used. To facilitate its use, we can configure it into the system environment variables. First, find the path of the ADB tool on your operating system. Generally, the Android SDK will be automatically downloaded during project building, and the ADB tool is located in the path where your SDK is stored. Here, the path of our ADB tool is C:\Users\username\AppData\Local\Android\Sdk\platform-tools
- Under Windows environment:Add the platform-tools directory (e.g., C:\Users\your username\AppData\Local\Android\Sdk\platform-tools) to the "Path" of the system environment variables.
- Linux/macOS:Execute echo 'export PATH=$PATH:~/Android/Sdk/platform-tools' >> ~/.bashrc (or ~/.zshrc) in the terminal, then restart the terminal.
- After configuration, execute adb in the terminal command line. If the output is normal, it means the configuration is successful.

Common ADB debugging commands
Basic commands
| Command | Function description |
|---|---|
adb help |
View ADB help and version information |
adb start-server |
Start the ADB service. Usually, it does not need to be executed manually; ADB commands will trigger it automatically |
adb kill-server |
Stop the ADB service. It can be used to restart the service when connection exceptions occur |
adb devices |
List all currently connected devices along with their serial numbers and statuses (device: connected; offline: no respond; no device: not connected) |
adb version |
Display the ADB version number |
Device connection management
| Command | Function description |
|---|---|
adb connect <IP:port> |
Connect to device via network (Wi-Fi) |
adb disconnect <IP:port> |
Disconnect wireless device |
adb pair <IP:port> <pairing code> |
Pair with device to enable secure wireless debugging (Android 11+) |
adb tcpip <port> |
Set device to listen for TCP/IP connections on specified port, preparing for wireless connection |
adb usb |
Switch connection mode back to USB |
Application management
| Command | Function description |
|---|---|
adb install <apk path> |
Install application |
adb install -r |
Overwrite existing application, retaining its data |
adb install -t |
Allow installation of applications with android:testOnly="true" |
adb install -d |
Allow version downgrade installation |
adb install -g |
Grant all runtime permissions immediately after installation |
adb install-multiple <apk1> <apk2> |
Install split APK (App Bundle) |
adb -s <device serial number> install ... |
Specify target device for installation when multiple devices are connected |
adb uninstall <package name> |
Uninstall application |
adb uninstall -k <package name> |
Uninstall application but retain data and cache directories |
View application information and applications interaction function
| Command | Function description |
|---|---|
adb shell pm list packages |
List package names of all applications on device |
adb shell pm list packages -3 |
List only third-party applications |
adb shell pm list packages -s |
List only system applications |
adb shell pm clear <package name> |
Clear application data and cache |
adb shell am start -n <package name>/<Activity name> |
Start an Activity |
adb shell am force-stop <package name> |
Force stop all processes and services of an application |
File operations
| Command | Function description |
|---|---|
adb pull <device path> <PC path> |
Copy files or directories from device to computer |
adb push <PC path> <device path> |
Copy files or directories from computer to device |
adb sync |
Synchronize and update specific partition data on device |
System operations and information check
| Command | Function description |
|---|---|
adb shell getprop ro.product.model |
View device model |
adb shell wm size |
View screen resolution |
adb shell wm density |
View screen density |
adb shell dumpsys battery |
View battery status information |
adb reboot |
Reboot device |
adb reboot recovery |
Reboot to Recovery mode |
adb root |
Restart adbd daemon with root privileges |
adb shell input keyevent <keycode> |
Simulate key press (e.g., 3=HOME, 4=Back, 24=Volume+, 26=Power) |
adb shell input tap <x> <y> |
Simulate a tap at screen coordinates |
adb shell input swipe <x1> <y1> <x2> <y2> |
Simulate swipe gesture |
adb shell input text <text> |
Input text (note: Chinese characters are not supported) |
Log check
| Command | Function description |
|---|---|
adb logcat |
View system logs |
adb logcat -c |
Clear old logs |
adb logcat -v time > log.txt |
Output logs with timestamps to file |
adb logcat *:W |
Display only logs with Warning level and above |
adb shell dmesg |
View kernel logs |
APK debugging
Emulator debugging
Note: Generally, Android Studio creates a default emulator when you first run a project. If you need a device with a specific Android version or resolution, you must create it manually.
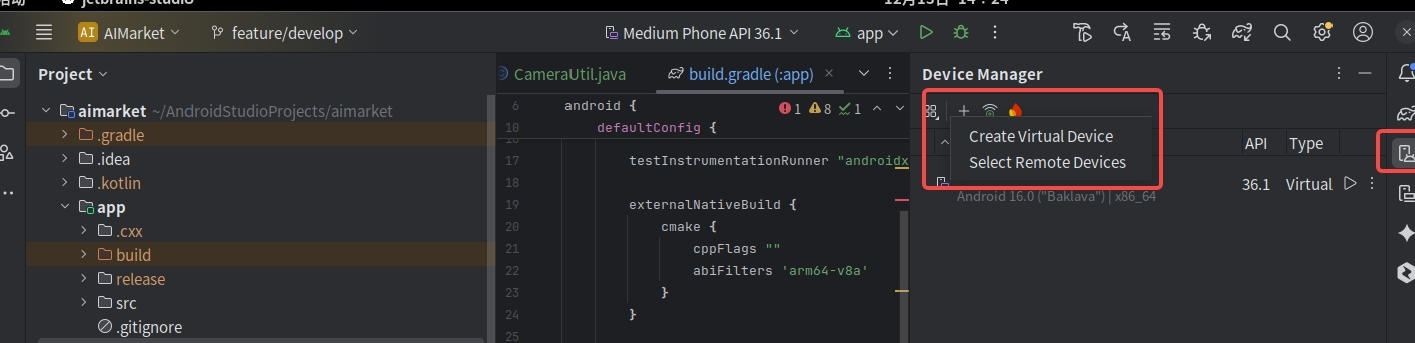
Steps:
- Locate and click Device Manager in the Android Studio toolbar.
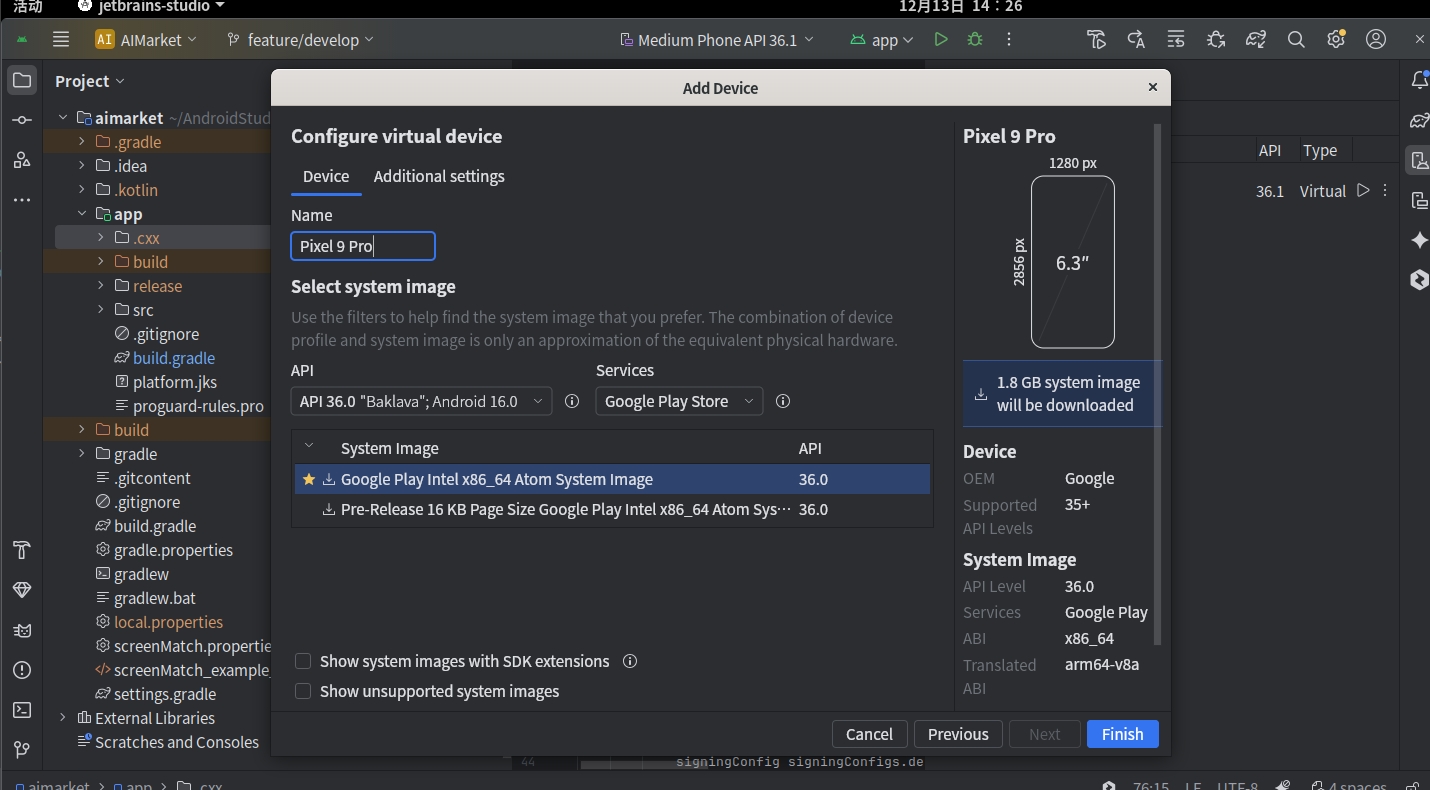
- Click Create Virtual Device.
- Select the desired device configuration and click Next to finish.
Physical device debugging
USB connection configuration
Steps:
- Hardware connection: Connect your phone to the computer using a USB cable that supports data transfer.
- Enable developer mode:
- Go to phone "Settings" -> "About Phone".
- Tap "Build Number" 7 times continuously until you see the prompt "You are now a developer".
- Enable USB debugging:
- Return to the Settings menu and find the new "Developer options" (Location varies by phone model, often under "System" or "Additional Settings").
- Enter and enable "USB debugging".
- Authorize if a prompt appears on the phone screen.

Verification:
Enter adb devices in the terminal. If the device serial number appears and the status is device, the connection is successful.

LAN connection
Wireless connectivity allows you to break free from cables, though typically you need to use a USB cable for the initial setup. Methods may vary depending on the Android versions.
- Connection steps:
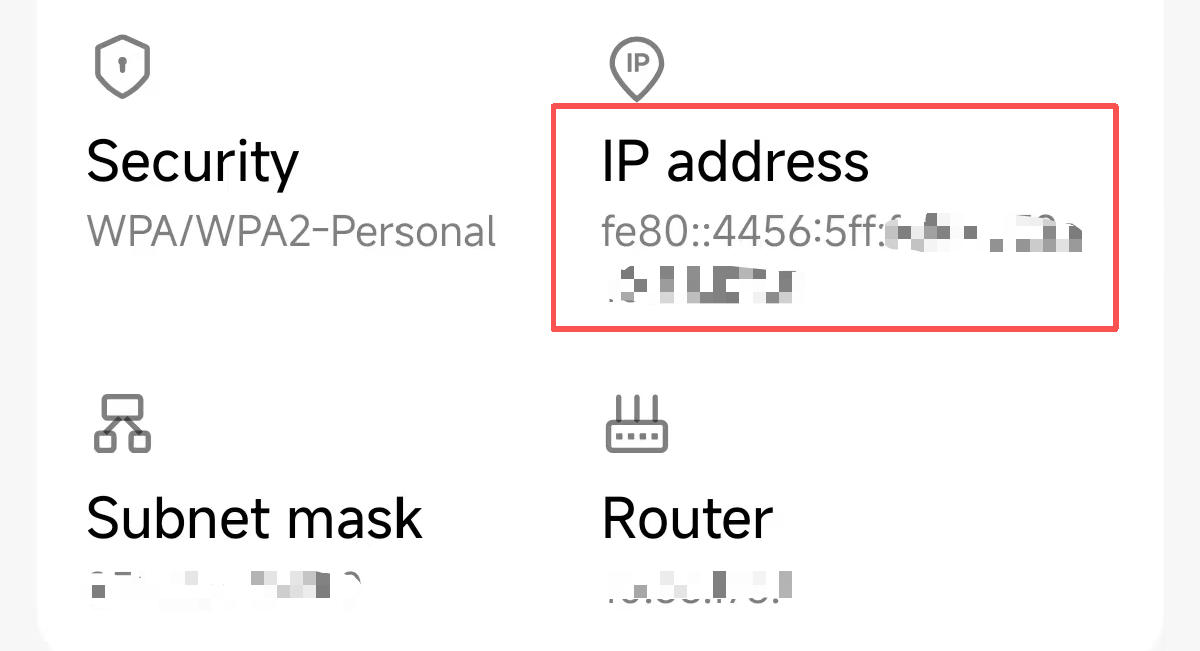
- Find the phone's current IP address (usually found in "Settings" -> "About Phone" or "Wi-Fi Settings").
- Enter the command
adb connect <IP_Address>in the terminal. - Verification: If the terminal prompts
connected to ..., or ifadb devicesshows the device starting with an IP address and the status isdevice, the connection is successful.