

 English
FGM842 Module Flash Tutorial
Prerequisites
Hardware Requirements
- A computer with USB ports
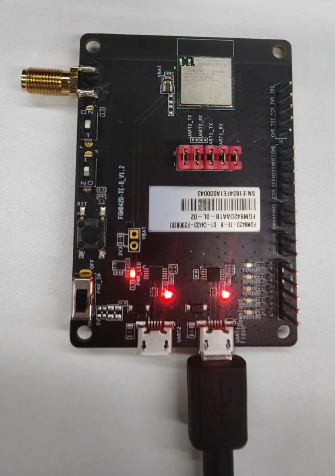
- FGM842D-TE-B development board
- USB-to-UART converter or MicroUSB cable also be OK.
- Firmware for FGM842D module
Software Tools
- Flashing tool:
BKFILlatest version, for details refer to the BKFIL documentation - Drivers: CH340G driver download link
- Firmware package:
FGM842D_XXX.bin, the latest version refer to FGM842D firmware download
Hardware Connection
Connect the FGM842D-TE-B development board to your computer using a USB-to-UART converter or a MicroUSB cable.
Flash the FGM842D module using UART1(Also used for AT command) and UART2(Used for debug). The connection is shown below:
Install the CH340G driver if you haven't done so already.
Commonly, the driver is automatically installed when you connect the USB-to-UART converter to your computer. If not, download and install the driver from the provided link.
Ensure the FGM842D module is powered on and connected properly to the development board.
Flashing Steps
- Download the latest version of the BKFIL flashing tool from the official website.
- Open the
BKFILtool on your computer.
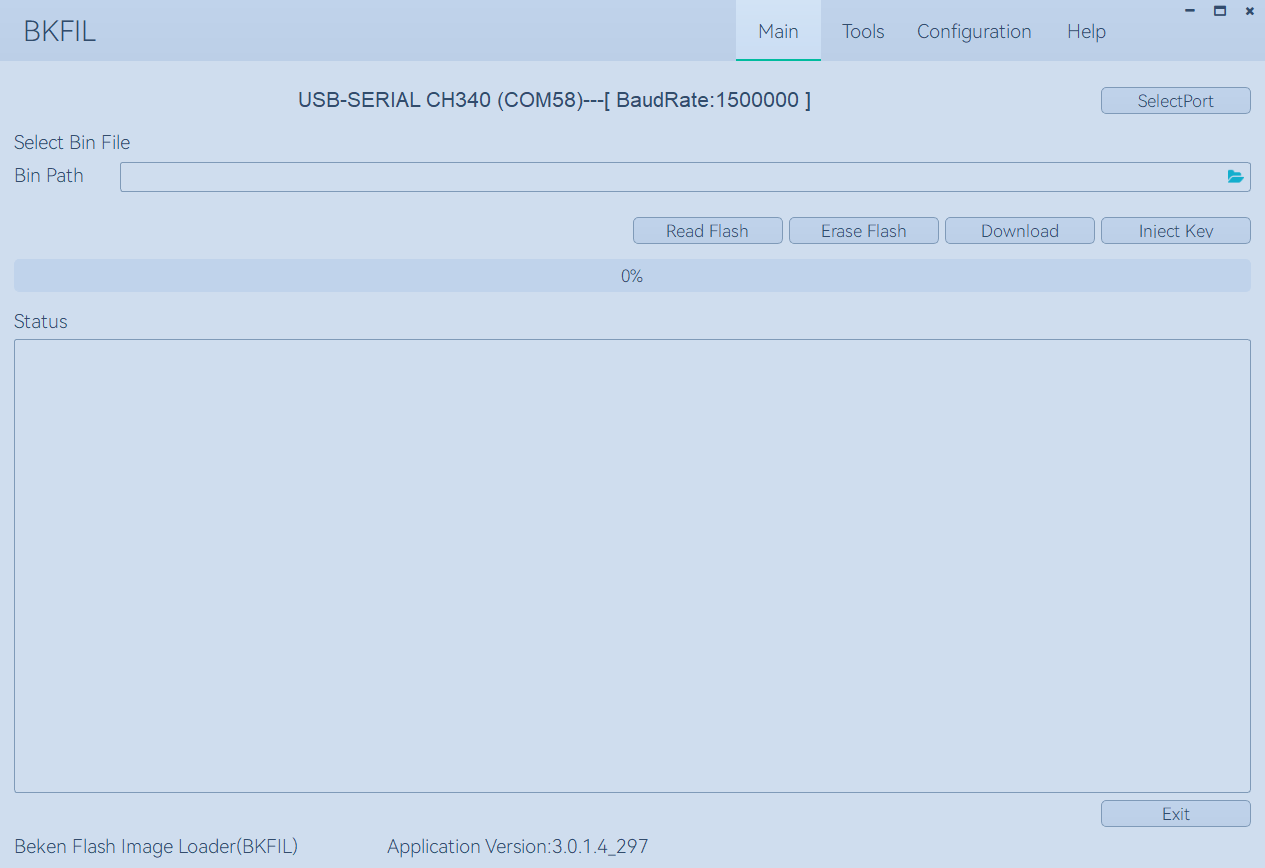
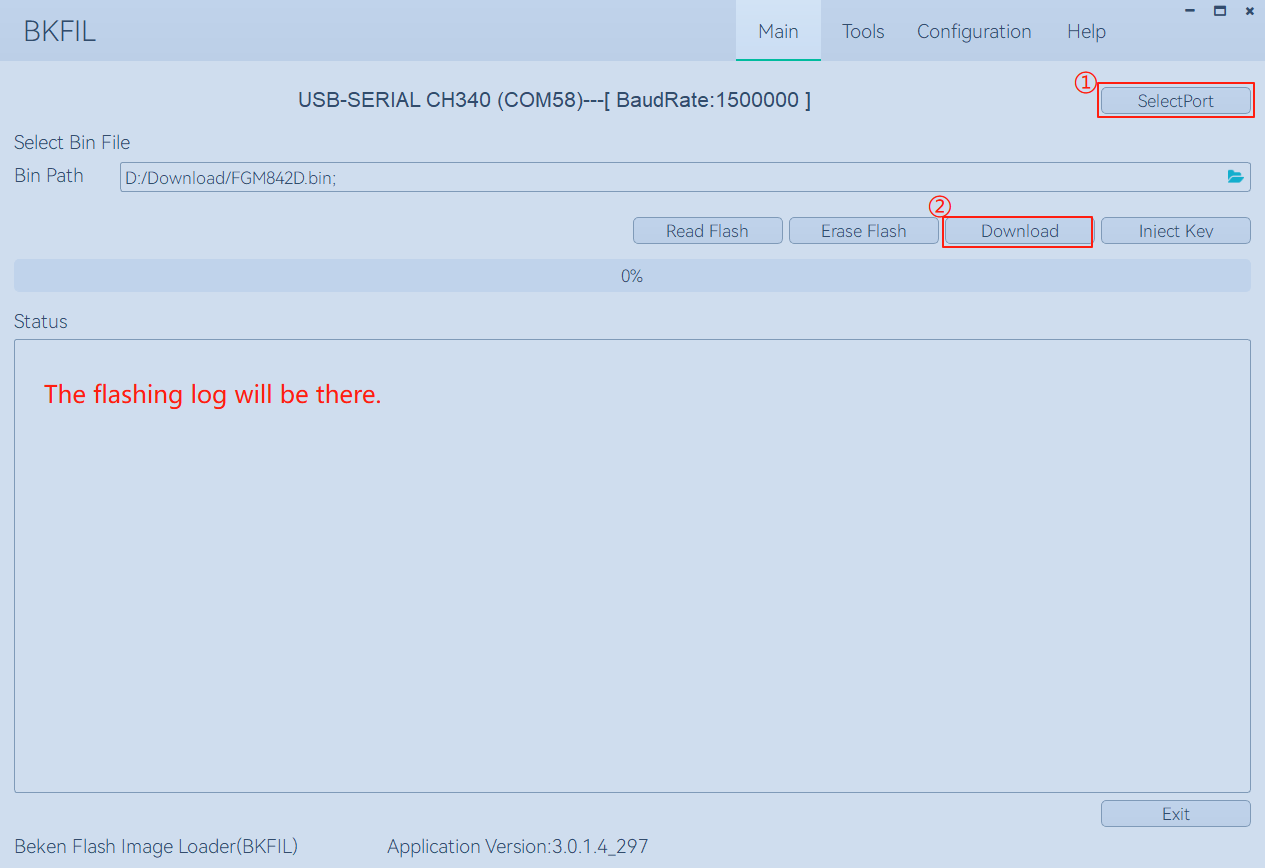
- Select the firmware file (
FGM842D_XXX.bin) in the flashing tool. - Set the correct COM port for the USB-to-UART converter in the flashing tool.
- Click the "Download" button in the flashing tool to begin the flashing process.
- Once the flashing is complete, you should see a success message in the window.
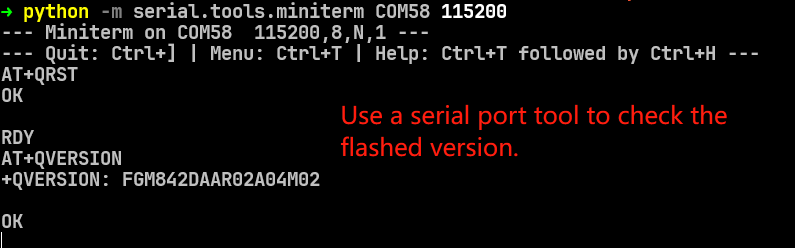
- Verify the firmware is running correctly by checking the module's functionality.
Use CommandLine to Flash
If you prefer to use the command line for flashing, BKFIL also supports command line operations. Here’s how to do it:
The bk_loader.exe is located in the BKFIL application directory. You can add the path to your system's environment variables or navigate to the directory in your command line interface.
Refer to the official documentation for the command line syntax and options, the commonly used command is as follows:
Help Command
# Display help information for bk_loader
bk_loader.exe --help

# Download help information for bk_loader
bk_loader.exe download --help

# Erase help information for bk_loader
bk_loader.exe erase --help

# Read help information for bk_loader
bk_loader.exe read --help

# Writekey help information for bk_loader
bk_loader.exe writekey --help
Example Command
| Mode | Command | Description |
|---|---|---|
| Download | bk_loader download –p 7 –i all.bin |
Use port 7 to download all.bin with default baud rate (1.5M) |
| Download | bk_loader download –p 7 –b 2000000 –i all.bin |
Use port 7 to download all.bin with custom baud rate (2M) |
| Read | bk_loader read –p 7 –i all.bin |
Use port 7 to read flash contents based on all.bin template |
| Read | bk_loader read –p 7 --custom_read_path custom_read.json |
Custom read operation using JSON config file |
| Erase | bk_loader erase –p 7 –i all.bin |
Use port 7 to erase flash regions defined in all.bin |
| Erase | bk_loader erase –p 7 --custom_erase_path custom_erase.json |
Custom erase operation using JSON config file |
| Key Injection | bk_loader writekey -p 11 –secureboot --aes_key_path aes_key_demo.json --random_key_path random_key.json |
Secure key injection: • aes_key_path: AES key file• random_key_path: Random key file |