
Remote Access to PI-SG565D via VNC
2025-10-29
Prerequisite:
- Wired Network: Connect PI-SG565D to the network. PI-SG565D will automatically obtain an IP address (via the DHCP protocol).
Linux system
The Linux system already has built-in tigervnc server service, which can be used directly.
1. Set VNC password
Enter the following command on the device terminal:
#Follow the prompts to enter the password twice in a row
mkdir ~/.vnc
vncpasswd -f > ~/.vnc/passwd
2. Create a startup script
Enter the following command on the device terminal:
# Create Script
cat > start_xvnc.sh << 'EOF'
#!/bin/bash
echo "Cleaning up previous sessions..."
pkill -9 -f xfce
pkill -9 -f xfwm4
pkill -9 -f Xvnc
sleep 2

echo "Starting VNC server..."
Xvnc :1 -geometry 1280x720 -depth 24 -rfbport 5901 -rfbauth ~/.vnc/passwd &
sleep 5

export DISPLAY=:1

echo "Starting window manager (without compositing)..."
xfwm4 --display=:1 --compositor=off &
WM_PID=$!
sleep 3

if ps -p $WM_PID > /dev/null;  then
echo "Window manager started successfully (PID: $WM_PID)"
else
echo "Failed to start window manager"
exit 1
fi

echo "Starting XFCE4 session..."
startxfce4 &
sleep 5

echo "Desktop components status:"
ps aux | grep -E "(xfce|xfwm|xfsettings|xfdesktop|xfce4-panel)" | grep -v grep
EOF


# Modify permissions
chmod +x start_xvnc.sh
3. Management commands
# Start VNC
./start_xvnc.sh

# Stop VNC
pkill -9 -f xfce
pkill -9 -f xfwm4
pkill -9 -f Xvnc

# View status
ps aux | grep vnc
netstat -tln | grep 59
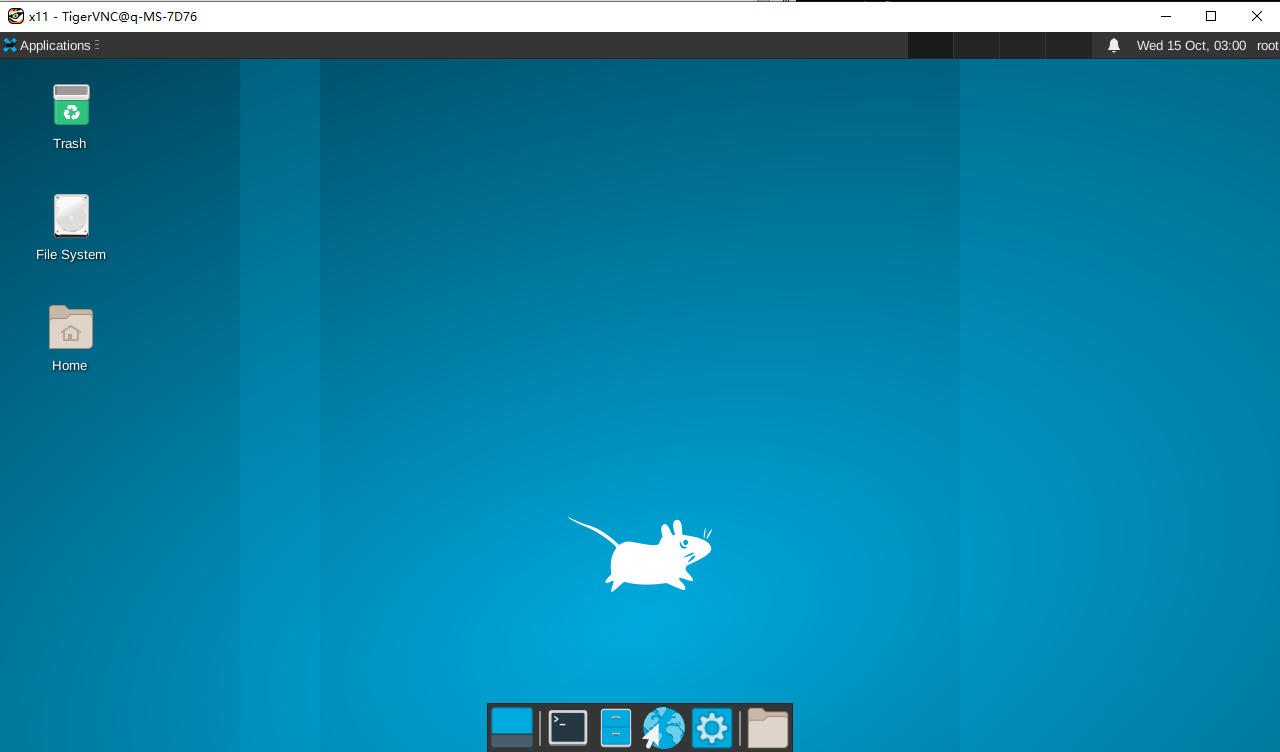
4. Test connection
# Connect from another computer, enter the password as prompted to log in
# For example, vncviewer 10.66.82. *: 5901
Vncviewer<Device IP Address>: 5901
- After successful connection, you will see the following screen
The Debian system
Due to compatibility issues with the underlying Wayland protocol, the Debian system can only adopt the Xvfb+x11vnc solution at present.
1. Install necessary software
Use the debug serial port or adb shell to enter the terminal window and enter the following command:
sudo apt update
sudo apt install -y xvfb xfce4 x11vnc
- When encountering an option, simply press the
Enterkey
2. Set VNC password
Enter the following command on the device terminal:
# Follow the prompts to enter the password twice in a row
mkdir -p ~/.vnc
x11vnc -storepasswd
3. Create a startup script
Enter the following command on the device terminal:
# Create Script
cat > ~/vnc_start.sh << 'EOF'
#!/bin/bash
echo "=== Starting Reliable VNC Server ==="
pkill Xvfb
pkill x11vnc
pkill startxfce4
sleep 2
echo "1. Starting virtual display..."
Xvfb :99 -screen 0 1280x720x24 -ac &
sleep 5
echo "2. Setting display environment..."
export DISPLAY=:99
echo "3. Starting desktop environment..."
startxfce4 &
sleep 10
echo "4. Starting VNC server..."
x11vnc -display :99 -forever -shared -rfbauth ~/.vnc/passwd -rfbport 5900 -bg
sleep 3
echo "=== Verification ==="
echo "VNC Process: $(ps aux | grep x11vnc | grep -v grep | wc -l)"
echo "Port Status: $(ss -tlnp | grep 5900 | wc -l)"
echo ""
echo " VNC SERVER READY!"
echo " Connect to: $(hostname -I | awk '{print $1}'):5900"
echo " No password required"
echo " Full desktop environment available"
EOF


#Modify permissions
chmod +x ~/vnc_start.sh
- Set login password, x11vnc -display :99 -forever -shared -rfbauth ~/.vnc/passwd -rfbport 5900 -bg
- Do not set a login password, x11vnc -display :99 -forever -shared -nopw -rfbport 5900 -bg
4. Switch x11 sessions
# Edit GDM configuration to force the use of X11
sudo nano /etc/gdm3/daemon.conf

# Remove comments from the file (i.e. remove the first #) and do not use Wayland protocol
WaylandEnable=false

# Restart GDM
sudo systemctl restart gdm3
- After GDM configuration forces the use of X11, the display screen connected to the device will not be able to display
5. Management commands
# Start VNC
./vnc_start.sh

# Stop VNC
pkill Xvfb
pkill x11vnc

# View status
ps aux | grep -E "(Xvfb|x11vnc)"
ss -tlnp | grep 5900
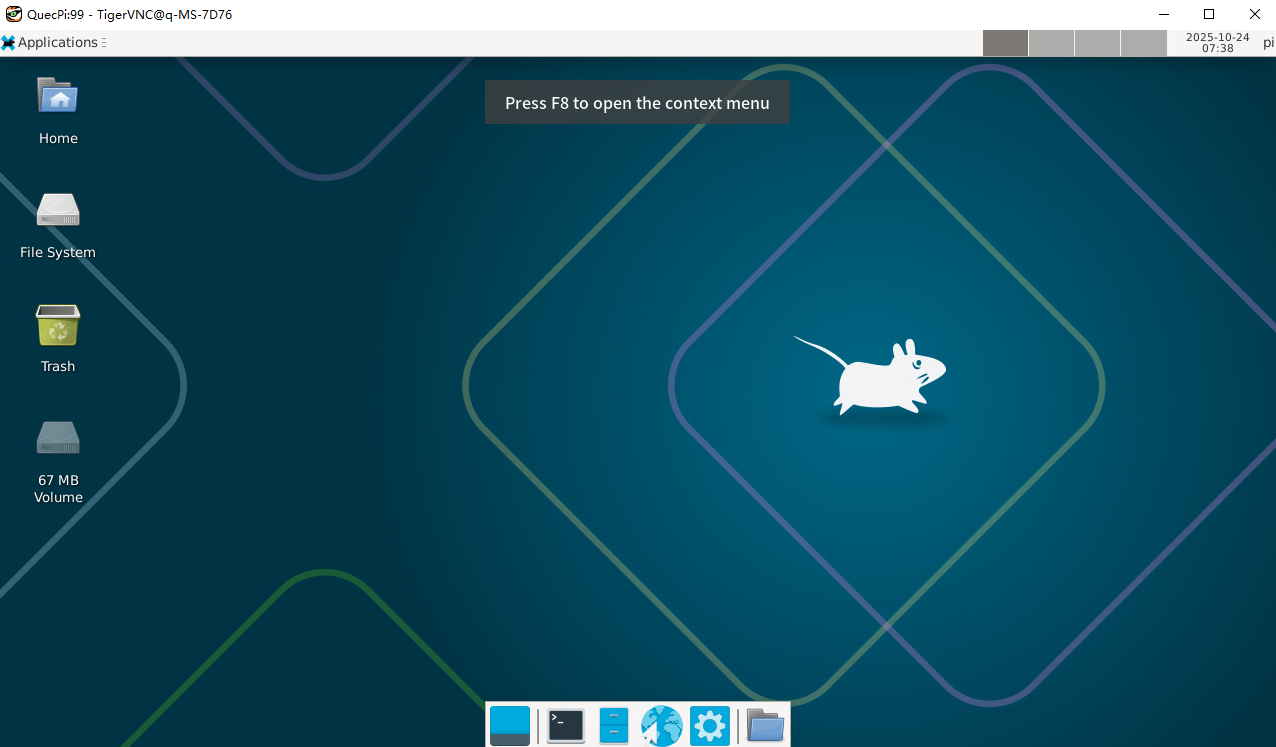
6. Test connection
# Connect from another computer, enter the password as prompted to log in
# For example, vncviewer 10.66.82. *: 5900
Vncviewer<Device IP Address>: 5900
- After successful connection, you will see the following screen
7. Restore display
After GDM configuration forces the use of X11, the display screen connected to the device will not be able to display. To restore the display, enter the following command:
#Edit GDM configuration
sudo nano /etc/gdm3/daemon.conf

#Add comments in the file (i.e. add the first #) using Wayland protocol
#WaylandEnable=false

#Restart GDM
sudo systemctl restart gdm3
- There may still be bugs in the current testing, and the mouse icon may not be found after recovery