
MIPI Camera - imx219 Testing
QuecPi Alpha single-board computer supports MIPI interface cameras. Here, we take a imx219 CSI interface CMOS camera from Waveshare as an example for testing.
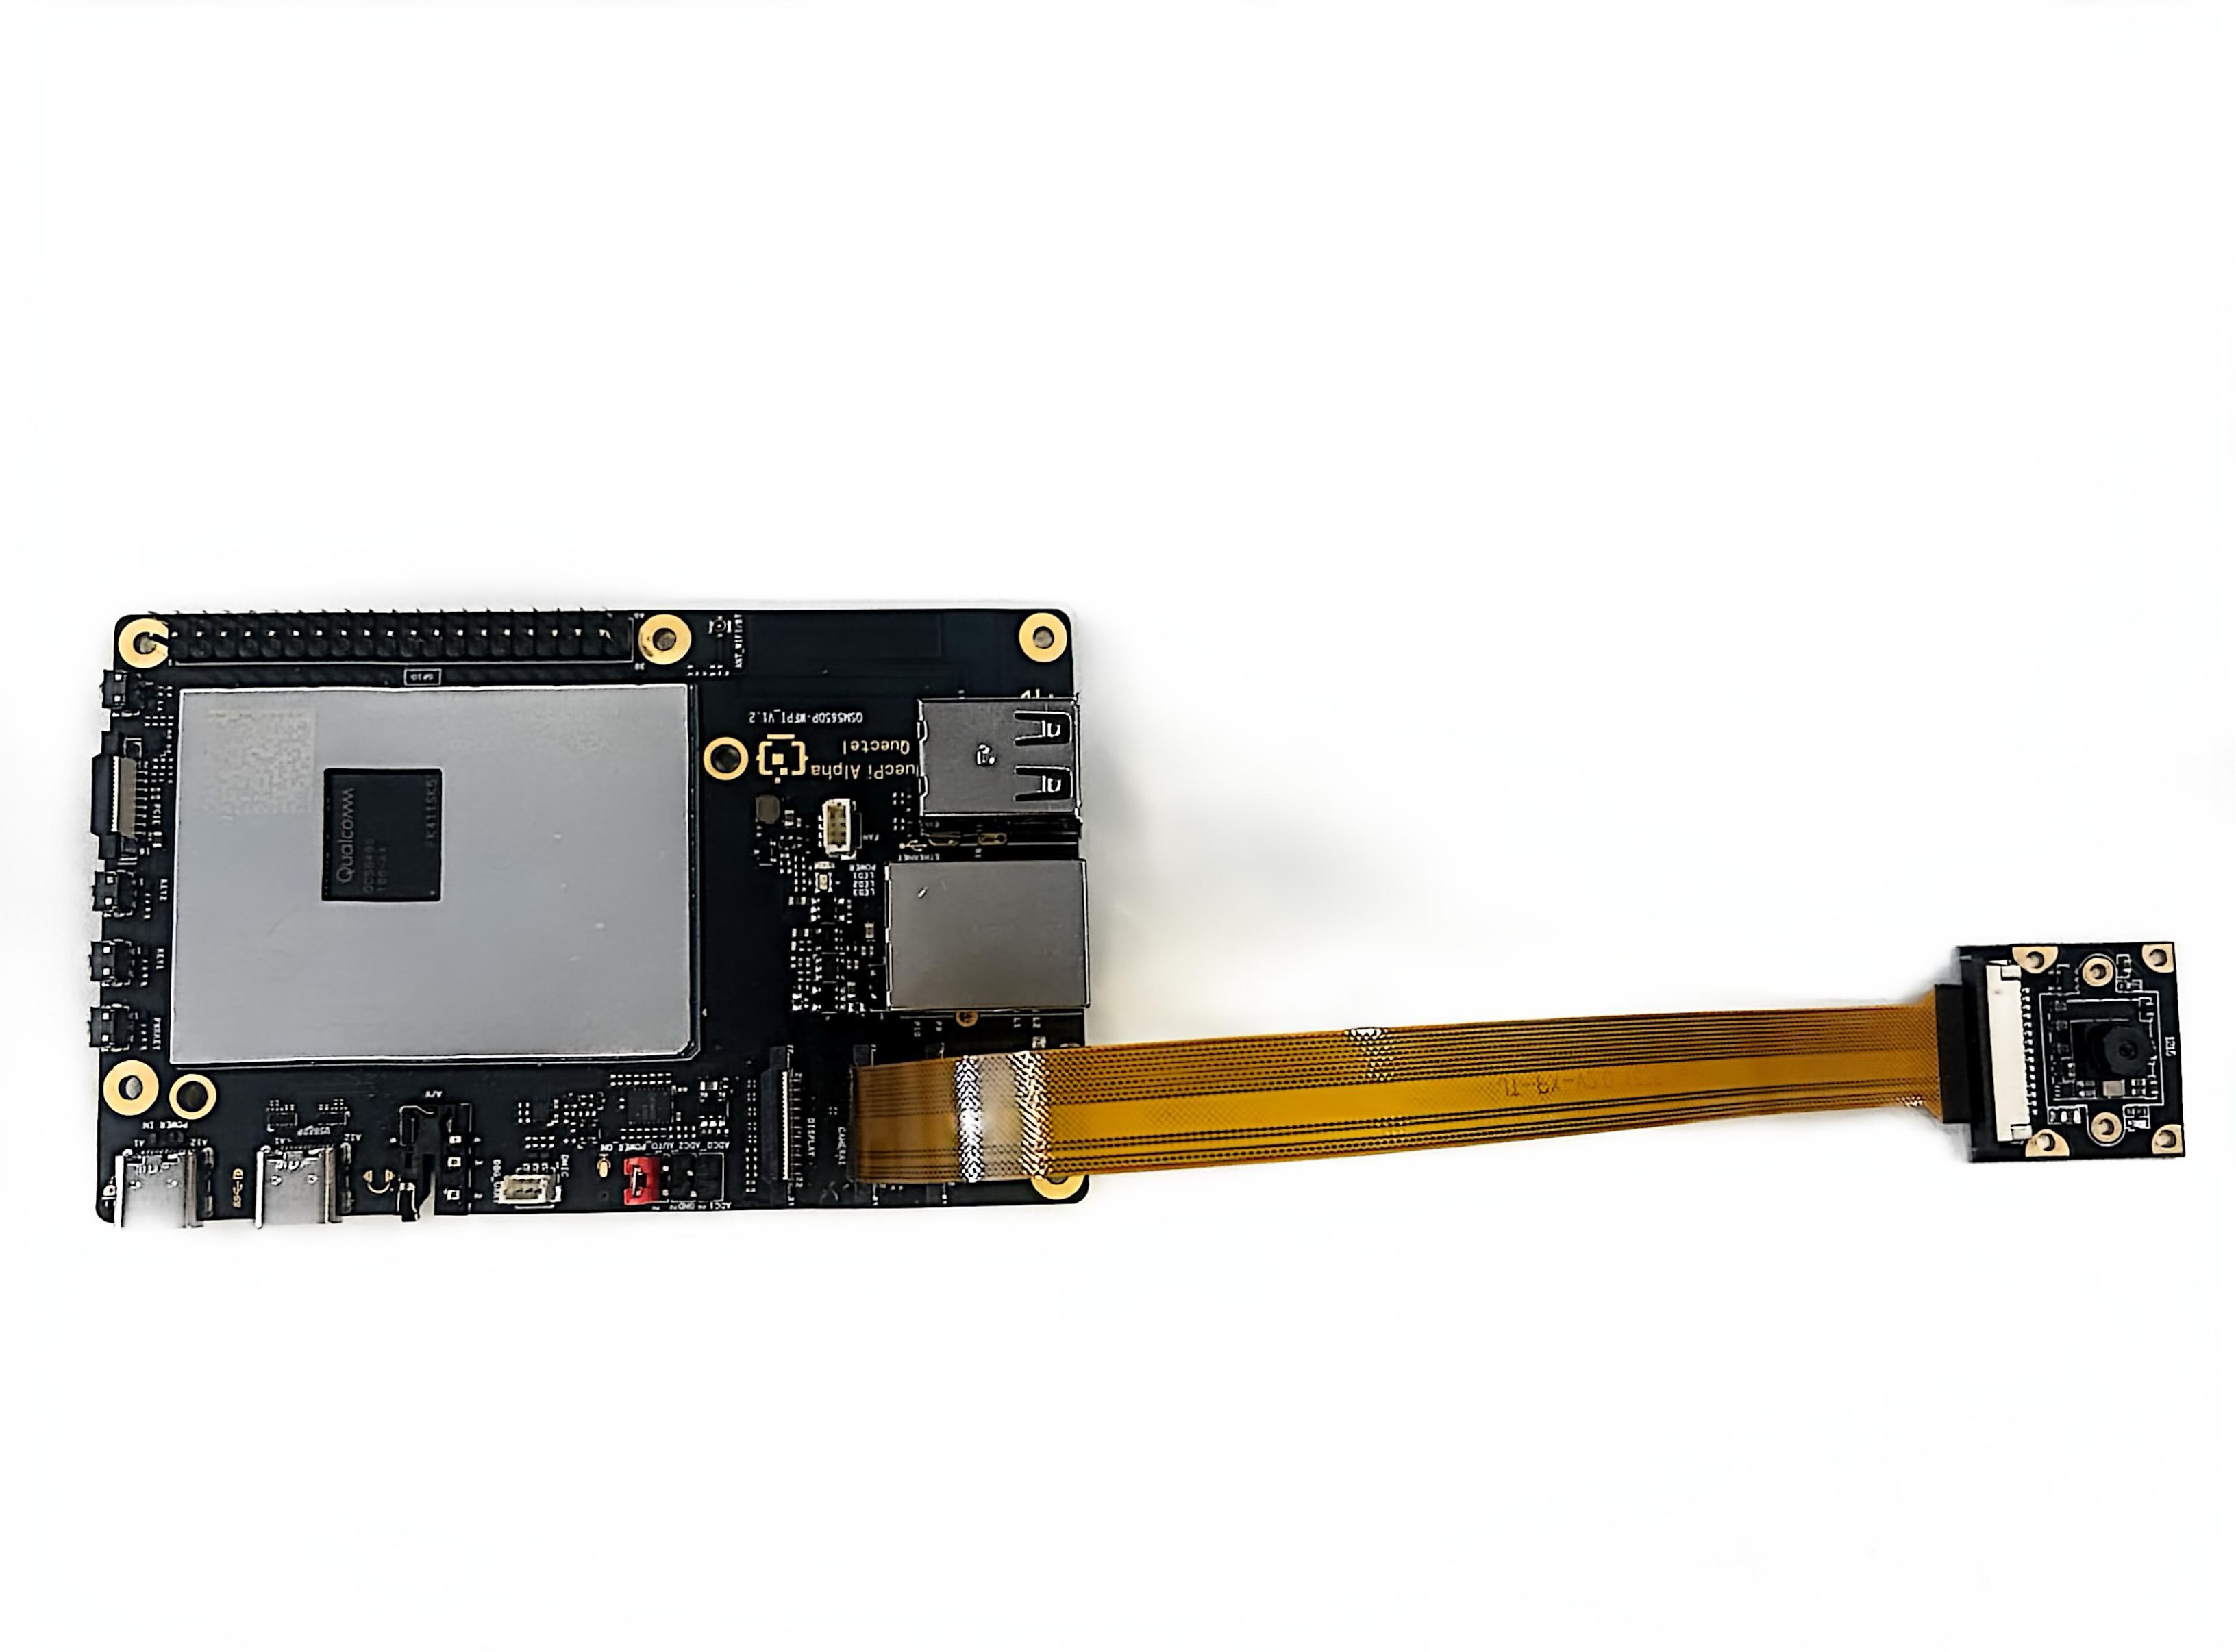
Camera Connection
Connect as shown in the figure below. When connecting, pull up the black latch part of the connector, Insert the FPC cable into the first CSI card slot. Note that the metal contact surface should face the inner metal contact surface of the board. Press the latch and confirm that the FPC cable is stable and not loose.
Precondition
Run the following command in SSH terminal:
mount -o rw,remount /
export XDG_RUNTIME_DIR=/dev/socket/weston
export WAYLAND_DISPLAY=wayland-1
Single Camera Stream Startup
- Run the following command in the device terminal.
gst-launch-1.0 -e qtiqmmfsrc name=camsrc ! 'video/x-raw(memory:GBM),format=NV12,width=1280,height=720,framerate=30/1' ! fakesink
- This example shows how to start the camera with the 720p@30 FPS configuration. Frames from the camera sensor are discarded by fakesink. If the gst pipeline state changes to “PLAYING” as shown below, it means the camera is running. Since this command dumps camera frames to fakesink, nothing will be saved on the device.
gbm_create_device(187): Info: backend name is: msm_drm
Setting pipeline to PAUSED ...
Pipeline is live and does not need PREROLL ...
Setting pipeline to PLAYING ...
New clock: GstSystemClock
- If you want to display the captured image in real-time, you need to connect the HDMI screen in advance and execute the following command:
gst-launch-1.0 -e qtiqmmfsrc name=camsrc camera=0 ! 'video/x-raw(memory:GBM),format=NV12,width=1280,height=720,framerate=30/1' ! waylandsink
- Camera=0 indicates the use of the first CSI interface camera, camera=1 indicates the use of the second CSI interface camera
- If you want to display in full screen, add
fullscreen=trueat the end of the command - If you want to stop the camera streaming, press
CTRL+C
Preview+Video Recording
- Run the following command in the device terminal:
gst-launch-1.0 -e qtiqmmfsrc name=camsrc camera=0 video_1::type=preview ! 'video/x-raw,format=NV12,width=1280,height=720,framerate=30/1',compression=ubwc,interlace-mode=progressive,colorimetry=bt601 ! tee name=t ! queue ! waylandsink fullscreen=true t. ! queue ! v4l2h264enc capture-io-mode=5 output-io-mode=5 extra-controls="controls,video_bitrate=6000000,video_bitrate_mode=0;" ! queue ! h264parse ! mp4mux ! filesink location=/opt/mux_avc.mp4
- This command starts the camera with the 720p 30 FPS configuration and saves it as a video file after h264 video encoding. If the gst pipeline state changes to “PLAYING”, it means the camera is running.
- If you want to stop the camera recording, press
CTRL+C. - The MP4 file is saved in the /opt/ directory.
Command description:
! is a connection symbol used to connect the output of the previous element to the input of the next element.
gst-launch-1.0This is the command-line tool of GStreamer used to start a GStreamer pipeline. The -e parameter means to exit when the pipeline ends instead of continuing to run.qtiqmmfsrc name=camsrc camera=0A camera source plugin dedicated to the Qualcomm platform, capturing video from device camera=0 (main camera).video_1::type=previewThis is the attribute configuration of the qtiqmmfsrc element. For the video_1 stream (different cameras may output multiple streams, such as preview stream, capture stream, etc.), set its type to preview (preview stream), indicating that the subsequent processing is for the video stream used for real-time preview scenes. Generally, parameters such as frame rate and resolution will be adapted to the preview requirements.video/x-raw,format=NV12,width=1280,height=720,framerate=30/1Video/x-raw (raw video), NV12 (YUV 4:2:0, single plane format, commonly used in video encoding), resolution 1280×720 (720p), frame rate 30fps.compression=ubwc,interlace-mode=progressive,colorimetry=bt601Enable Qualcomm's UBWC (Ultra Bandwidth Compression) technology to reduce memory bandwidth requirements through hardware compression, with line by line scanning (non interlaced) and a color space of ITU-R BT.601 (applicable to standard definition video).tee name=tThe splitter (tee) element is used to copy one input data into multiple outputs, facilitating multiple different processing of the same video stream (one for preview display and the other for encoding and storage). Name this tee element as t, and other branches will reference it by name to obtain the video streamqueue ! waylandsink fullscreen=truequeue:Queue element, used to create a buffer queue in pipeline, which decouples upstream and downstream elements and enables asynchronous processing. It can alleviate the problem of inconsistent processing speed between upstream and downstream, avoiding blocking or frame loss caused by slow processing by one party.
Waylandink: Output the sink element, used to render and display video images on the screen in the Wayland display server environment.
Fullscreen=true: Set waylandsink to display the video screen in full screen mode.
t. ! queuet.:By The syntax references the tee element previously named t to obtain the video stream for subsequent processing.
queue: Reuse queue elements, buffer data, and ensure smooth encoding and other processes.
v4l2h264enc capture-io-mode=5 output-io-mode=5 extra-controls="controls,video_bitrate=6000000 video_bitrate_mode=0;"Use DMABUF (Direct Memory Access Buffer) for input to optimize data transfer efficiency, and also use DMABUF to output encoded data with a target bit rate of 6 Mbps. Use CBR (Fixed Bit Rate) mode, suitable for network streaming media or scenarios that require stable bandwidth.queue ! h264parse ! mp4mux ! filesink location=/opt/mux_avc.mp4queue:Another queue element continues to buffer the encoded data and coordinate the subsequent processing speed.Parses the H.264 stream, adds the necessary NAL unit headers to make it conform to the MP4 encapsulation requirements, encapsulates the H.264 video stream into MP4 format, and writes the data to the file /opt/mux_avc.mp4.
Preview+Photo
- Run the following command in the device terminal:
gst-pipeline-app -e qtiqmmfsrc name=camsrc camera=0 ! 'video/x-raw(memory:GBM),format=NV12,width=1280,height=720,framerate=30/1' ! waylandsink camsrc.image_1 ! "image/jpeg,width=1280,height=720,framerate=30/1" ! multifilesink location=/opt/frame%d.jpg async=false sync=true
- Press the
Enterkey. This command will print the following menu and wait for user input.
##################################### MENU #####################################

============================== Pipeline Controls==============================
(0) NULL: Set the pipeline into NULL state
(1) READY: Set the pipeline into READY state
(2) PAUSED: Set the pipeline into PAUSED state
(3) PLAYING: Set the pipeline into PLAYING state

==================================== Other====================================
(p) Plugin Mode: Choose a plugin which to control
(q) Quit : Exit the application

Choose an option:
- Use the following menu steps to take a snapshot during preview.
(1) ready -> (3) Playing -> (Enter)-> (p)Plugin Mode : Select (5)camerasrc ->(36) capture-image -> (1): still – Snapshot ->(1) Snapshot count ('guint' value for arg1)
- To stop the camera, press
Enter, pressb(return), and then pressq(exit). The snapshot image taken is saved in /opt/. By running the followingscpcommand on the host PC, recorded content can be extracted from the device:
scp -r root@[ip-addr]:/opt/<file name> .
- The generated files are as shown in the figure below:
