
EC800X QuecDuino EVB Introduction
Supported Modules
Supported module models
Feature List
Basic Overview
The EC800X QuecDuino EVB is equipped with Quectel EC800 series modules. It supports the following module series:
EC800M series, EC800K series, EG800K series, EC800E series, etc.
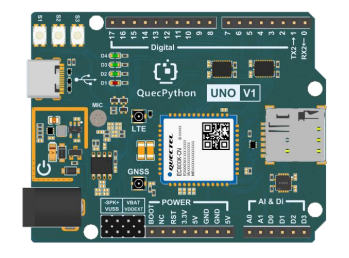
Rendering
The main components and interface layout of the development board are shown in the figure below.
Document download
EVB Resources
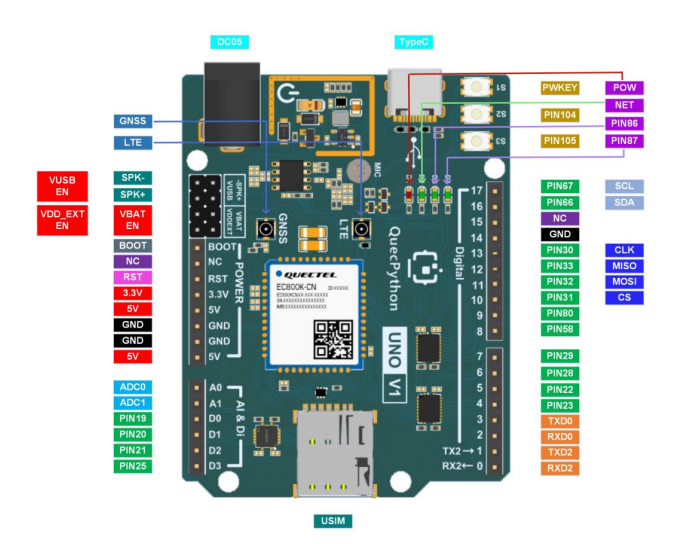
EVB Interface
Interface Definition / Pinout
| Pin Header | Pin No. | Comment | Feature |
|---|---|---|---|
| BOOT | - | Module USB_BOOT Pin | Pull high or low (depending on the specific module model) to enter force download mode |
| NC | - | floating | - |
| RST | - | Module RESET Pin | Pull low to reset |
| 3.3V | - | Power Output | 3.3V/200mA |
| 5V | - | Power Input/Output | 5V/2A(Leave floating/unconnected for V1.1 version) |
| GND | - | Ground | - |
| GND | - | Ground | - |
| 5V | - | Power Input/Output | 5V/2A(Leave floating/unconnected for V1.1 version) |
| A0 | - | Module ADC0 Input Pin | 0-1.2V |
| A1 | - | Module ADC1 Input Pin | 0-1.2V |
| D0 | 19 | I/O | 3.3V |
| D1 | 20 | I/O | 3.3V |
| D2 | 21 | I/O | 3.3V |
| D3 | 25 | I/O | 3.3V |
| 0 | - | Main UART Receive | 3.3V |
| 1 | - | Main UART Transmit | 3.3V |
| 2 | - | Auxiliary UART Receive | 3.3V |
| 3 | - | Auxiliary UART Receive | 3.3V |
| 4 | 23 | I/O | 3.3V |
| 5 | 22 | I/O | 3.3V |
| 6 | 28 | I/O | 3.3V |
| 7 | 29 | I/O | 3.3V |
| 8 | 58 | I/O | 3.3V |
| 9 | 80 | I/O | 3.3V |
| 10 | 31 | I/O | 3.3V |
| 11 | 32 | I/O | 3.3V |
| 12 | 33 | I/O | 3.3V |
| 13 | 30 | I/O | 3.3V |
| 14 | - | Ground | - |
| 15 | - | NC | Leave floating |
| 16 | 66 | I/O | 3.3V |
| 17 | 67 | I/O | 3.3V |
The main pin layout of the development board is shown in the figure below.
Tips
For more information about the EVB, please visit https://developer.quectel.com/en/resource-download
EVB Configuration
The EVB is equipped with various sensors and other peripherals. The pins of peripherals are shown in the table below.
| No. | Name | Model | Supports | Interface Type | Pin No. |
|---|---|---|---|---|---|
| 1 | USB Interface | - | yes | Type-C | - |
| 2 | LED Indicator | - | yes | GPIO | - |
| 3 | Microphone | B4013AM423-092 | yes | SPK | - |
Quick Start Guide
Hardware Preparation
Step 1: Required Items
- Development board
- USB-C cable (A-to-C)
- Windows 10 PC
- Nano-SIM card
- 4G antenna
Step 2: Antenna & SIM Installation
- Attach the provided antenna to the MAIN antenna port.
- Insert the SIM card into the Nano-SIM slot.
Step 3: Connect the Board
- Connect the development board's Type-C port to a computer USB port using a USB Type-C cable to supply power. Before powering on, ensure to short the VUBS EN, VDD_EXT EN, and VBAT EN jumper pins.
Step 4: Power On
- Press and hold S1 until the power indicator light (labeled D1 on the board) on the main board illuminates. If PWK_ON has been shorted in the previous step, there is no need to press and hold the power key, as the system will boot automatically.
For detailed information regarding the development board's indicator lights and power settings, please refer to the specifications document.
Driver Installation
- Download the QuecPython USB Driver from QuecPython Official Drivers.
- Extract and run
setup.exeorsetup.bat. - Verify installation in Device Manager (look for "Quectel USB" ports). Ignore unrelated devices like "Mobile ECM Network Adapter."
Tool Installation
- QPYcom: Download from QuecPython Tools. Extract and use directly.
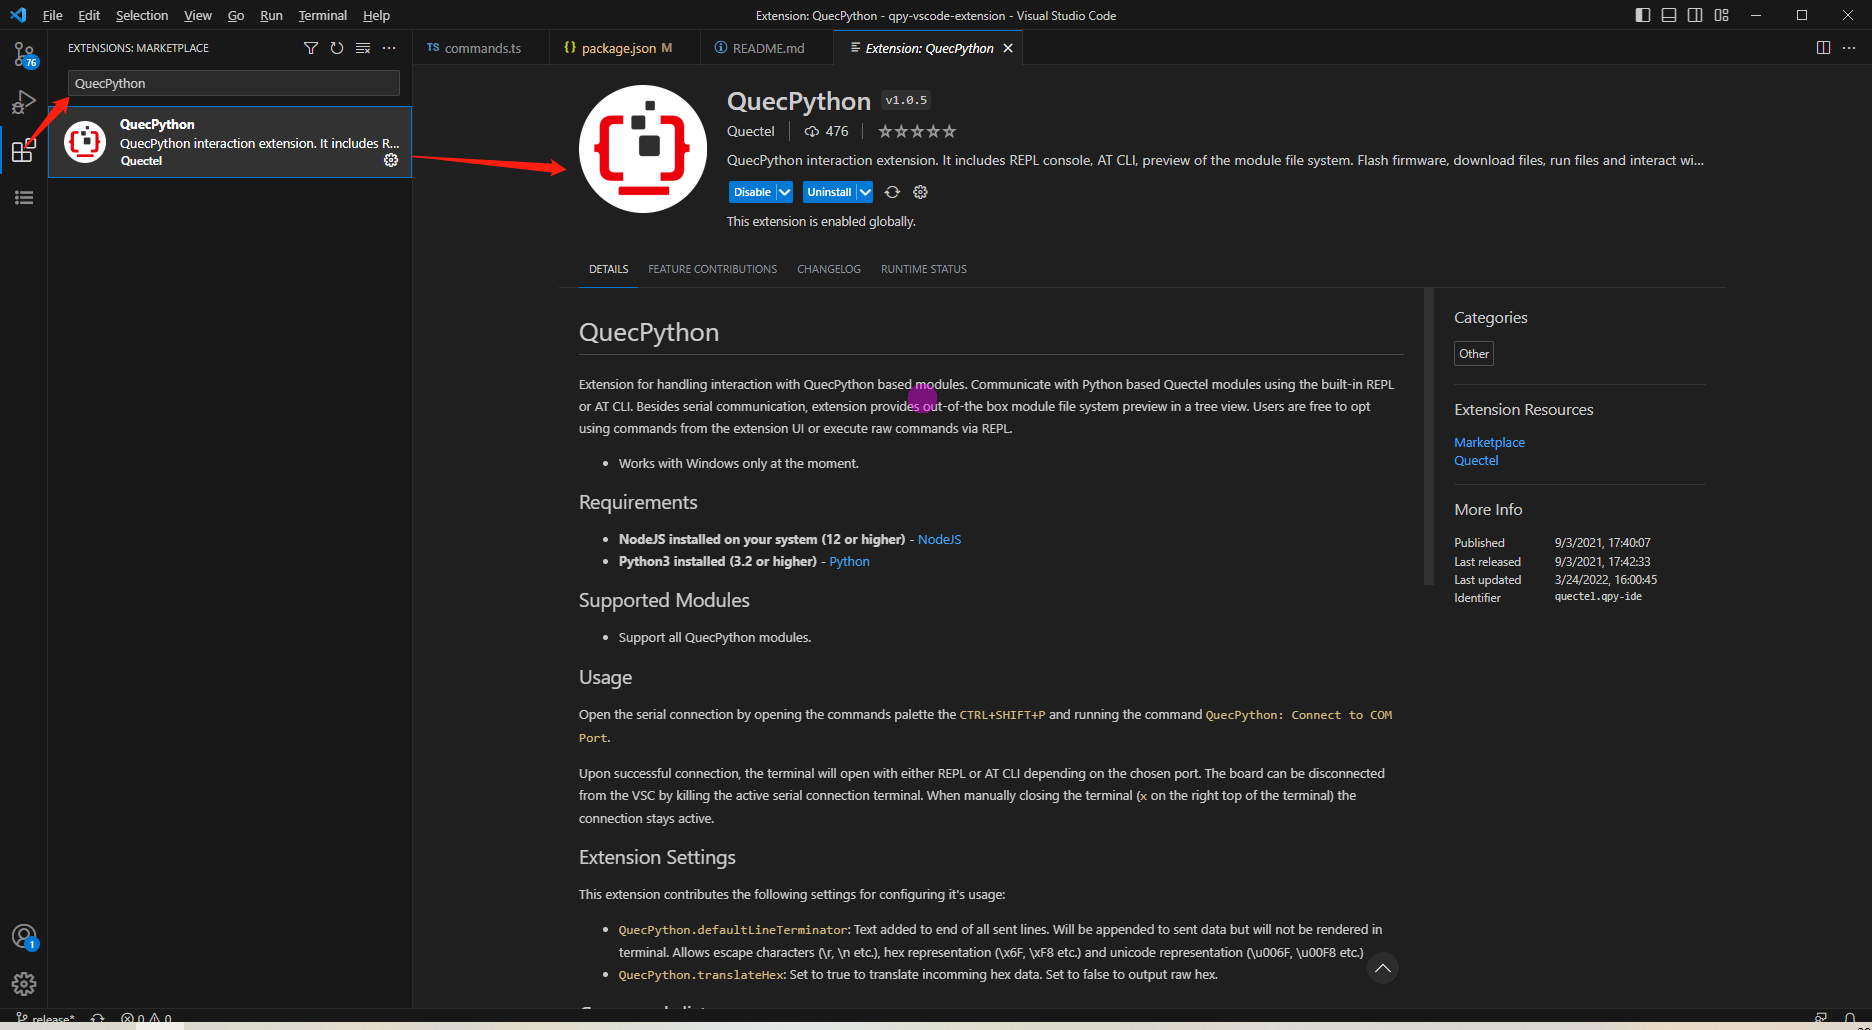
- VSCode Plugin: Search for "QuecPython" in the Visual Studio Code marketplace.
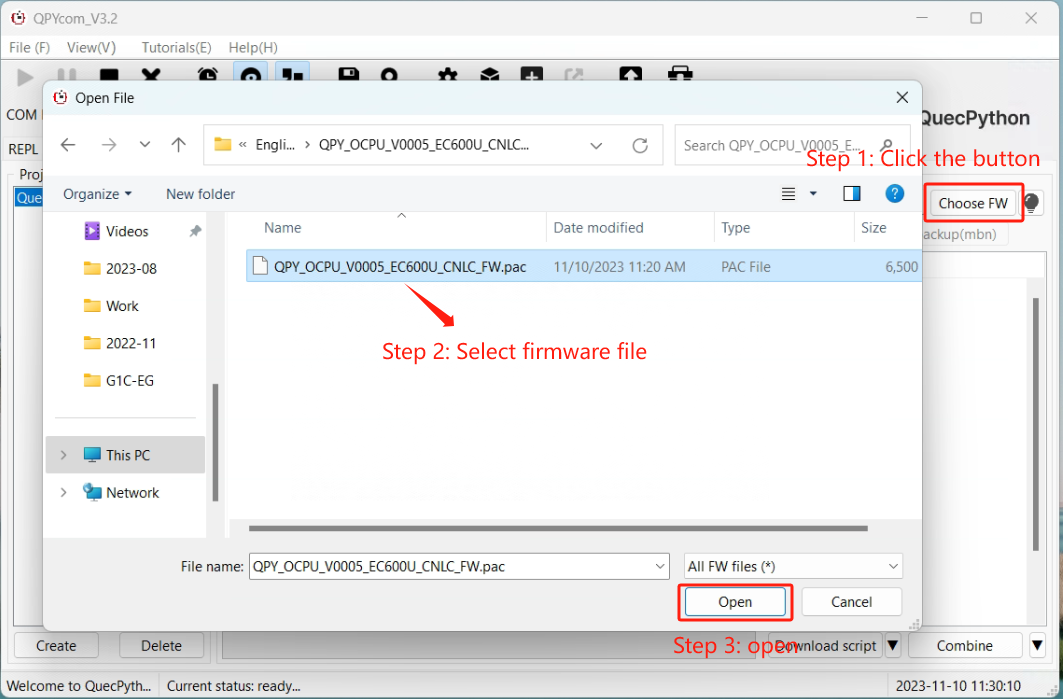
Firmware Burning
Firmware Download: Get the latest QuecPython firmware from QuecPython Firmware Page.
Burning Steps:
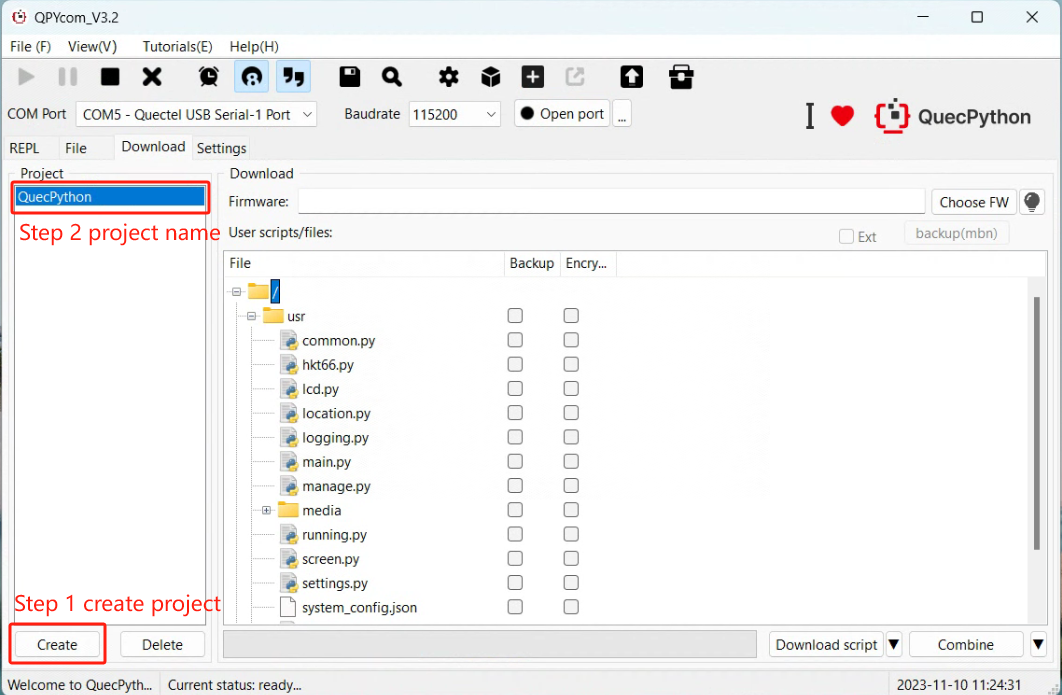
- Open QPYcom, select the USB REPL port, and create a new project.
- Choose the
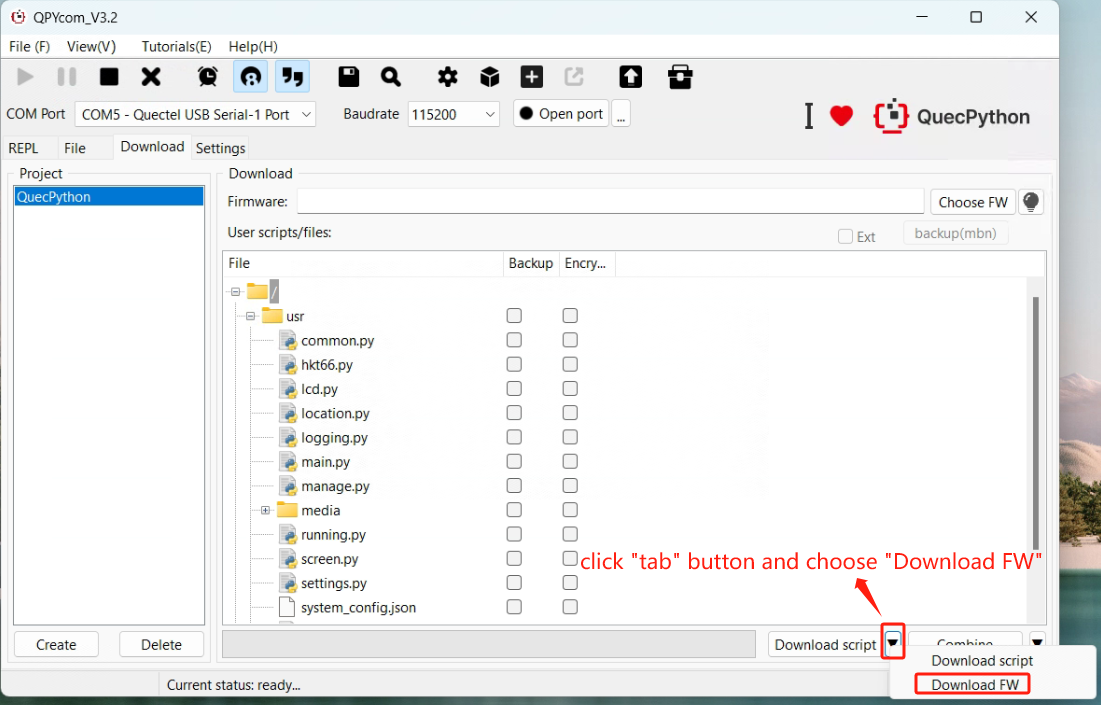
.binfirmware file - Set mode to "Download FW" and click Download.
- For BG95, enable DM serial port before burning.
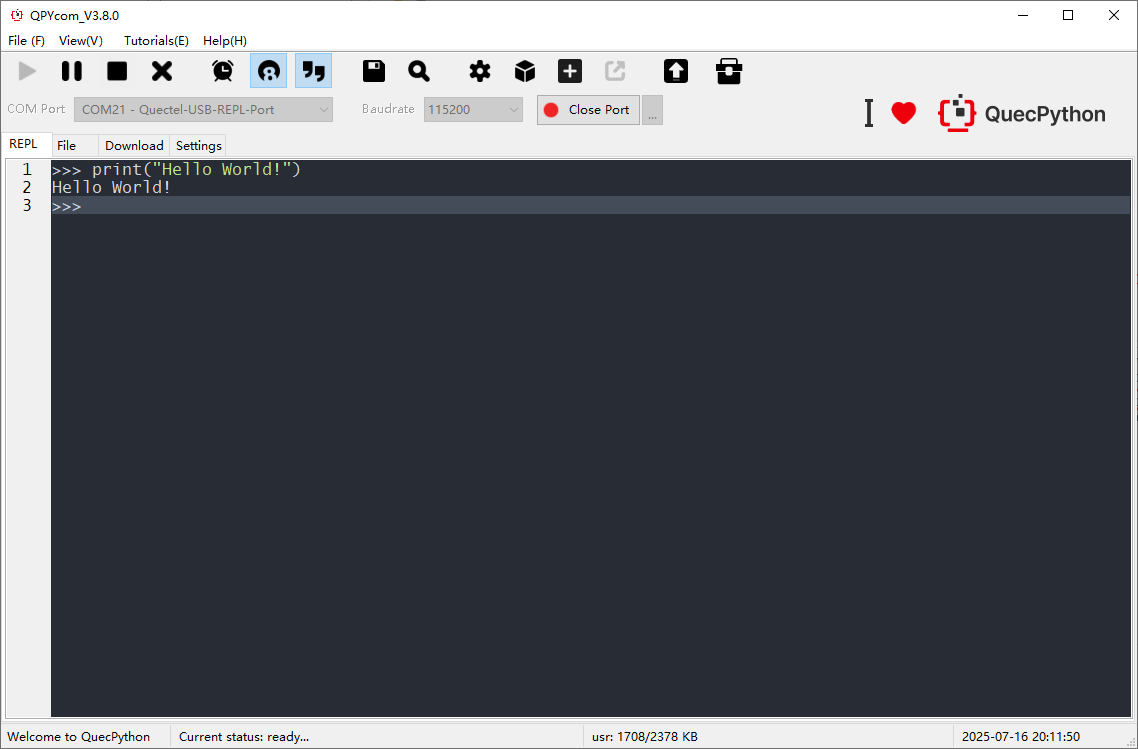
REPL Debugging
- Connect via QPYcom and open the REPL interface.
- Test with
print("Hello World!").
First Script Development
Writing a Script
Create
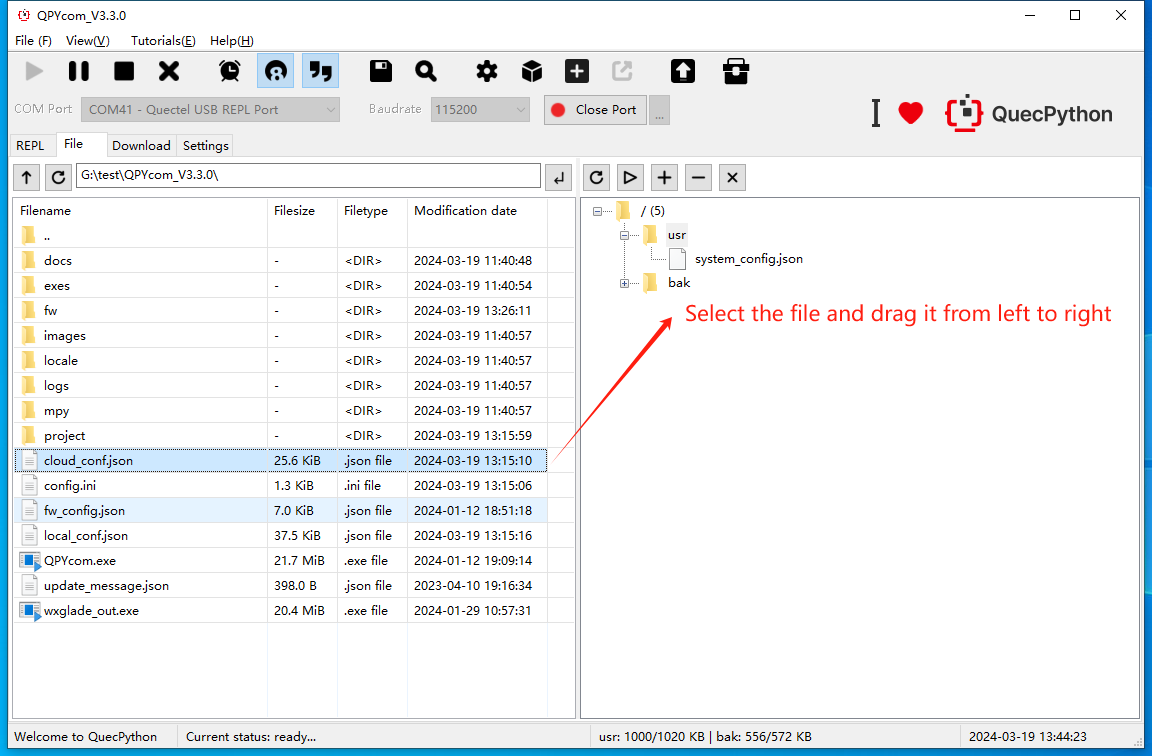
helloworld.py:print("Hello World!")File Transfer
- Method 1: Drag-and-drop files via QPYcom’s GUI.
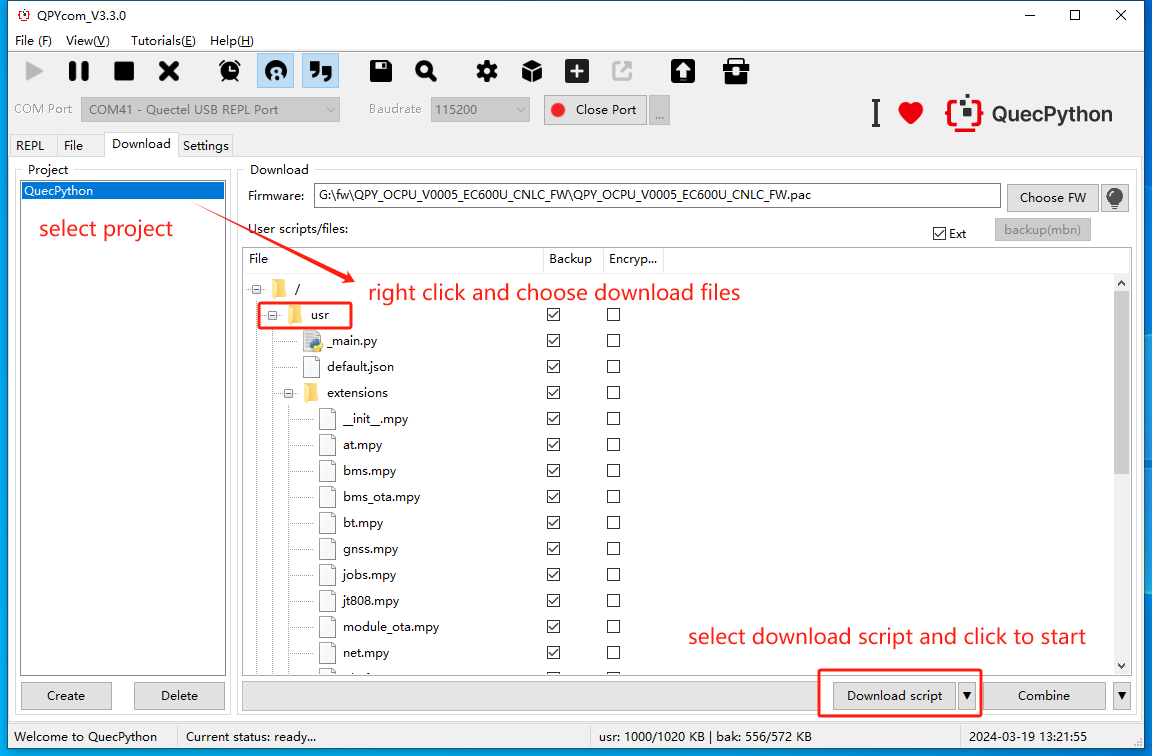
- Method 2: Use the "Download Script" feature in QPYcom.
Running Scripts
Execute via REPL:
import example
example.exec("/usr/helloworld.py")
Stopping Program Execution
How to stop a running program. The following methods are provided according to the type of the running script file:
Is the program name main.py? Does the program contain a dead loop? Does the program use multiple threads? Stopping Steps ✓ ✓ ✓ (1) Press Ctrl + A to enter RAW mode(2) Press Ctrl + D to restart the QuePython virtual machine(3) Press Ctrl + B to return to the normal interactive mode(4) If the above methods fail, re-flash the firmware ✗ (1) Press Ctrl + C to interrupt the program execution(2) If the above method fails, re-flash the firmware ✗ ✓ (1) Press Ctrl + A to enter RAW mode(2) Press Ctrl + D to restart the QuePython virtual machine(3) Press Ctrl + B to return to the normal interactive mode(4) If the above methods fail, wait for the program to finish running ✗ (1) Press Ctrl + C to interrupt the program execution
(2) If the above method fails, re-flash the firmware✗ ✓ ✓ (1) Press Ctrl + D to restart the QuePython virtual machine
(2) If the above method fails, directly restart the module✗ (1) Press Ctrl + D to restart the QuePython virtual machine
(2) If the above method fails, directly restart the module✗ ✓ (1) Press Ctrl + C to interrupt the program execution
(2) If the above method fails, re-flash the firmware or directly restart the module✗ (1) Press Ctrl + C to interrupt the program execution
(2) If the above method fails, re-flash the firmware or directly restart the module