
EC2X EVB Introduction
Supported Modules
Supported module models
Feature List
Basic Overview
The QuecPython_EC2X_EVB is specifically designed for QuecPython. It is a small and portable "pocket-sized" EVB with rich features, such as temperature and humidity sensor, acceleration sensor, SIM card slot, SD card slot, LCD connector, LDR and MIC.
The EVB is equipped with a Type-C interface, so developers only need a USB Type-C cable to easily manipulate the EVB.
The EVB is equipped with the EC200U series module. For details, see EC200U-EU.
Feature Description
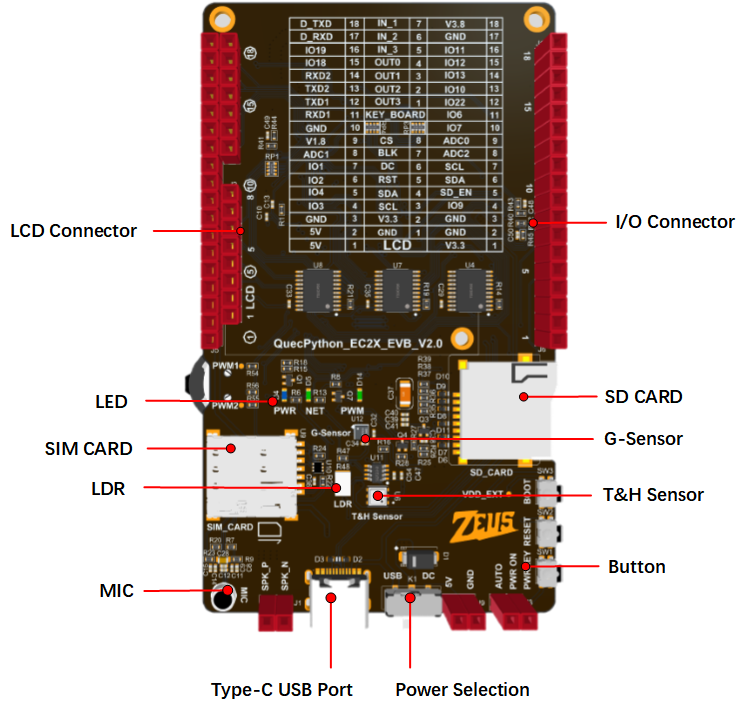
The main components and interface layout of the EVB are shown in the figure below.
Document download
EVB Resources
EVB Interface
J5 Pin Assignment
| Pin Header | Pin No. | Name | Feature |
|---|---|---|---|
| J5 | - | VCC_5V | 5V |
| J5 | - | VCC_5V | 5V |
| J5 | - | GND | Ground |
| J5 | 24 | IO3 | GPIO3 |
| J5 | 25 | IO4 | GPIO4 |
| J5 | 26 | IO2 | GPIO2 |
| J5 | 27 | IO1 | GPIO1 |
| J5 | 44 | ADC1_IN | ADC1 |
| J5 | - | VDD_EXT | 1.8 V |
J6 Pin Assignment
| Pin Header | Pin No. | Name | Feature |
|---|---|---|---|
| J6 | - | V3.3 | 3.3 V |
| J6 | - | GND | Ground |
| J6 | - | GND | Ground |
| J6 | 3 | IO9 | GPIO9 |
| J6 | 119 | SD_EN | SD card enable control |
| J6 | 142 | SDA | I2C1 |
| J6 | 141 | SCL | I2C1 |
| J6 | 43 | ADC2_IN | ADC2 |
| J6 | 45 | ADC0_IN | ADC0 |
J7 Pin Assignment
| Pin Header | Pin No. | Name | Feature |
|---|---|---|---|
| J7 | - | GND | Ground |
| J7 | 138 | RX1 | UART1 |
| J7 | 137 | TX1 | UART1 |
| J7 | 67 | TX2 | UART2 |
| J7 | 68 | RX2 | UART2 |
| J7 | 65 | IO18 | GPIO18 |
| J7 | 64 | IO19 | GPIO19 |
| J7 | 11 | D_RX | UART |
| J7 | 12 | D_TX | UART |
J10 Pin Assignment
| Pin Header | Pin No. | Name | Feature |
|---|---|---|---|
| J10 | 136 | IO7 | GPIO7 |
| J10 | 135 | IO6 | GPIO6 |
| J10 | 127 | IO22 | GPIO22 |
| J10 | 40 | IO10 | GPIO10 |
| J10 | 39 | IO13 | GPIO13 |
| J10 | 38 | IO12 | GPIO12 |
| J10 | 37 | IO11 | GPIO11 |
| J10 | - | GND | Ground |
| J10 | - | V3.8 | 3.8 V |
The following figure shows the pin assignment.

Tips
For more information about the EVB, please visit https://developer.quectel.com/en/resource-download?cid=252
EVB Configuration
The EVB is equipped with various sensors and other peripherals. The pins of peripherals are shown in the table below.
| Pin No. | Name | Model | Supported | Interface Type |
|---|---|---|---|---|
| 41 and 42 | Temperature and Humidity Sensor | AHT20 | Yes | I2C |
| 45 | LDR | GT36528 | Yes | ADC |
| 41 and 42 | G-Sensor | QMA7981 | Yes | I2C |
| 75 and 77 | Microphone | GMI6050P-66DB | Yes | SPK |
| 73 and 74 | Power Amplifier Chip | NS4160 | Yes | SPK |
| 122–125 | LCD (Choose the package with screen) | ST7789 | Yes | SPI |
| 28–34 | SD_CARD | XKTF-NO2-N | Yes | SPI |
Quick Start Guide
Hardware Preparation
Step 1: Required Items
- Development board
- USB-C cable (A-to-C)
- Windows 10 PC
- Nano-SIM card
- 4G antenna
Step 2: Antenna & SIM Installation
- Attach the provided antenna to the MAIN antenna port.
- Insert the SIM card into the Nano-SIM slot.
Step 3: Connect the Board
- Power the board via USB-C.
Step 4: Power On
- Press and hold PWK until the power indicator light on the mainboard (labeled as POW) lights up.
- If you short-circuited PWK_ON, there's no need to press PWK; the board will power on automatically.
If the PWR indicator is constantly on, the EVB is successfully turned on.
Driver Installation
- Download the QuecPython USB Driver from QuecPython Official Drivers.
- Extract and run
setup.exeorsetup.bat. - Verify installation in Device Manager (look for "Quectel USB" ports). Ignore unrelated devices like "Mobile ECM Network Adapter."
Tool Installation
- QPYcom: Download from QuecPython Tools. Extract and use directly.
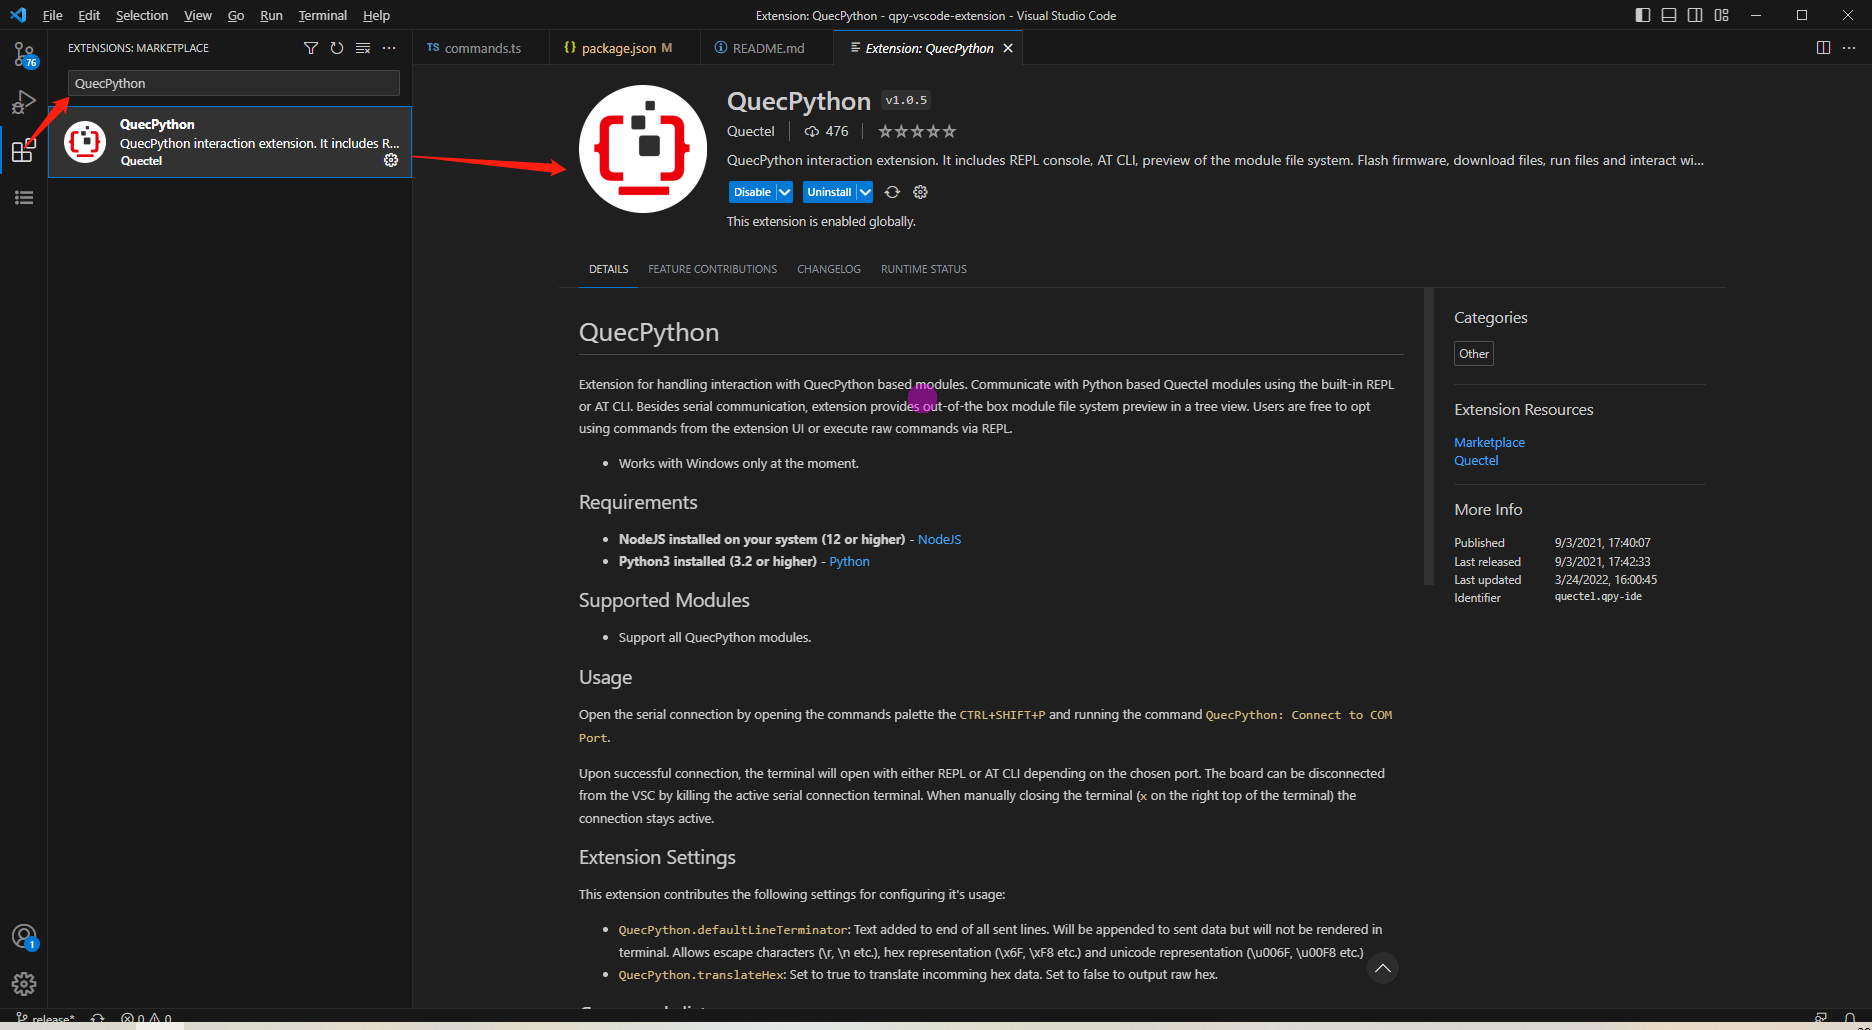
- VSCode Plugin: Search for "QuecPython" in the Visual Studio Code marketplace.
Firmware Burning
Firmware Download: Get the latest QuecPython firmware from QuecPython Firmware Page.
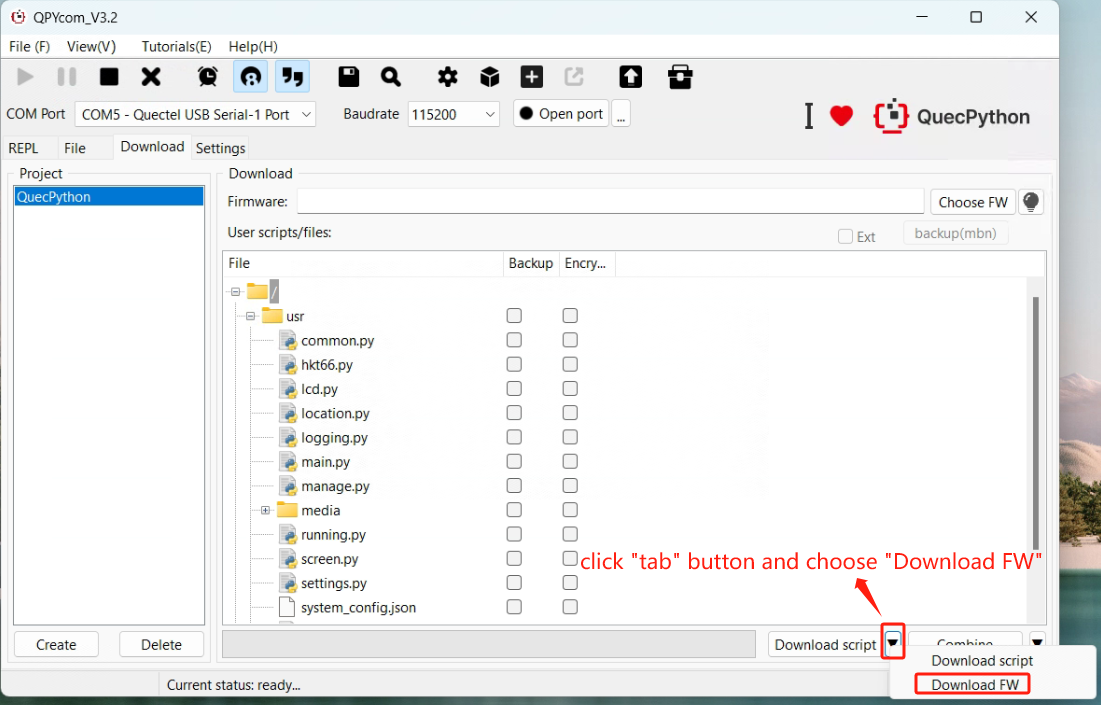
Burning Steps:
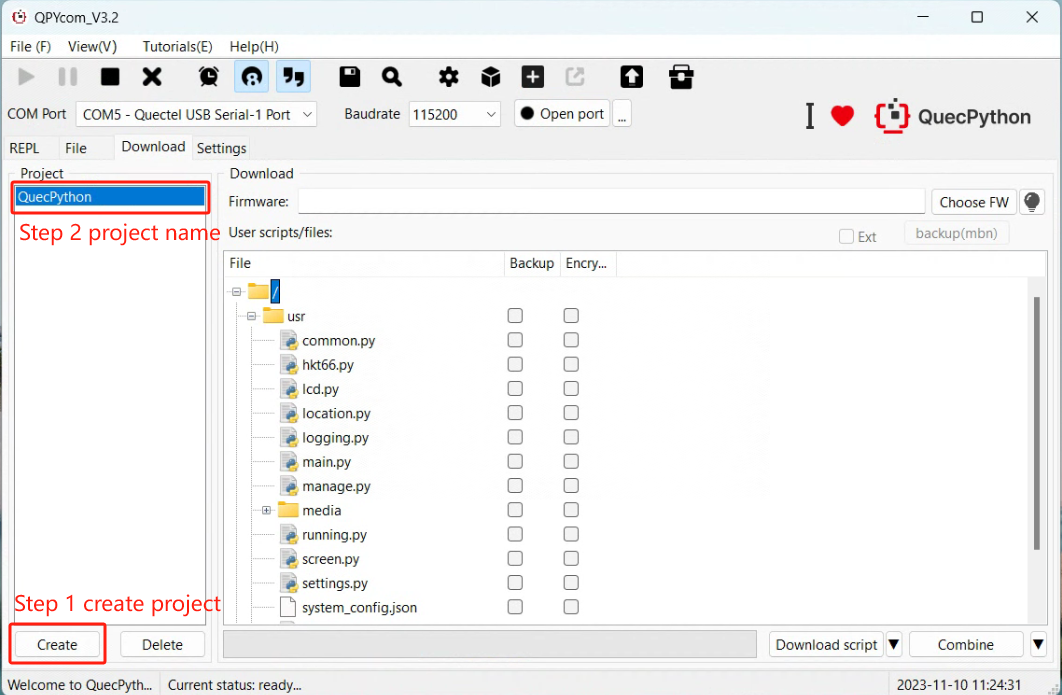
Open QPYcom, select the USB REPL port, and create a new project.
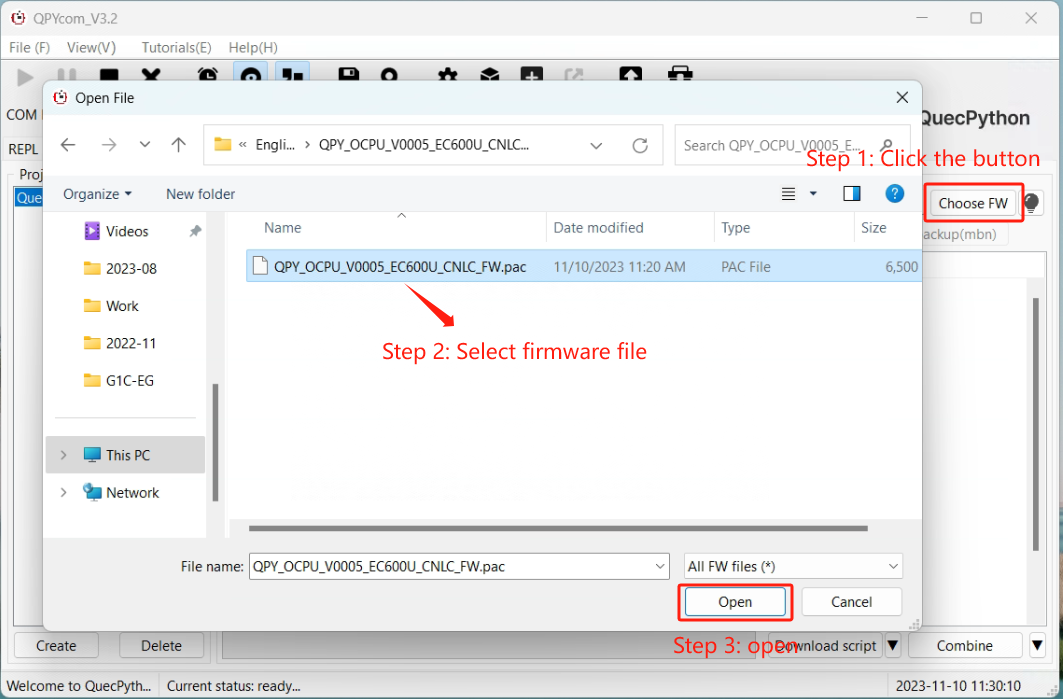
Choose the
.binfirmware fileSet mode to "Download FW" and click Download.
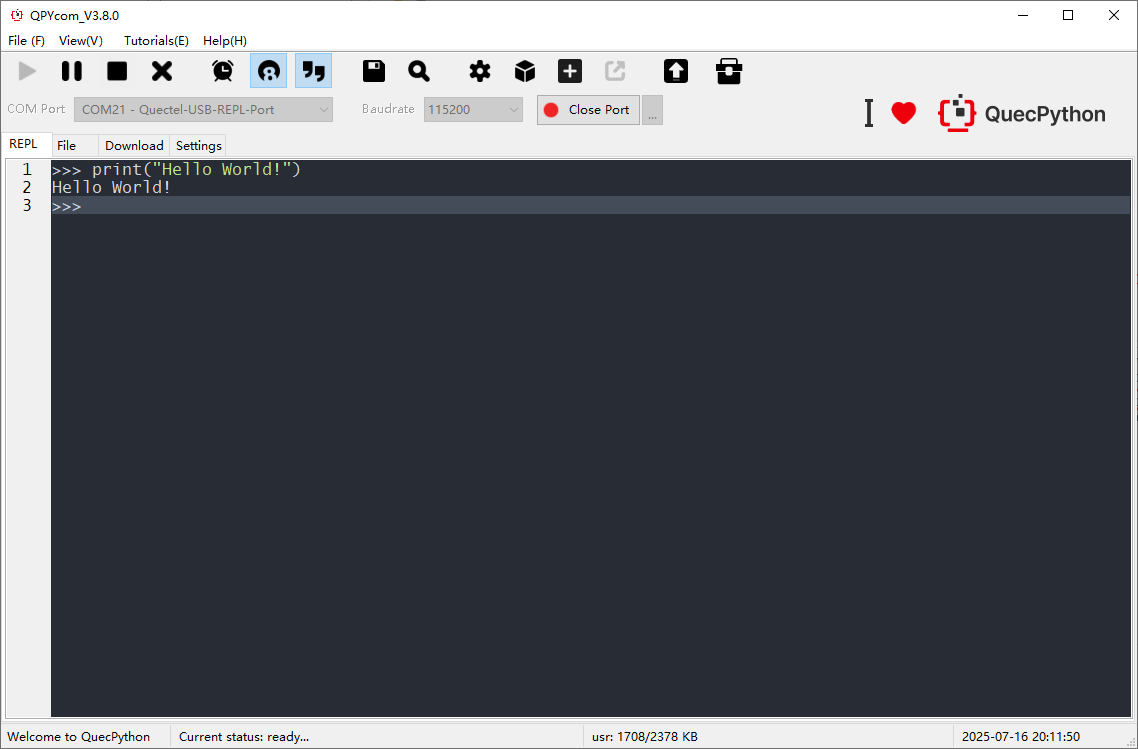
REPL Debugging
- Connect via QPYcom and open the REPL interface.
- Test with
print("Hello World!").
First Script Development
Writing a Script
Create helloworld.py:
print("Hello World!")
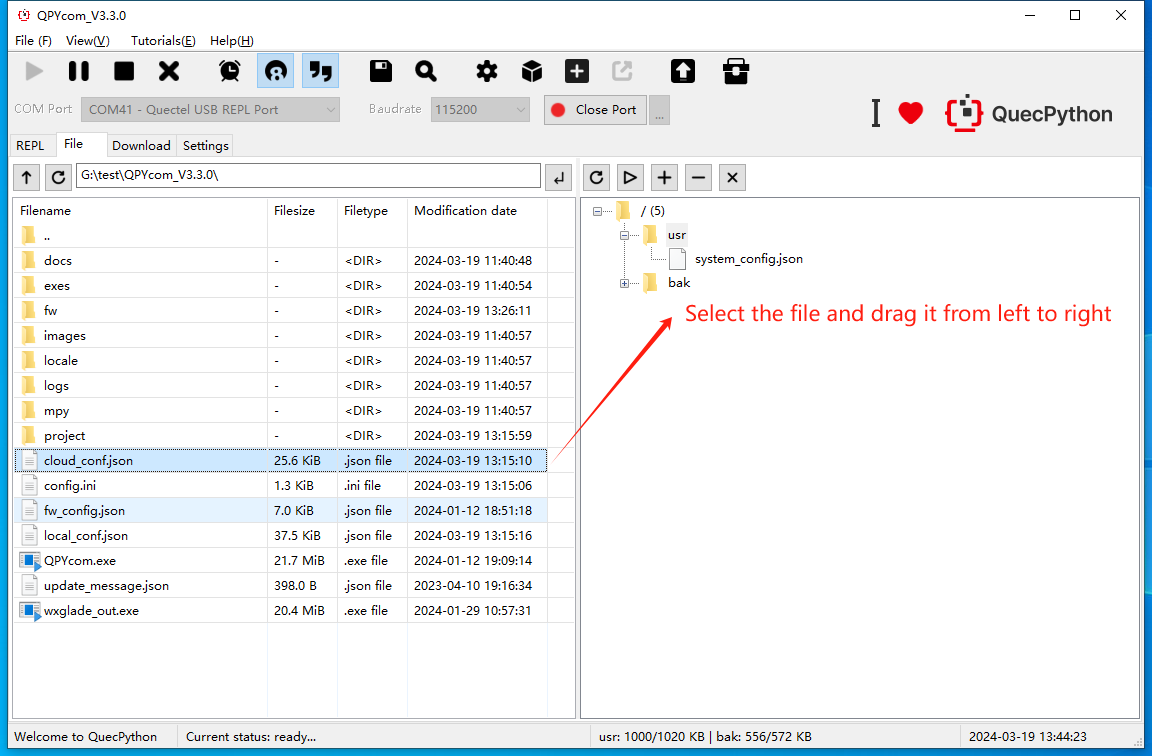
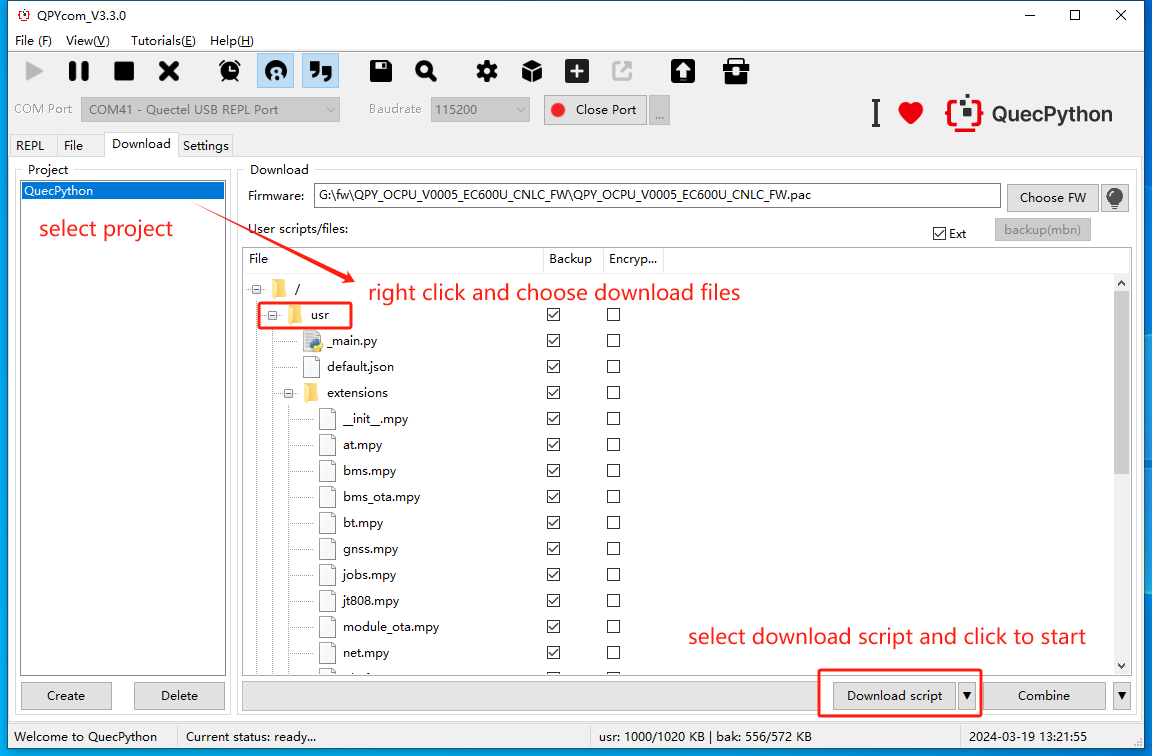
File Transfer
- Method 1: Drag-and-drop files via QPYcom’s GUI.
- Method 2: Use the "Download Script" feature in QPYcom.
Running Scripts
Execute via REPL:
import example
example.exec("/usr/helloworld.py")
Stopping Program Execution
How to stop a running program. The following methods are provided according to the type of the running script file:
| Is the program name main.py? | Does the program contain a dead loop? | Does the program use multiple threads? | Stopping Steps |
|---|---|---|---|
| ✓ | ✓ | ✓ | (1) Press Ctrl + A to enter RAW mode (2) Press Ctrl + D to restart the QuePython virtual machine (3) Press Ctrl + B to return to the normal interactive mode (4) If the above methods fail, re-flash the firmware |
| ✓ | ✓ | ✗ | (1) Press Ctrl + C to interrupt the program execution (2) If the above method fails, re-flash the firmware |
| ✓ | ✗ | ✓ | (1) Press Ctrl + A to enter RAW mode (2) Press Ctrl + D to restart the QuePython virtual machine (3) Press Ctrl + B to return to the normal interactive mode (4) If the above methods fail, wait for the program to finish running |
| ✓ | ✗ | ✗ | (1) Press Ctrl + C to interrupt the program execution (2) If the above method fails, re-flash the firmware |
| ✗ | ✓ | ✓ | (1) Press Ctrl + D to restart the QuePython virtual machine (2) If the above method fails, directly restart the module |
| ✗ | ✓ | ✗ | (1) Press Ctrl + D to restart the QuePython virtual machine (2) If the above method fails, directly restart the module |
| ✗ | ✗ | ✓ | (1) Press Ctrl + C to interrupt the program execution (2) If the above method fails, re-flash the firmware or directly restart the module |
| ✗ | ✗ | ✗ | (1) Press Ctrl + C to interrupt the program execution (2) If the above method fails, re-flash the firmware or directly restart the module |