

 English
HCM010S & HCM511S Firmware Burning and OTA Upgrade Guide
Preface
This document mainly introduces the firmware burning and OTA upgrade methods for modules or development boards such as HCM010S and HCM511S based on the Silicon Labs solution.
Firmware Burning
Prerequisites
Hardware Requirements
- A computer with USB ports
- HCM010S or HCM511S development board
- J-Link burning tool
Software Tools
PC Segger J-Flash burning tool

Download link: SEGGER - The Embedded Experts - Downloads - J-Link / J-Trace
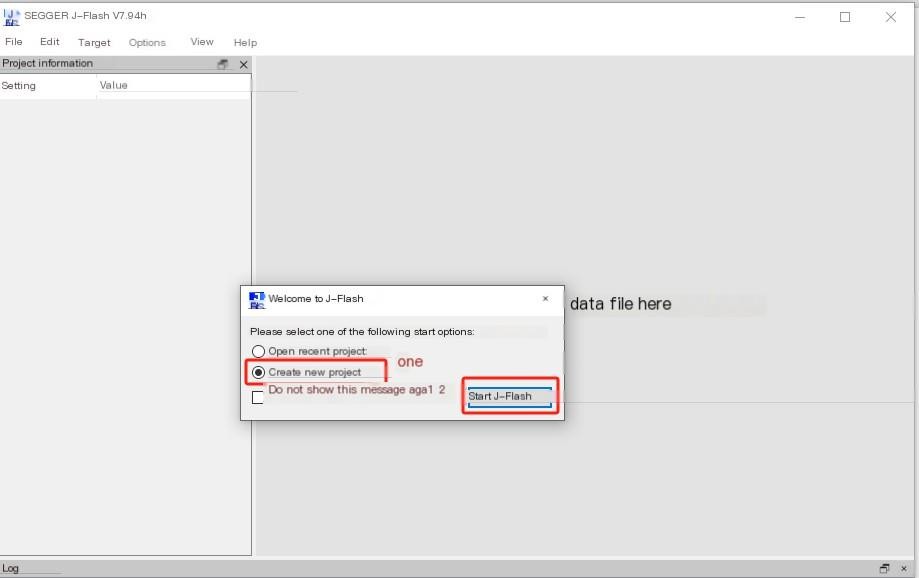
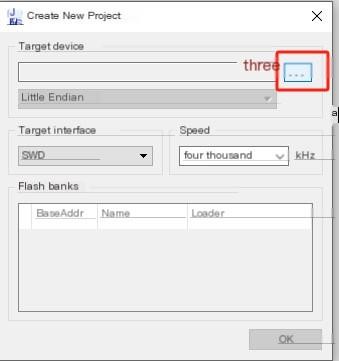
Burning Steps
Connect J-Link to module/development board, open J-Flash, select chip model:
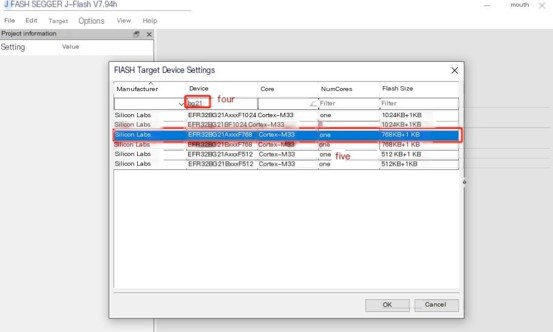
The comparison table of OC and chip models for each module is as follows:
| Module OC | Chip Model |
|---|---|
| HCM511SAA | EFR32BG22AxxxF352 |
| HCM511SAB | EFR32BG22AxxxF512 |
| HCM511SAC | EFR32BG22AxxxF352 |
| HCM010SAA | EFR32BG21AxxxF768 |
| HCM010SAB | EFR32BG21AxxxF768 |
Use
File→Open data fileto open the.hexfile that needs to be burned, or simply drag the hex file into the file box: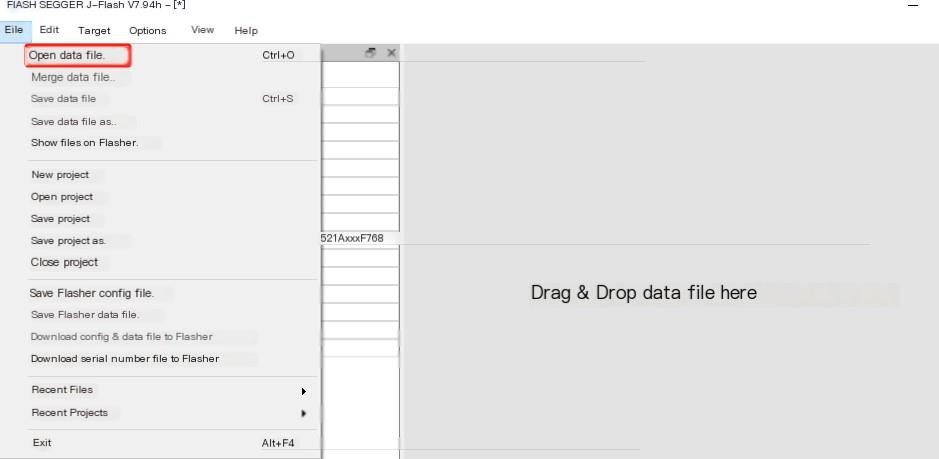
Click
Target→Connectto connect the module/development board.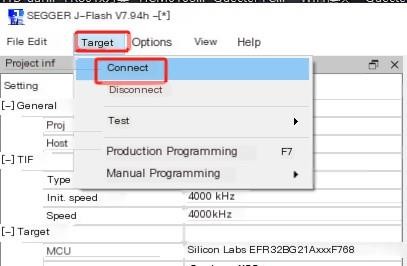
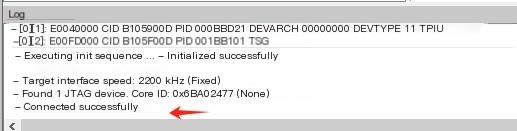
After successful connection, it is shown as follows:
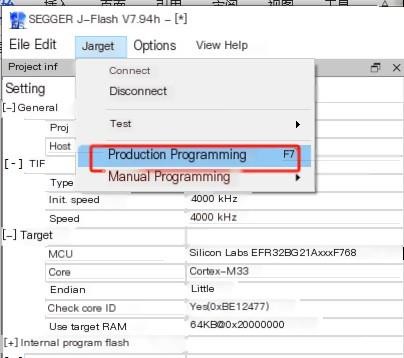
Click
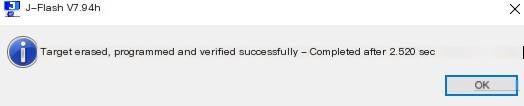
Target→Production Programmingto burn firmware: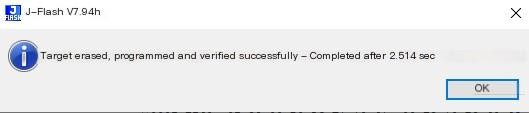
The successful burning is as follows:
Power on again to reset or click
Target→Manual Programming→Start Applicationto run the new firmware: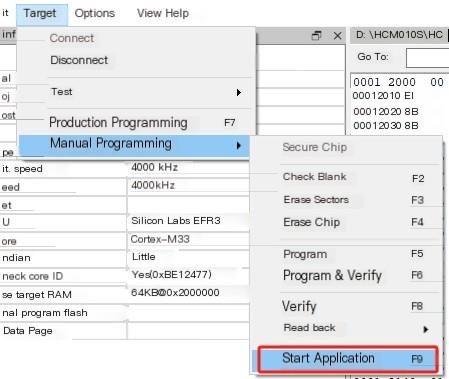
OTA Upgrade
Prerequisites
- Smartphone (Android or iOS)
- EFR Connect APP
- Target firmware containing OTA service
- Target
.gblfile for upgrade
Upgrade Steps
Download the EFR Connect APP:
- Android APP: EFR Connect BLE Mobile App - Silicon Labs
- iOS APP: Search for "EFR Connect" in the App Store
Enable module broadcasting (refer to the AT command process in section 4.1.1 of the Quectel_HCMxxxS_AT command manual).
OTA service:
0x1D14D6EE-FD63-4FA1-BFA4-8F47B42119F0The standard AT firmware has automatically added OTA services, and users do not need to add them separately.

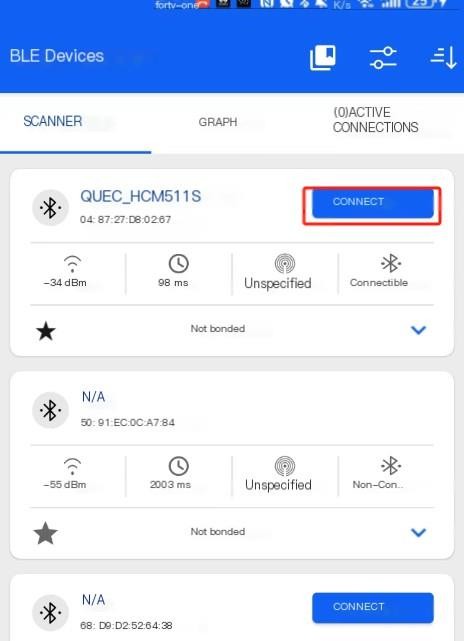
Open the EFR Connect APP on your phone and connect to the target device:
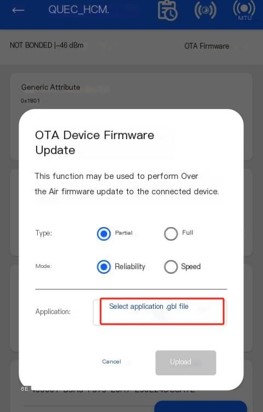
Click on the "OTA Firmware" option in the upper right corner of the connection interface, then select the target
.gblfile and click "Upload" to start OTA: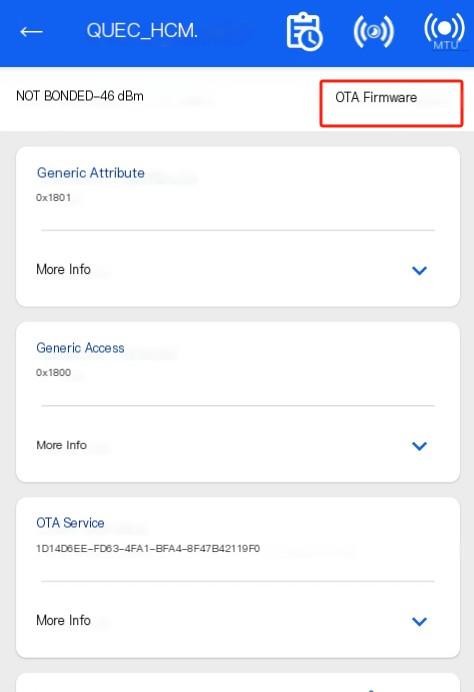
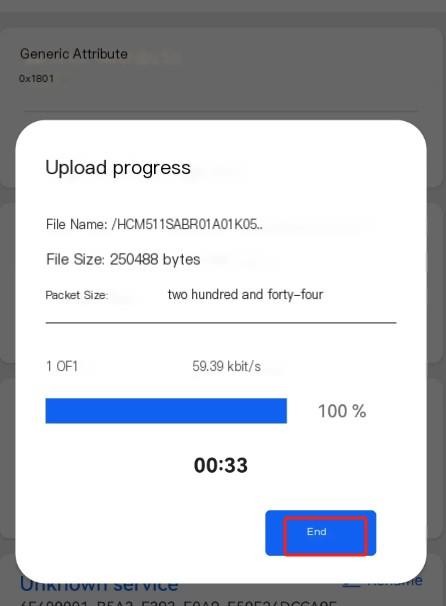
Wait for the upgrade to complete, click "End" and exit the APP.
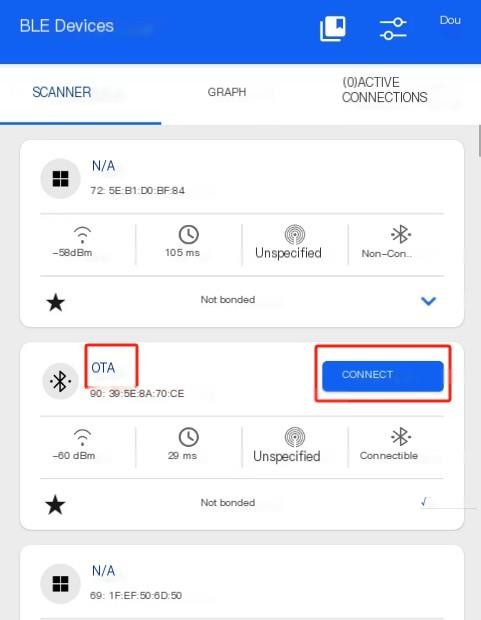
In case of OTA abnormal power outage or interruption, reset the module and find the device named "OTA". Click "Connect" to continue OTA upgrade:
Note: In this case, the module needs to be manually reset after the upgrade is completed in order to run the new firmware.